> ## Documentation Index
> Fetch the complete documentation index at: https://help.get-ryze.ai/llms.txt
> Use this file to discover all available pages before exploring further.
# Connect Webflow
> Connect your Webflow site with a site token so Ryze can publish articles straight into a CMS collection.
Webflow connects with a **site API token** — a token you generate in your site's settings that lets Ryze write to your CMS without sharing your login. Once connected, programmatic articles publish straight into the Webflow collection you choose, with fields mapped automatically.
## Step 1 — Generate a site token in Webflow
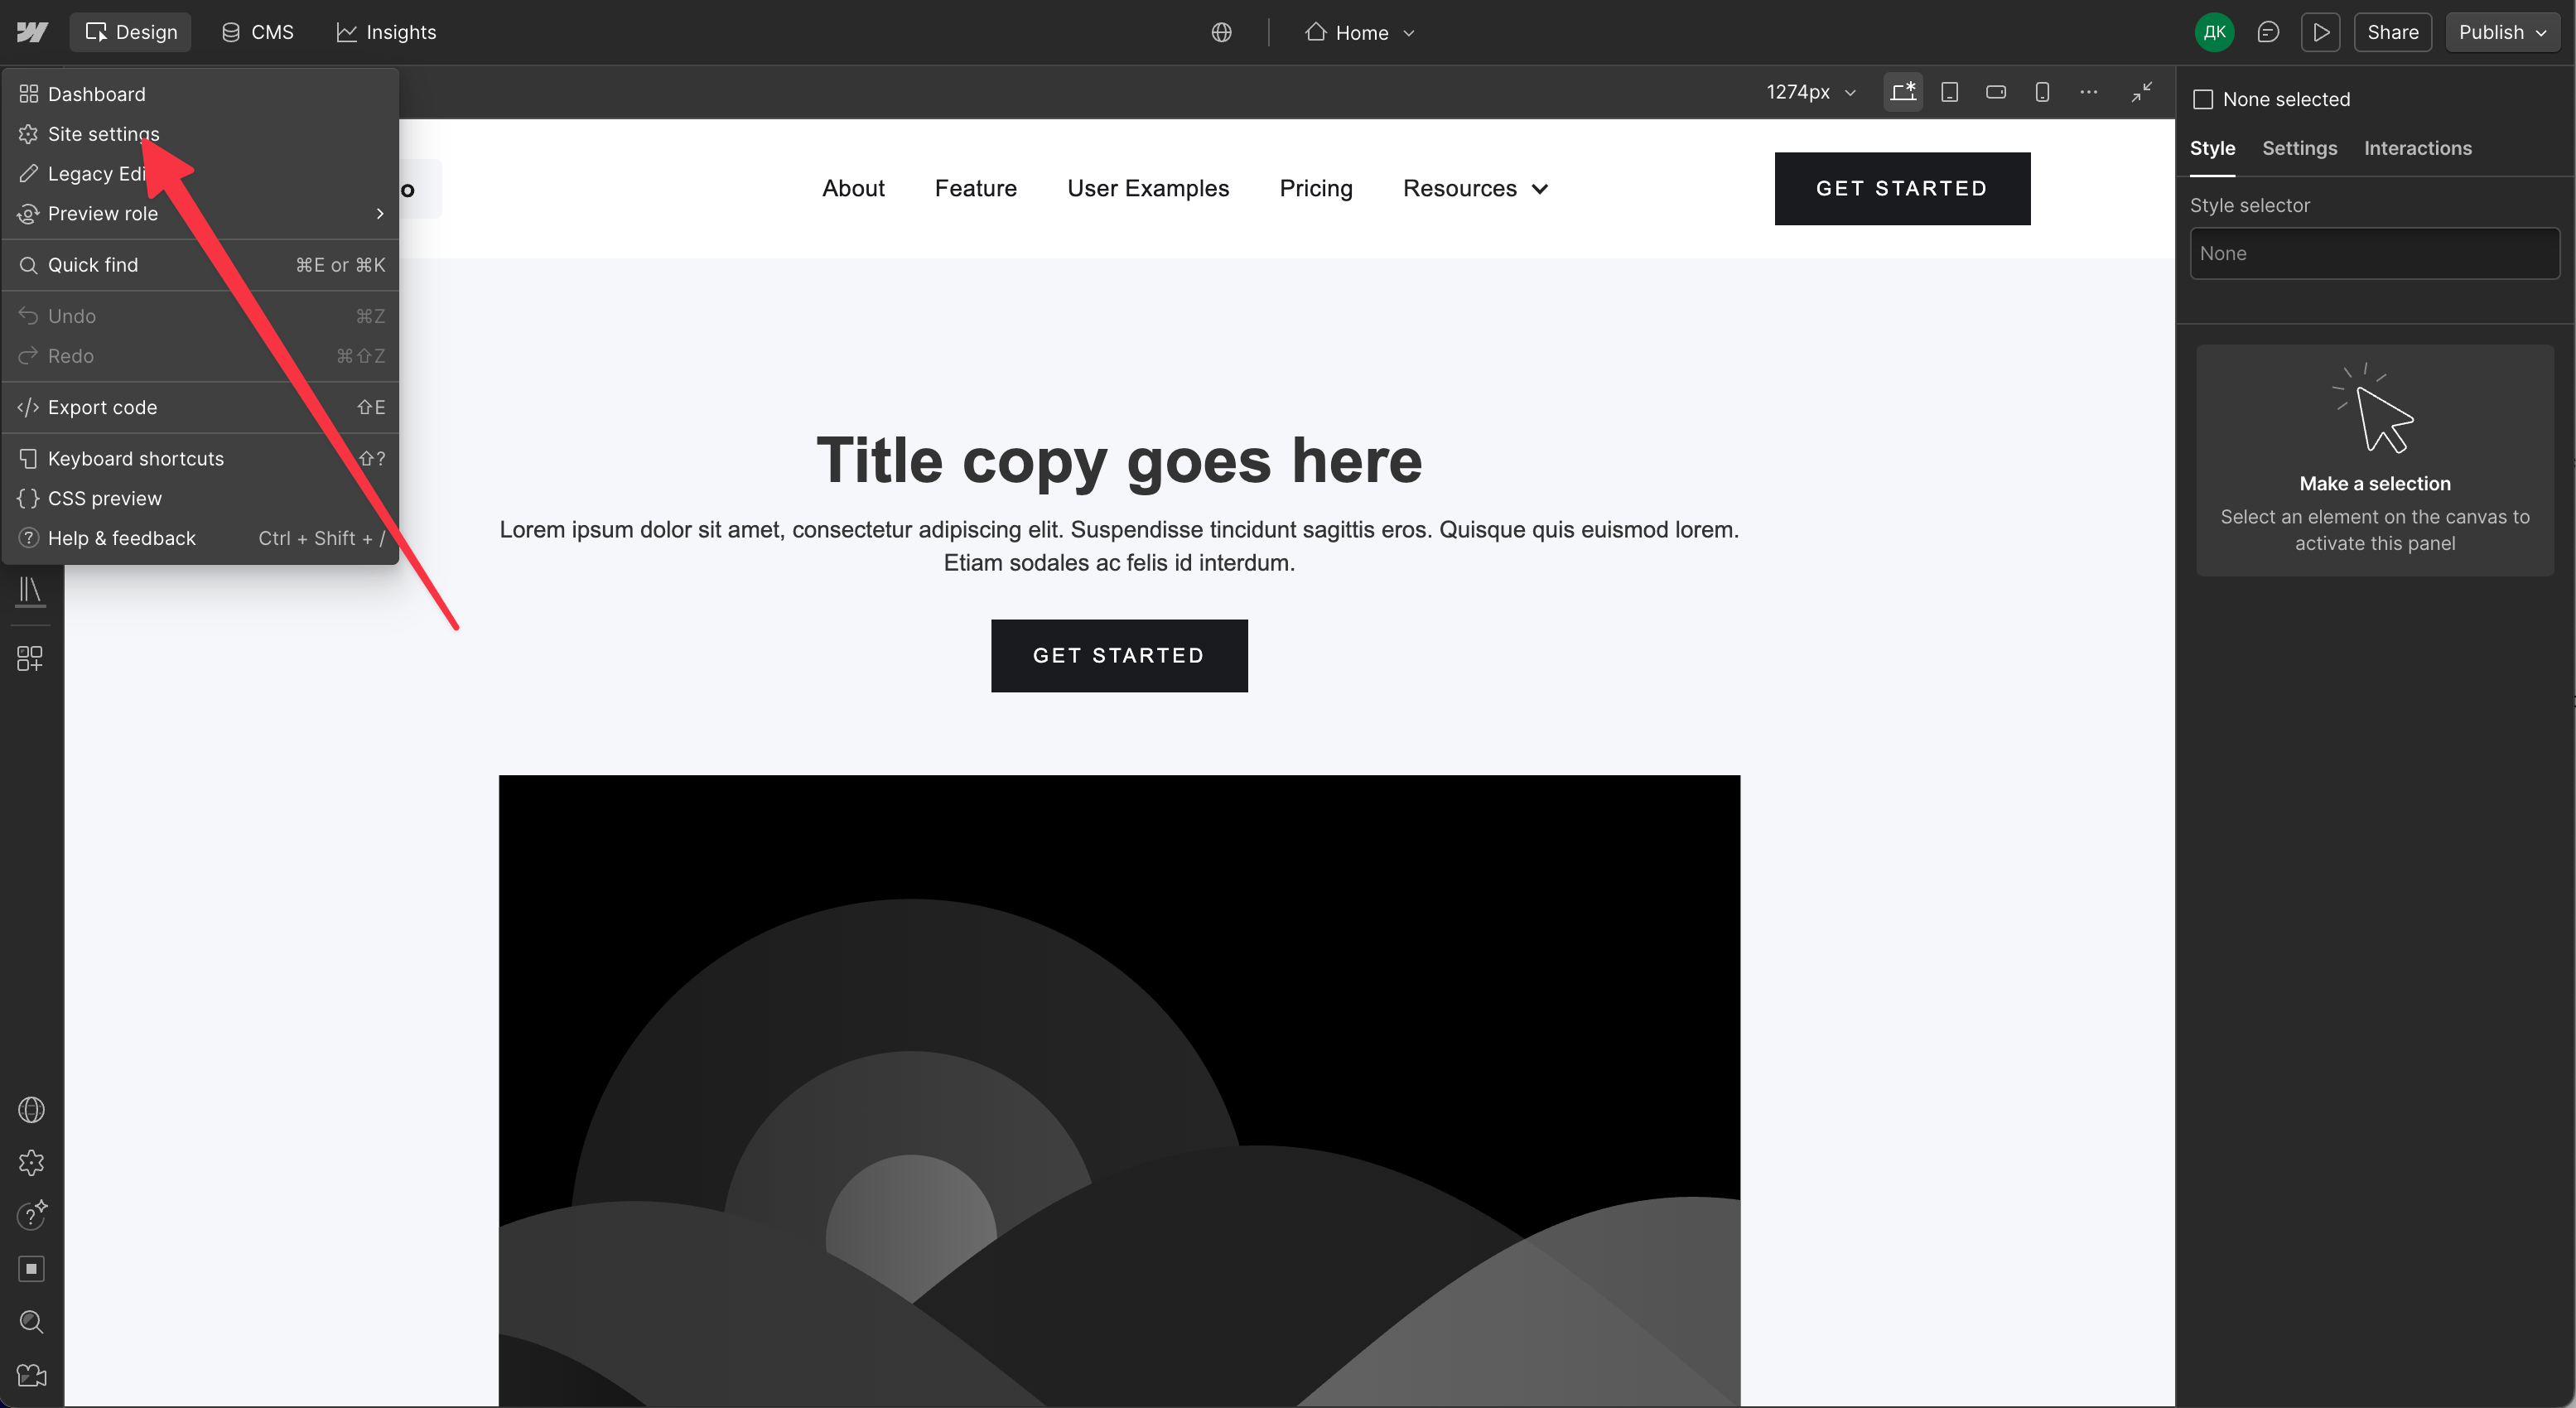
In the Webflow Designer, open the site menu (top left) and click **Site settings**. You can also reach settings from the Webflow dashboard.
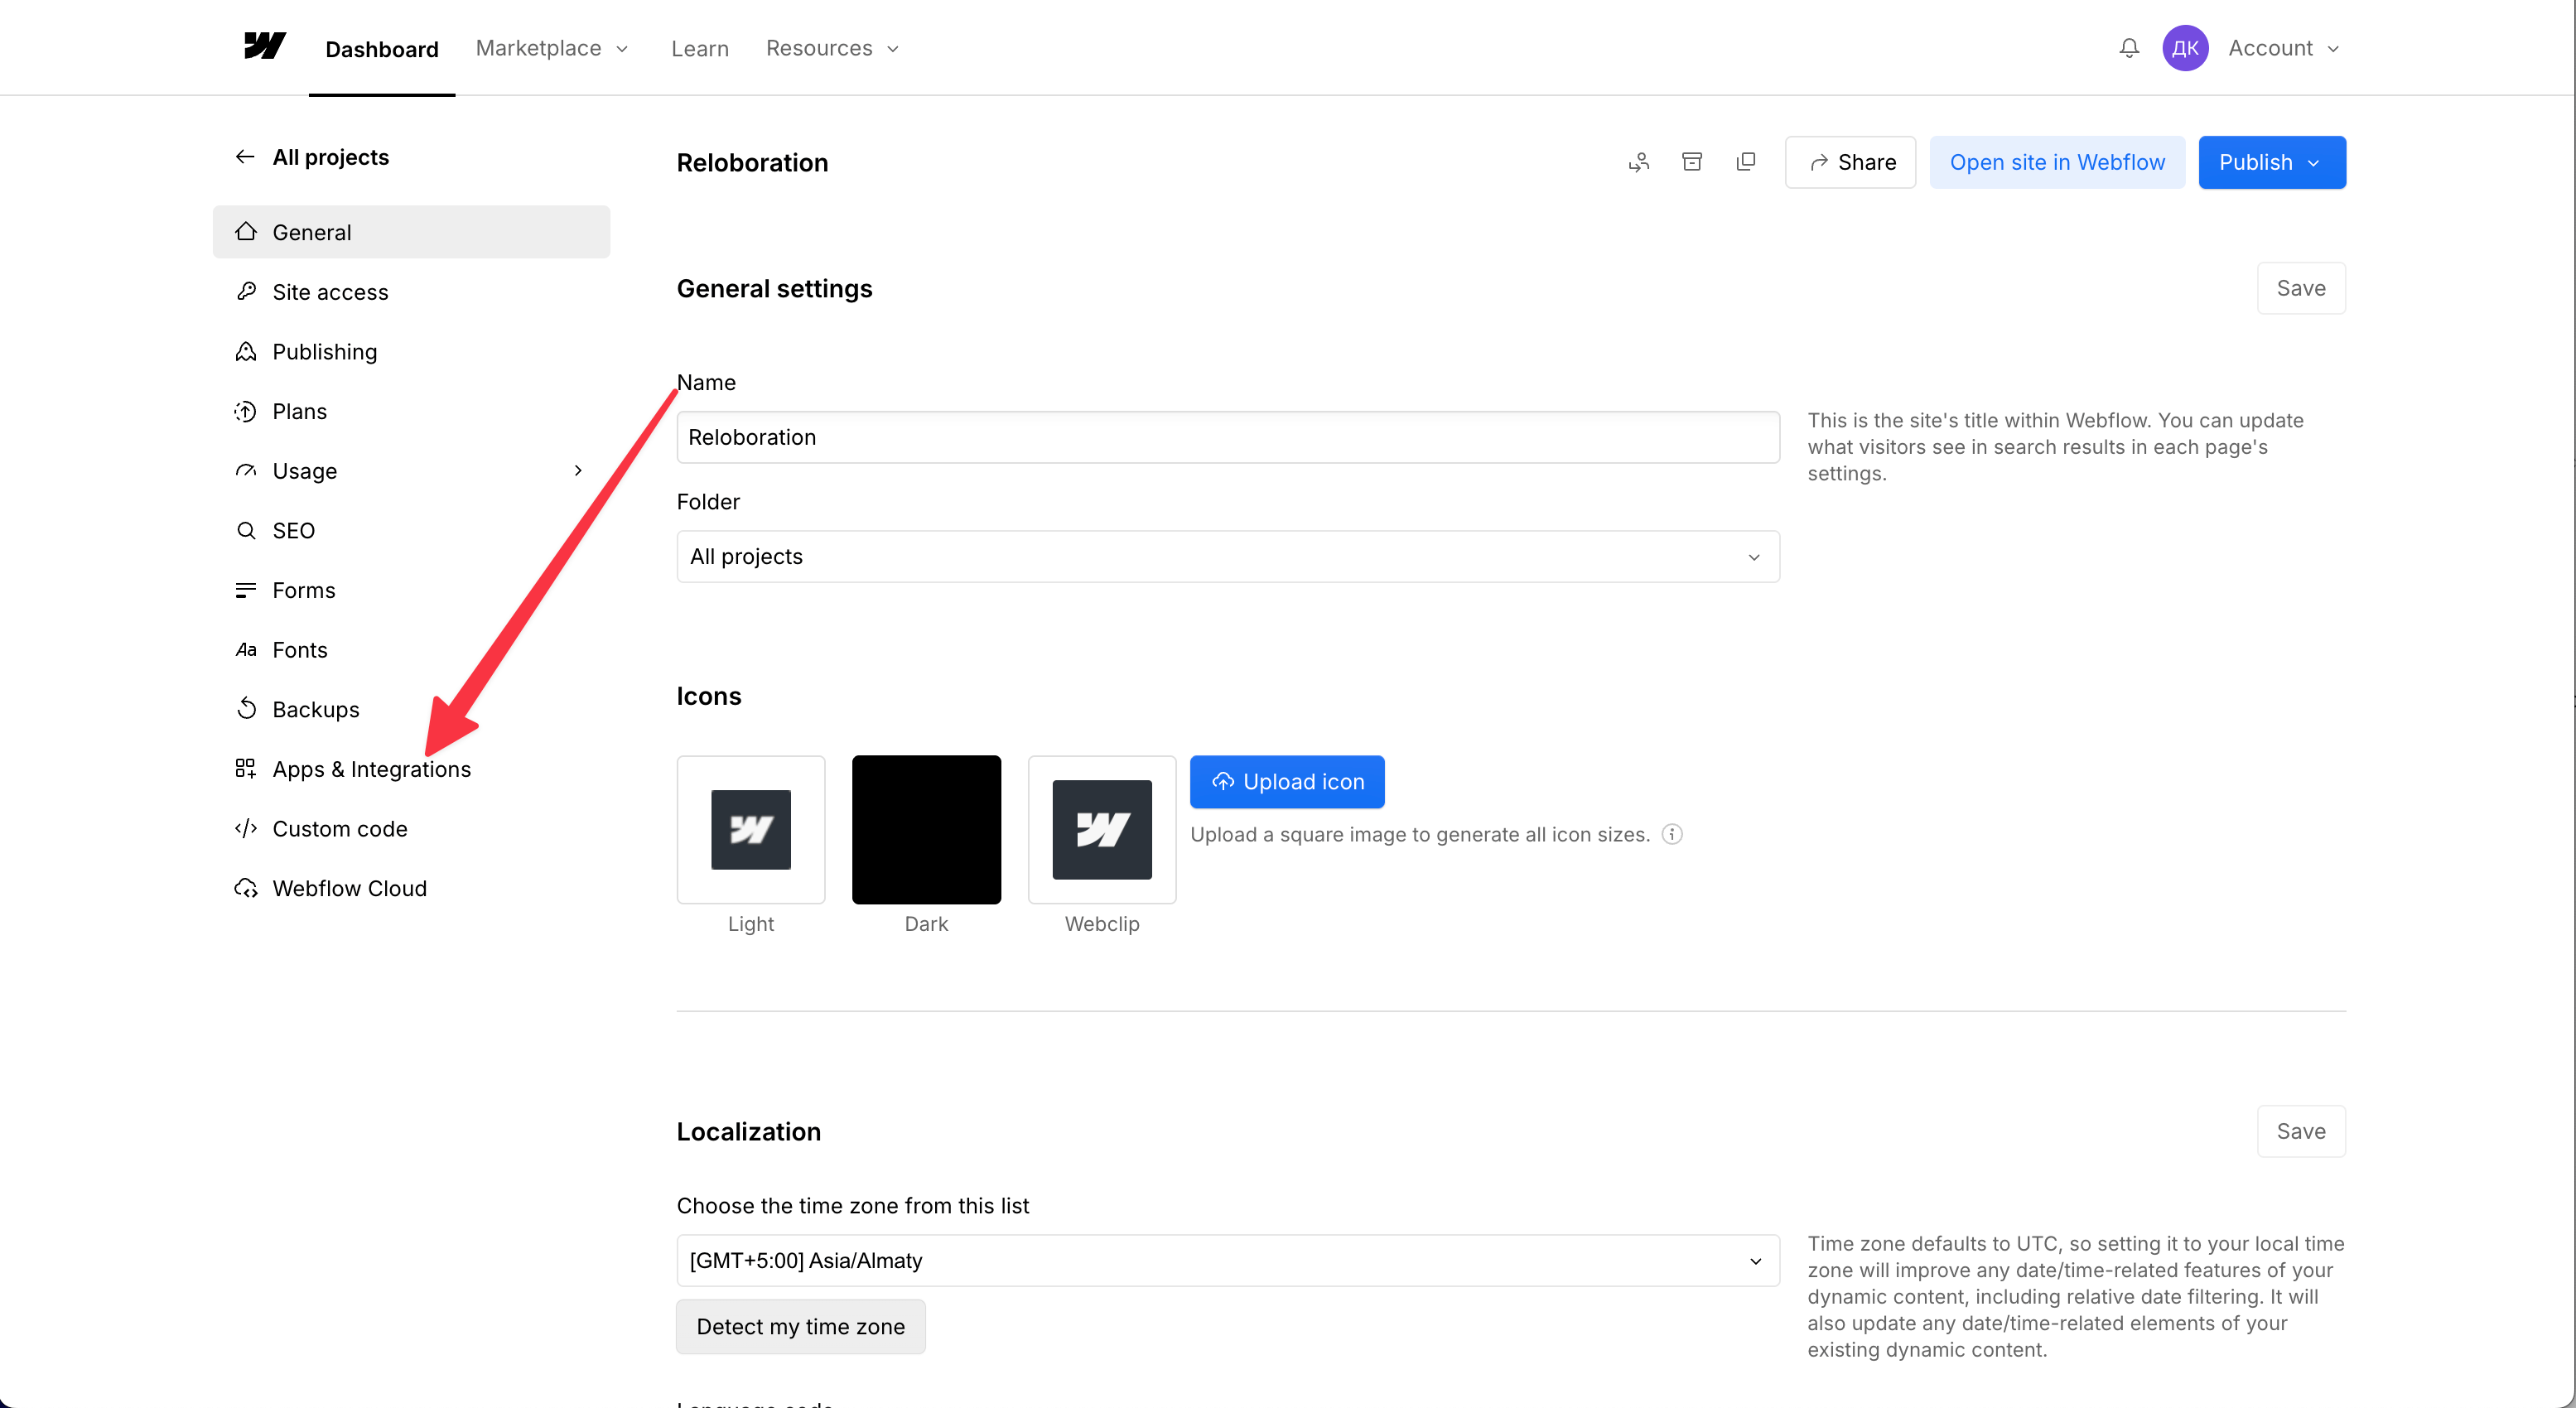
 In the settings sidebar, open **Apps & Integrations**.
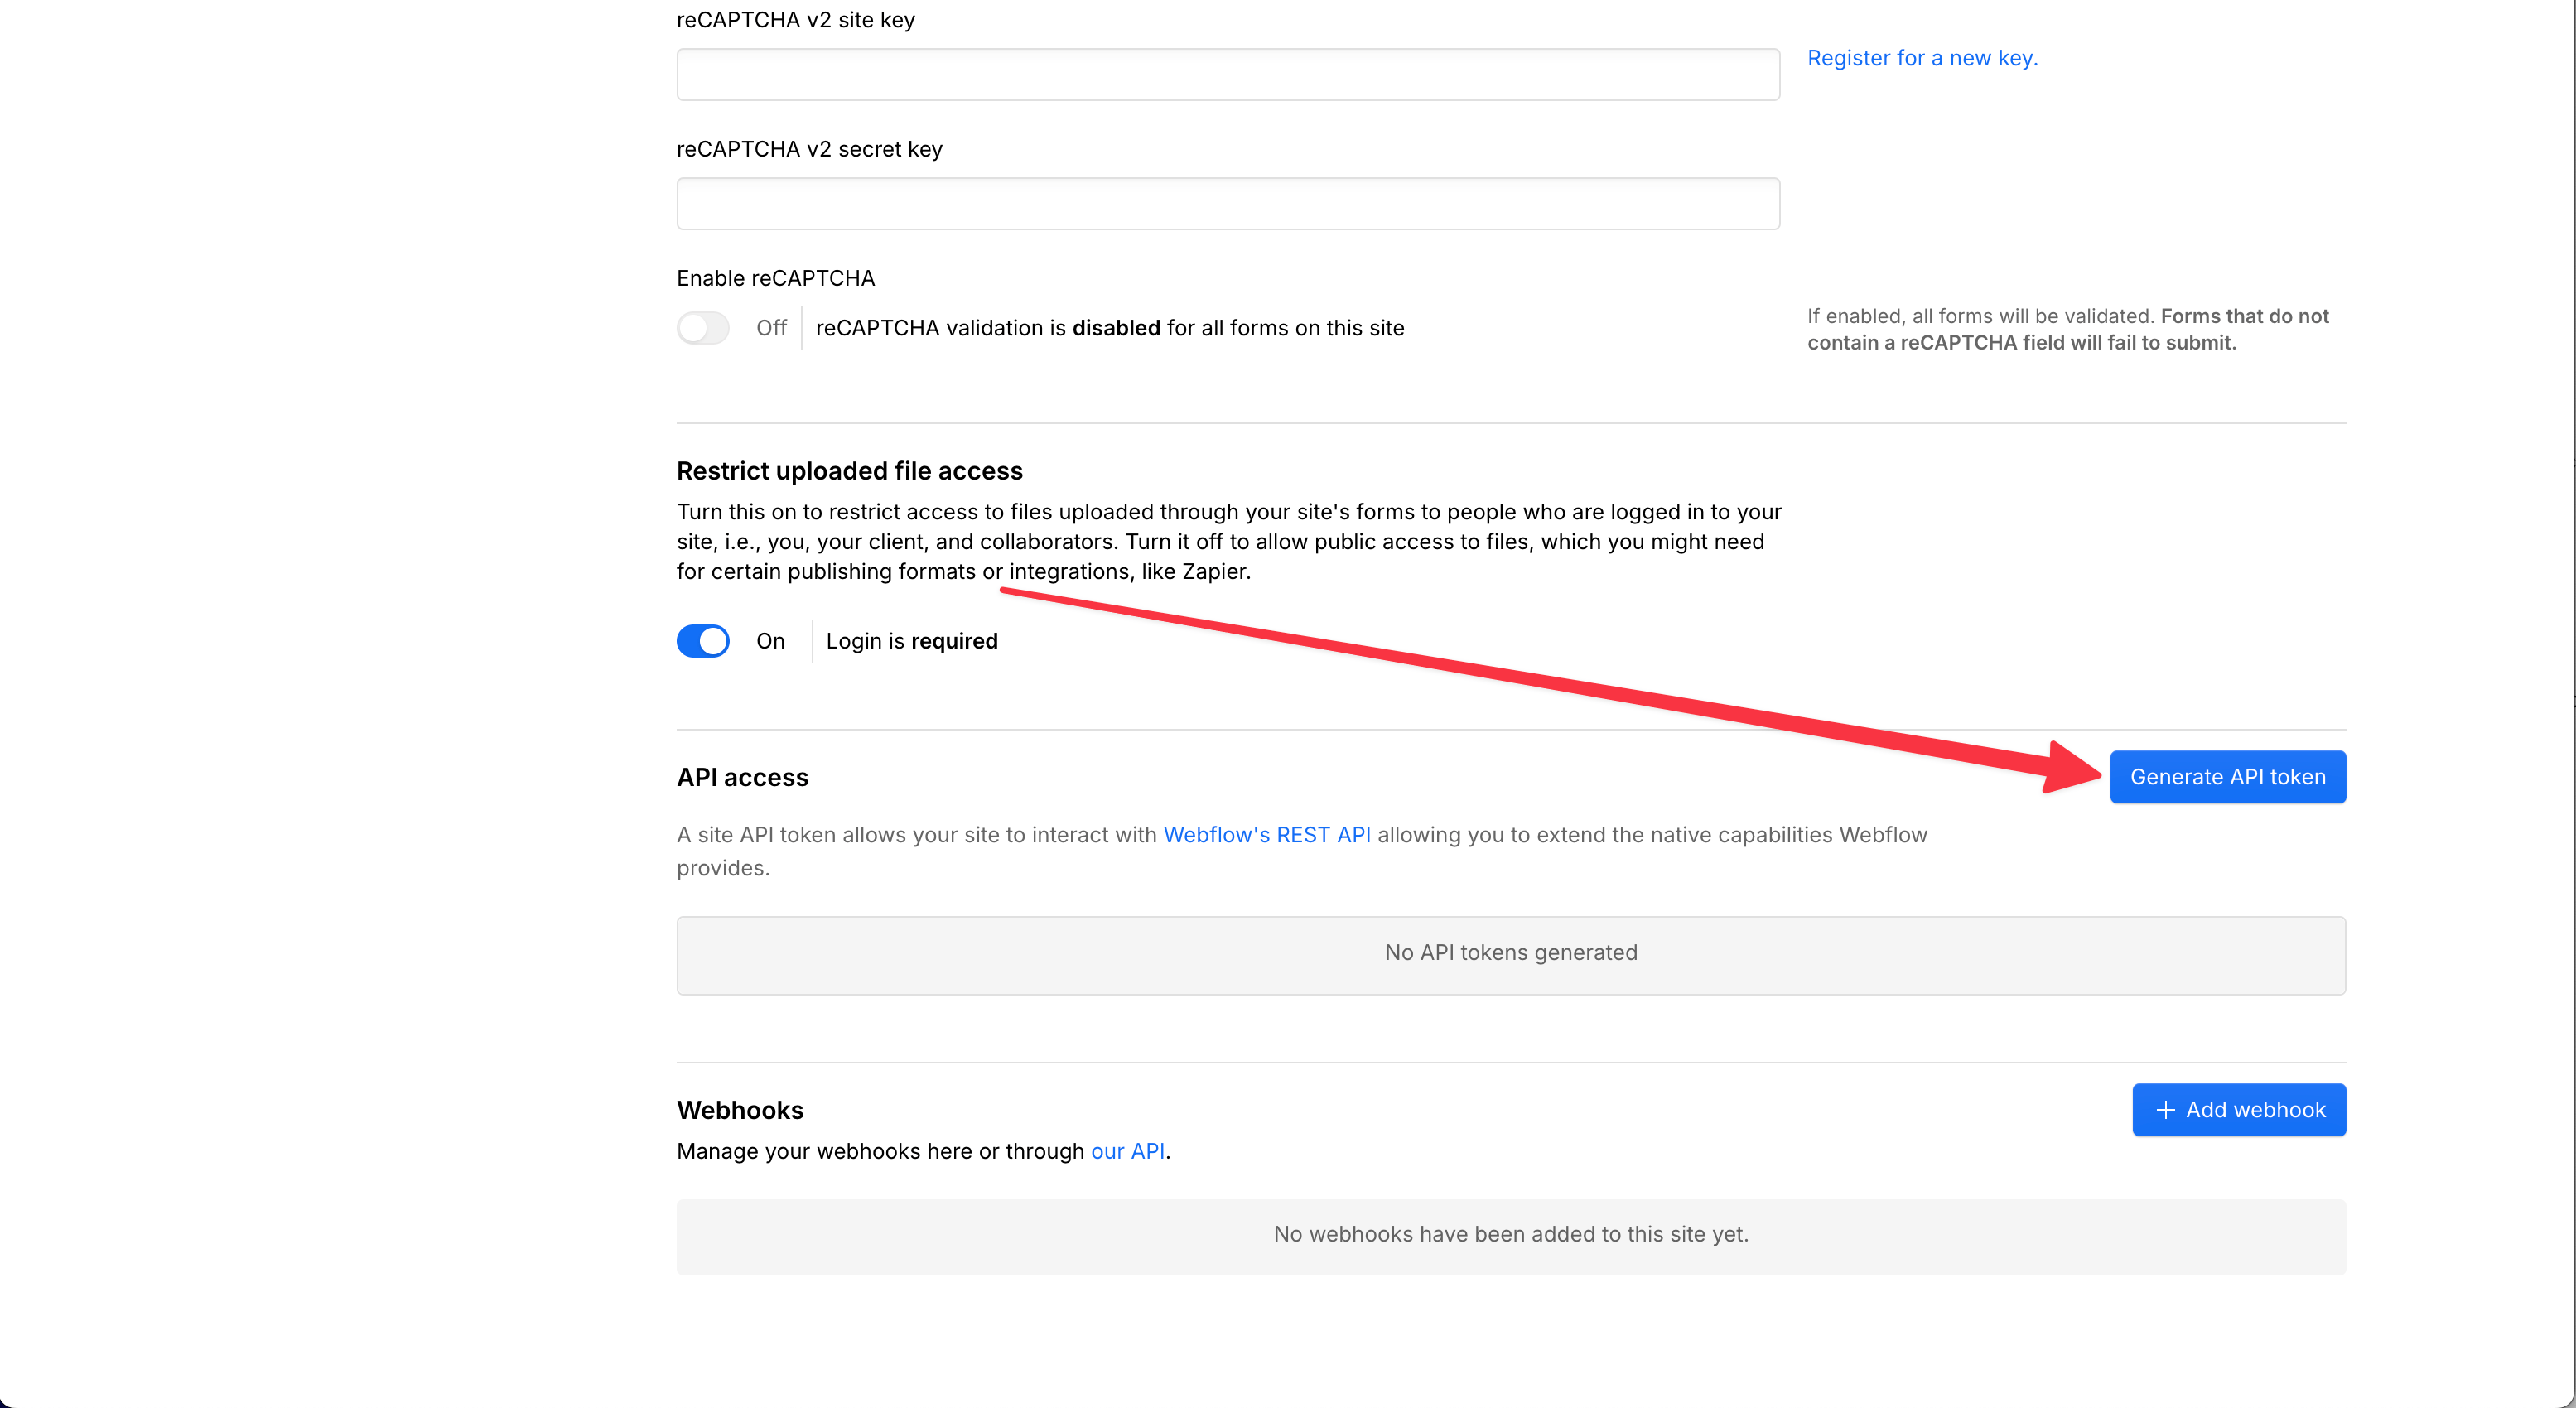
 Scroll to **API access** and click **Generate API token**. Name it something recognizable, like `Ryze AI`.
 Grant these scopes — everything else can stay on **No access**:
| Permission | Access |
| ---------- | -------------- |
| **CMS** | Read and write |
| **Assets** | Read and write |
| **Sites** | Read-only |
CMS is how articles are created and published, Assets is where featured images are uploaded, and Sites lets Ryze list your sites so you can pick one.
Click **Create token** and copy it right away.
Grant these scopes — everything else can stay on **No access**:
| Permission | Access |
| ---------- | -------------- |
| **CMS** | Read and write |
| **Assets** | Read and write |
| **Sites** | Read-only |
CMS is how articles are created and published, Assets is where featured images are uploaded, and Sites lets Ryze list your sites so you can pick one.
Click **Create token** and copy it right away.
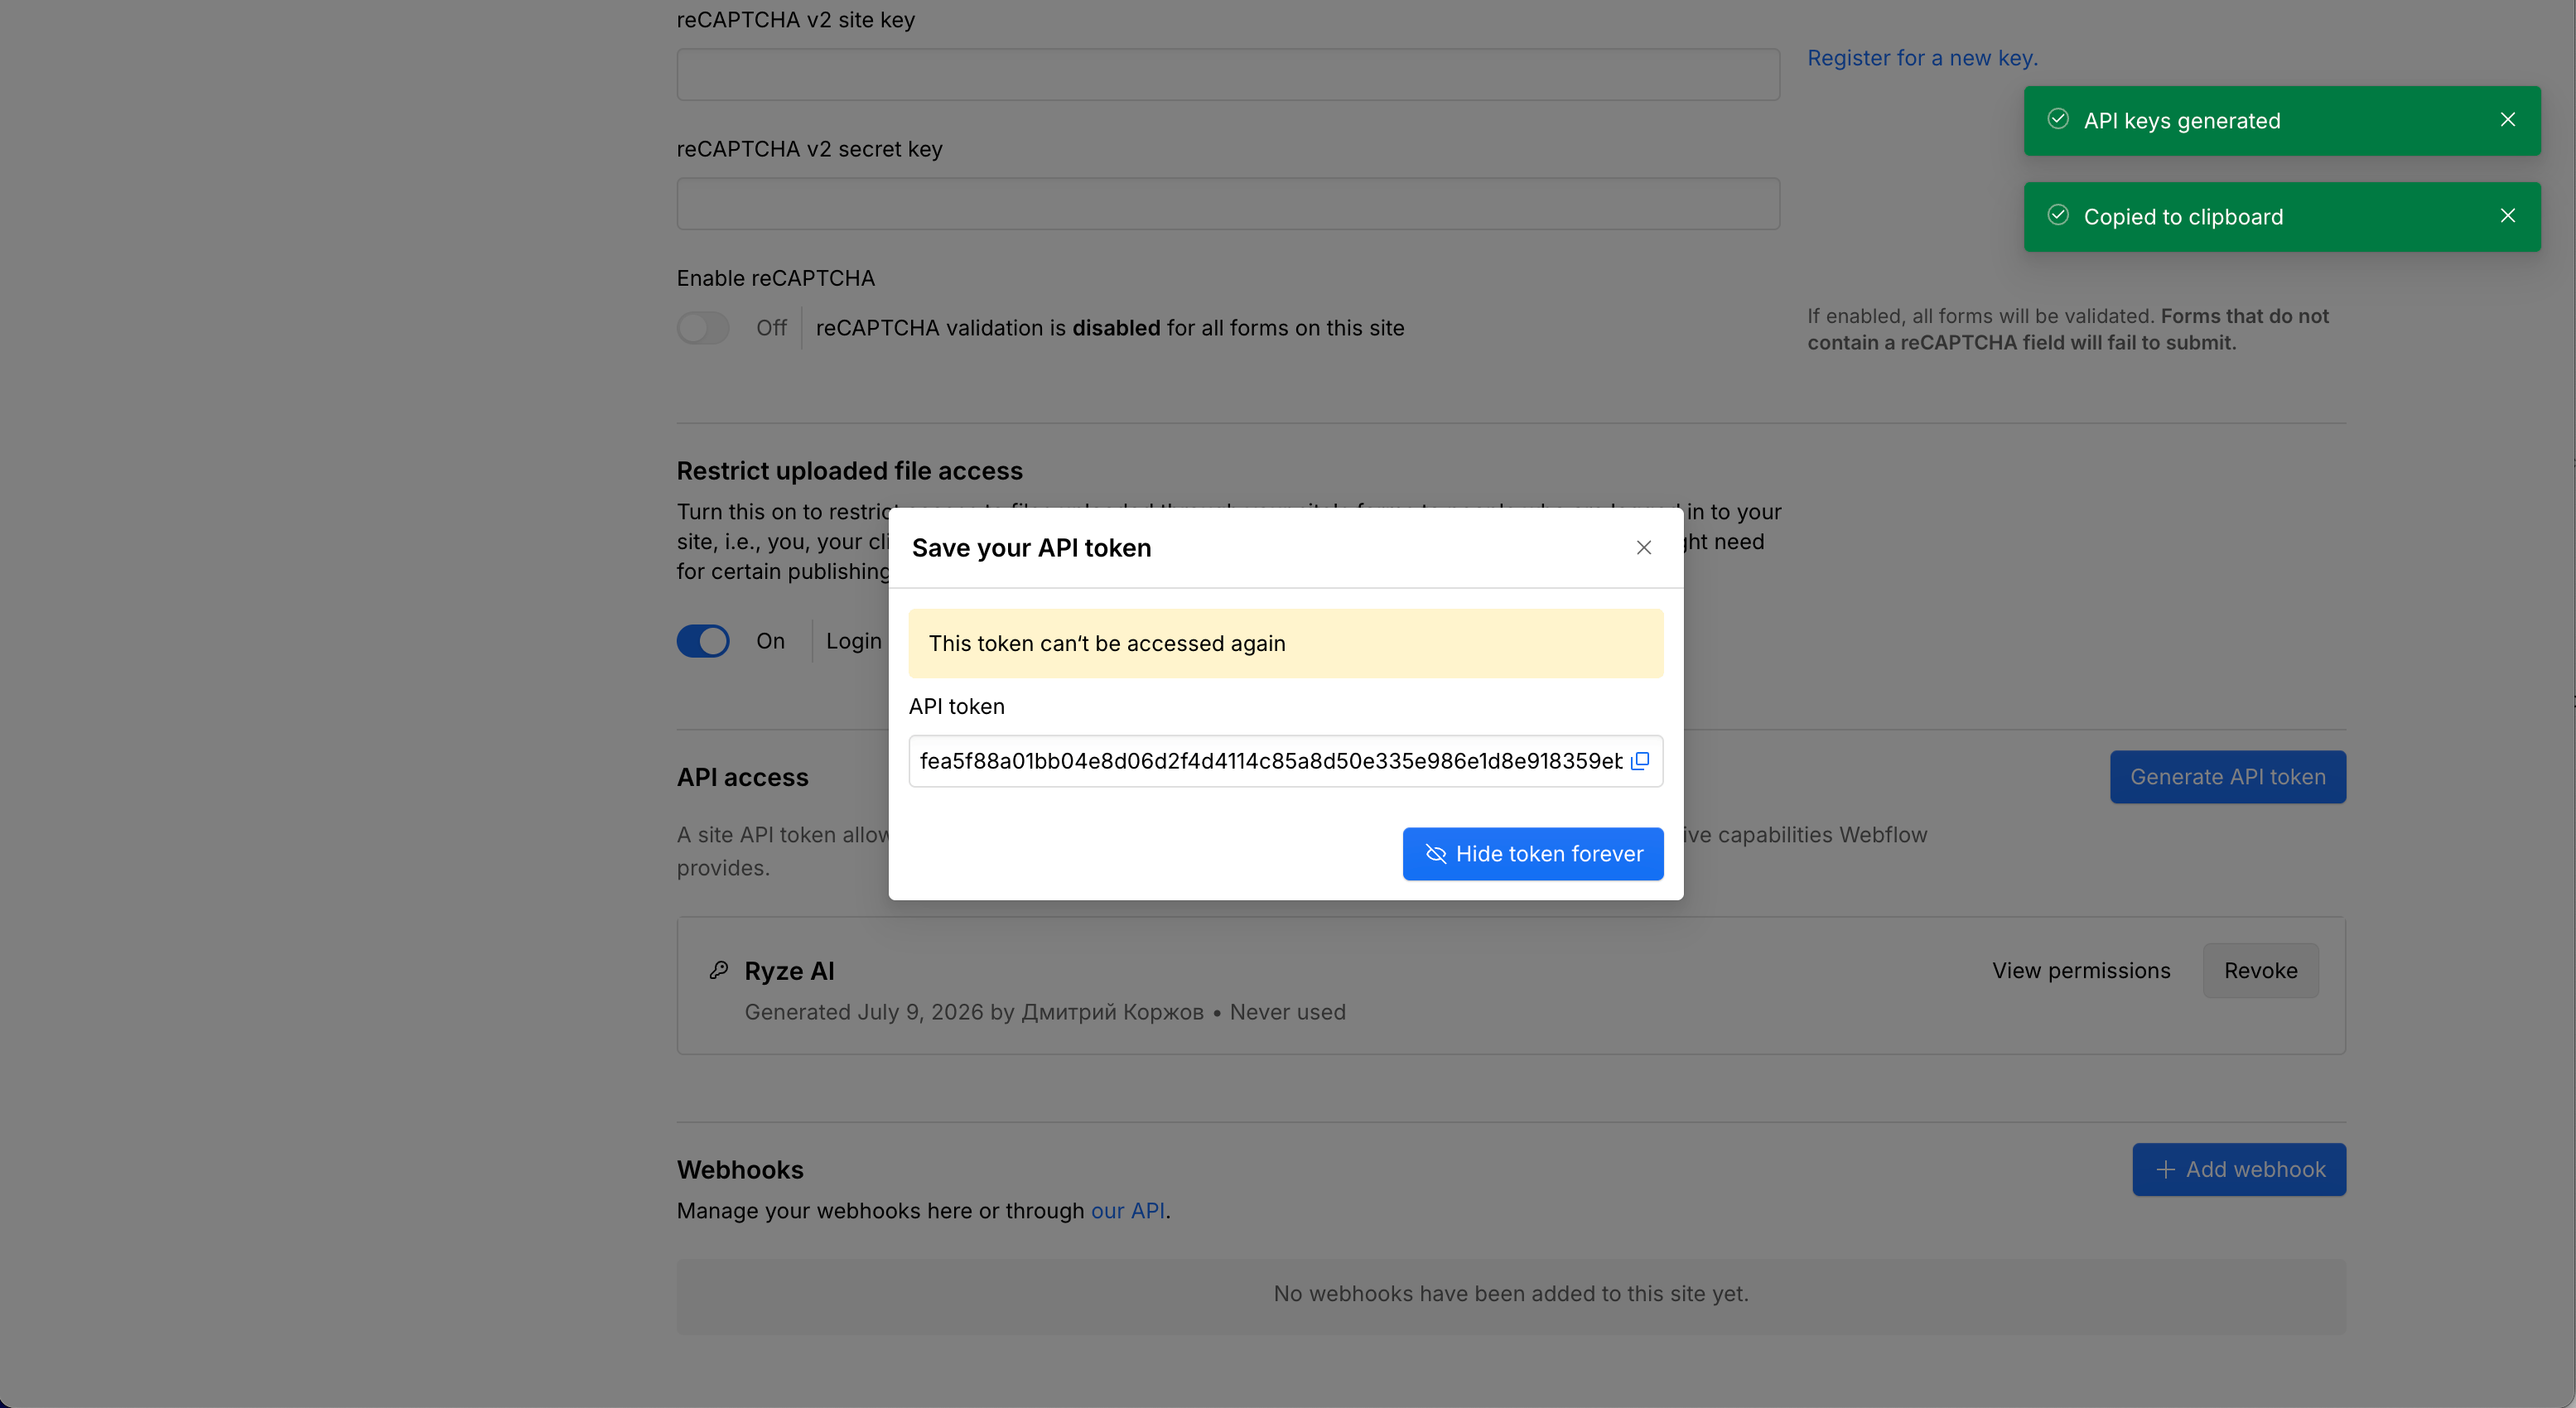 Webflow shows the token **only once**. If you lose it, revoke it and generate a new one.
## Step 2 — Connect in Ryze
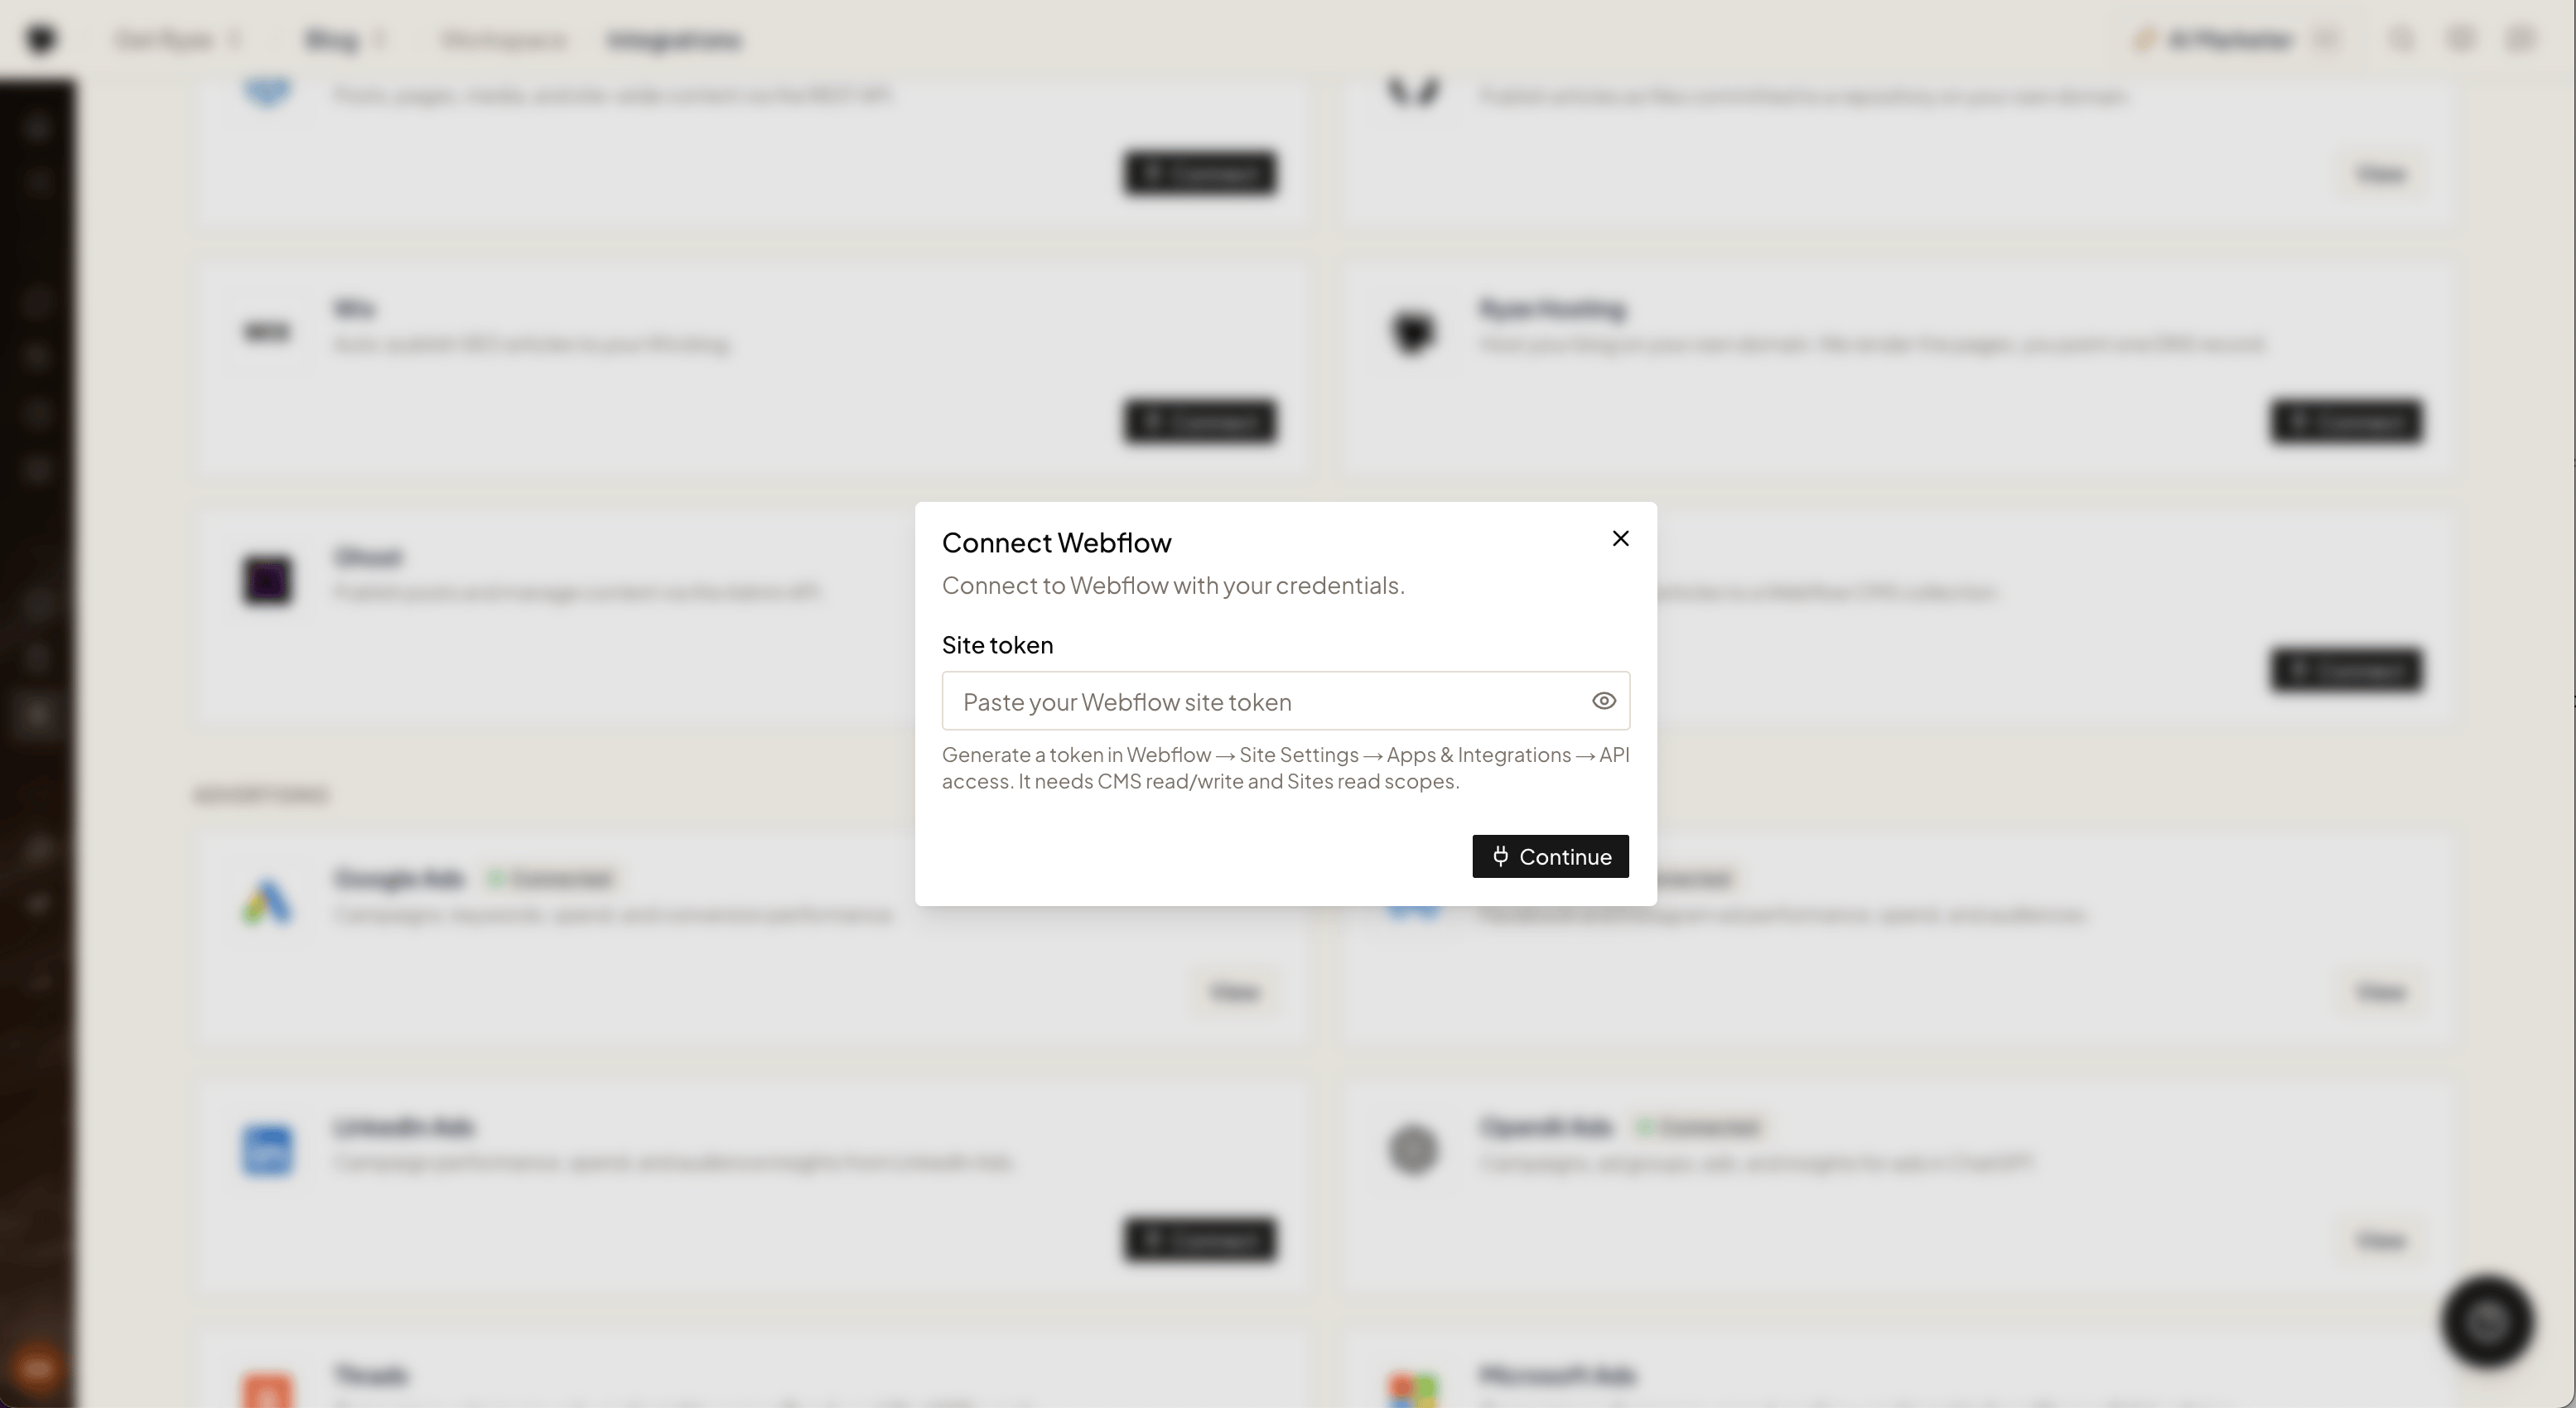
In **Workspace Settings → Integrations**, click **Connect** on the Webflow card and paste your site token.
Webflow shows the token **only once**. If you lose it, revoke it and generate a new one.
## Step 2 — Connect in Ryze
In **Workspace Settings → Integrations**, click **Connect** on the Webflow card and paste your site token.
 ## Step 3 — Choose the site and collection
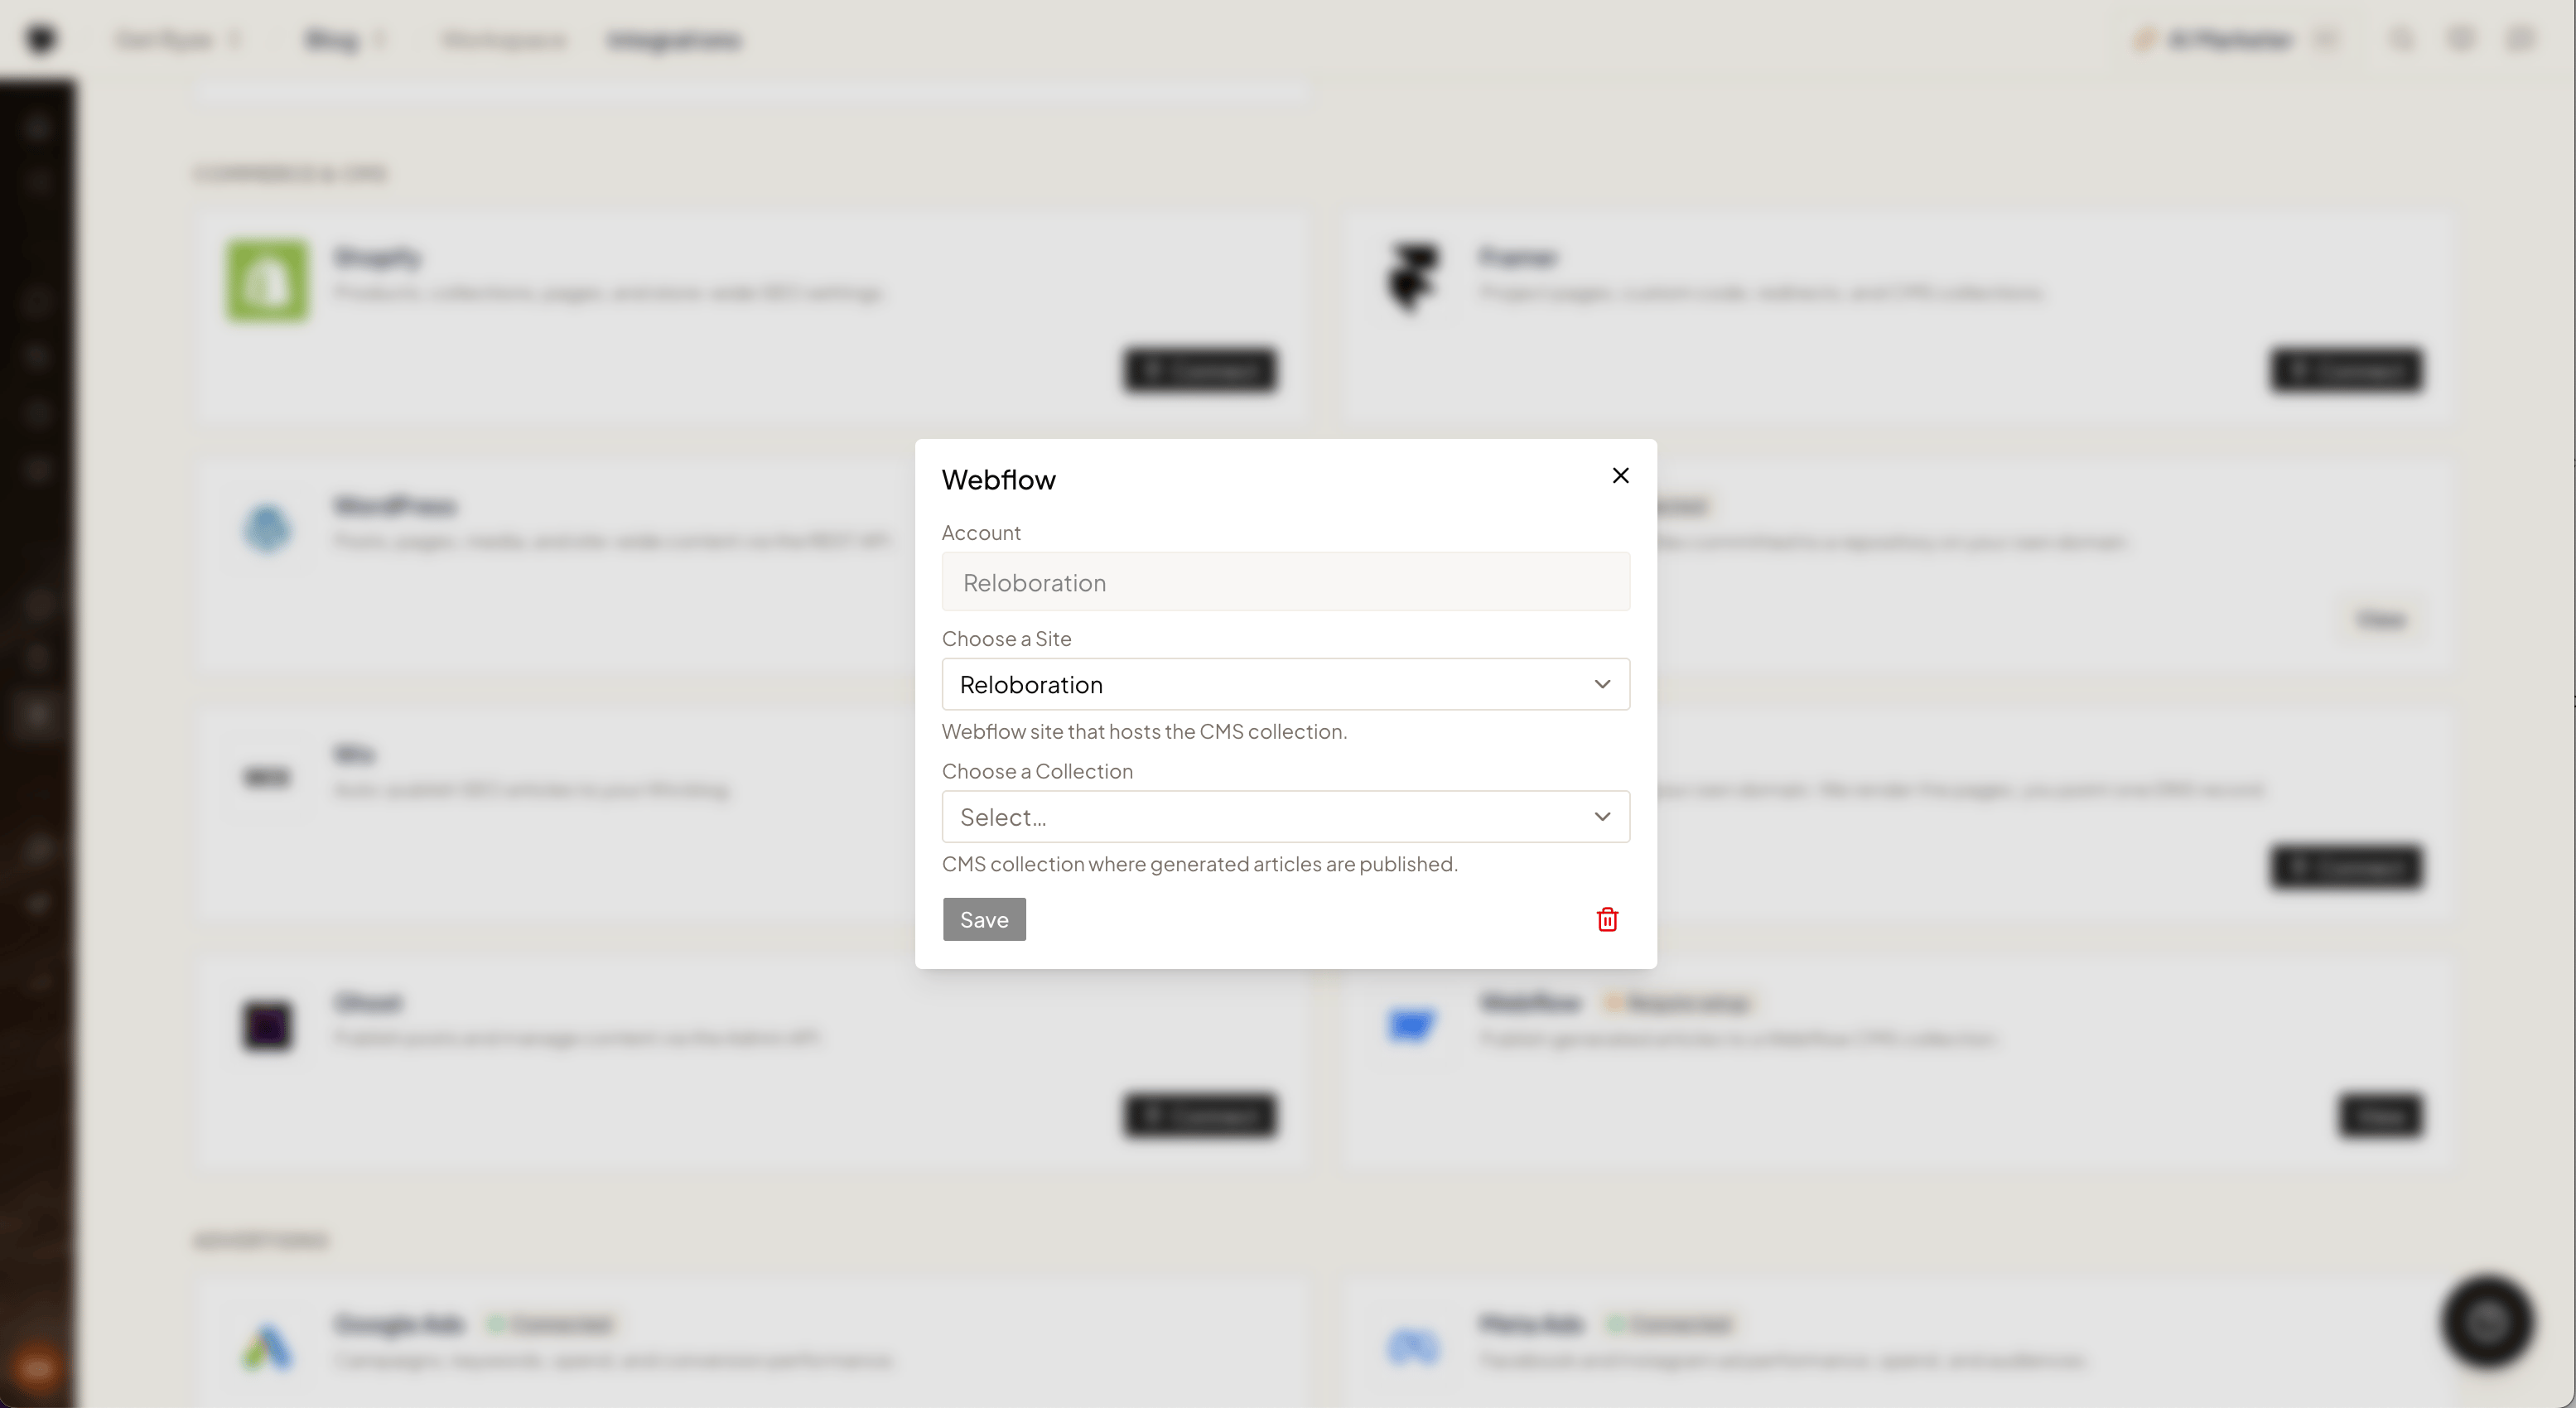
After the token is verified, pick the **site** that hosts your blog and the **CMS collection** where generated articles should be published.
## Step 3 — Choose the site and collection
After the token is verified, pick the **site** that hosts your blog and the **CMS collection** where generated articles should be published.
 Ryze maps your collection's fields automatically — title, slug, body, and the featured image land in the right places without manual field mapping.
## Troubleshooting
* **Token rejected** — make sure it's a **site token** from that site's settings, not a workspace token, and that the CMS scope is set to Read and write.
* **Collection missing from the list** — the token only sees the site it was created on; generate the token on the site that hosts your blog.
* **Images not appearing** — the **Assets** scope must be Read and write; regenerate the token if it was read-only.
Still stuck? Email [support@get-ryze.ai](mailto:support@get-ryze.ai).
Ryze maps your collection's fields automatically — title, slug, body, and the featured image land in the right places without manual field mapping.
## Troubleshooting
* **Token rejected** — make sure it's a **site token** from that site's settings, not a workspace token, and that the CMS scope is set to Read and write.
* **Collection missing from the list** — the token only sees the site it was created on; generate the token on the site that hosts your blog.
* **Images not appearing** — the **Assets** scope must be Read and write; regenerate the token if it was read-only.
Still stuck? Email [support@get-ryze.ai](mailto:support@get-ryze.ai).