

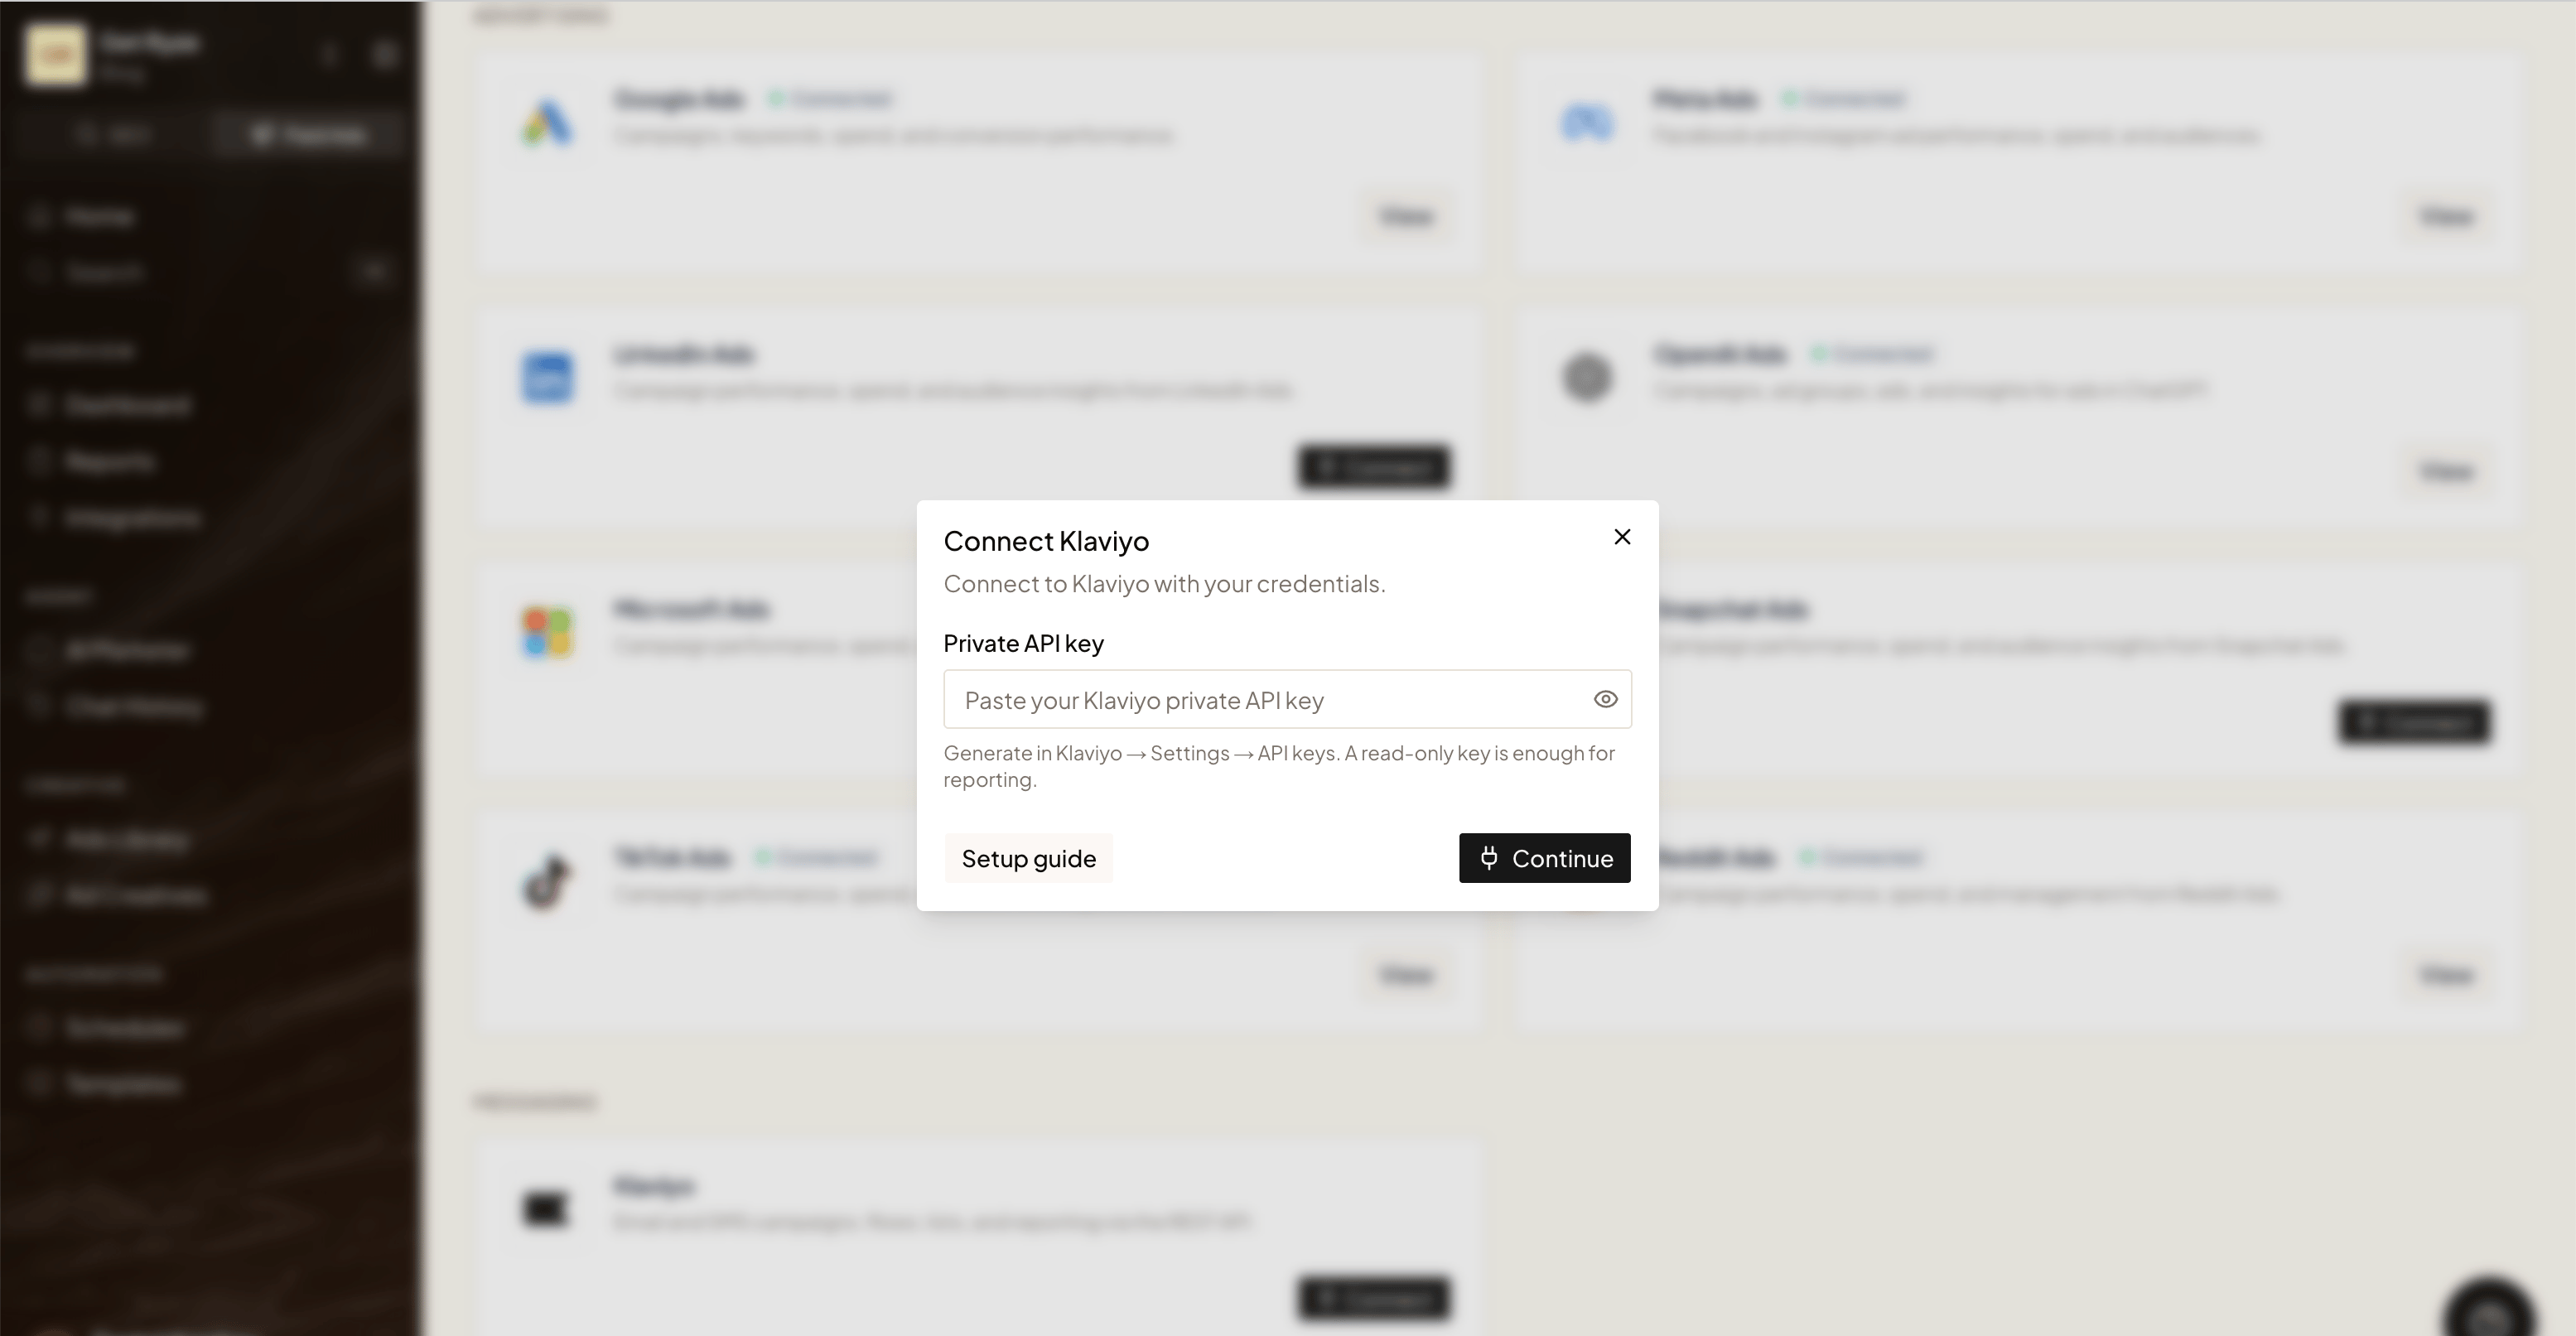
Step 1 — Generate a private API key
1
Open settings
In Klaviyo, click your account name in the lower-left corner, then click Settings.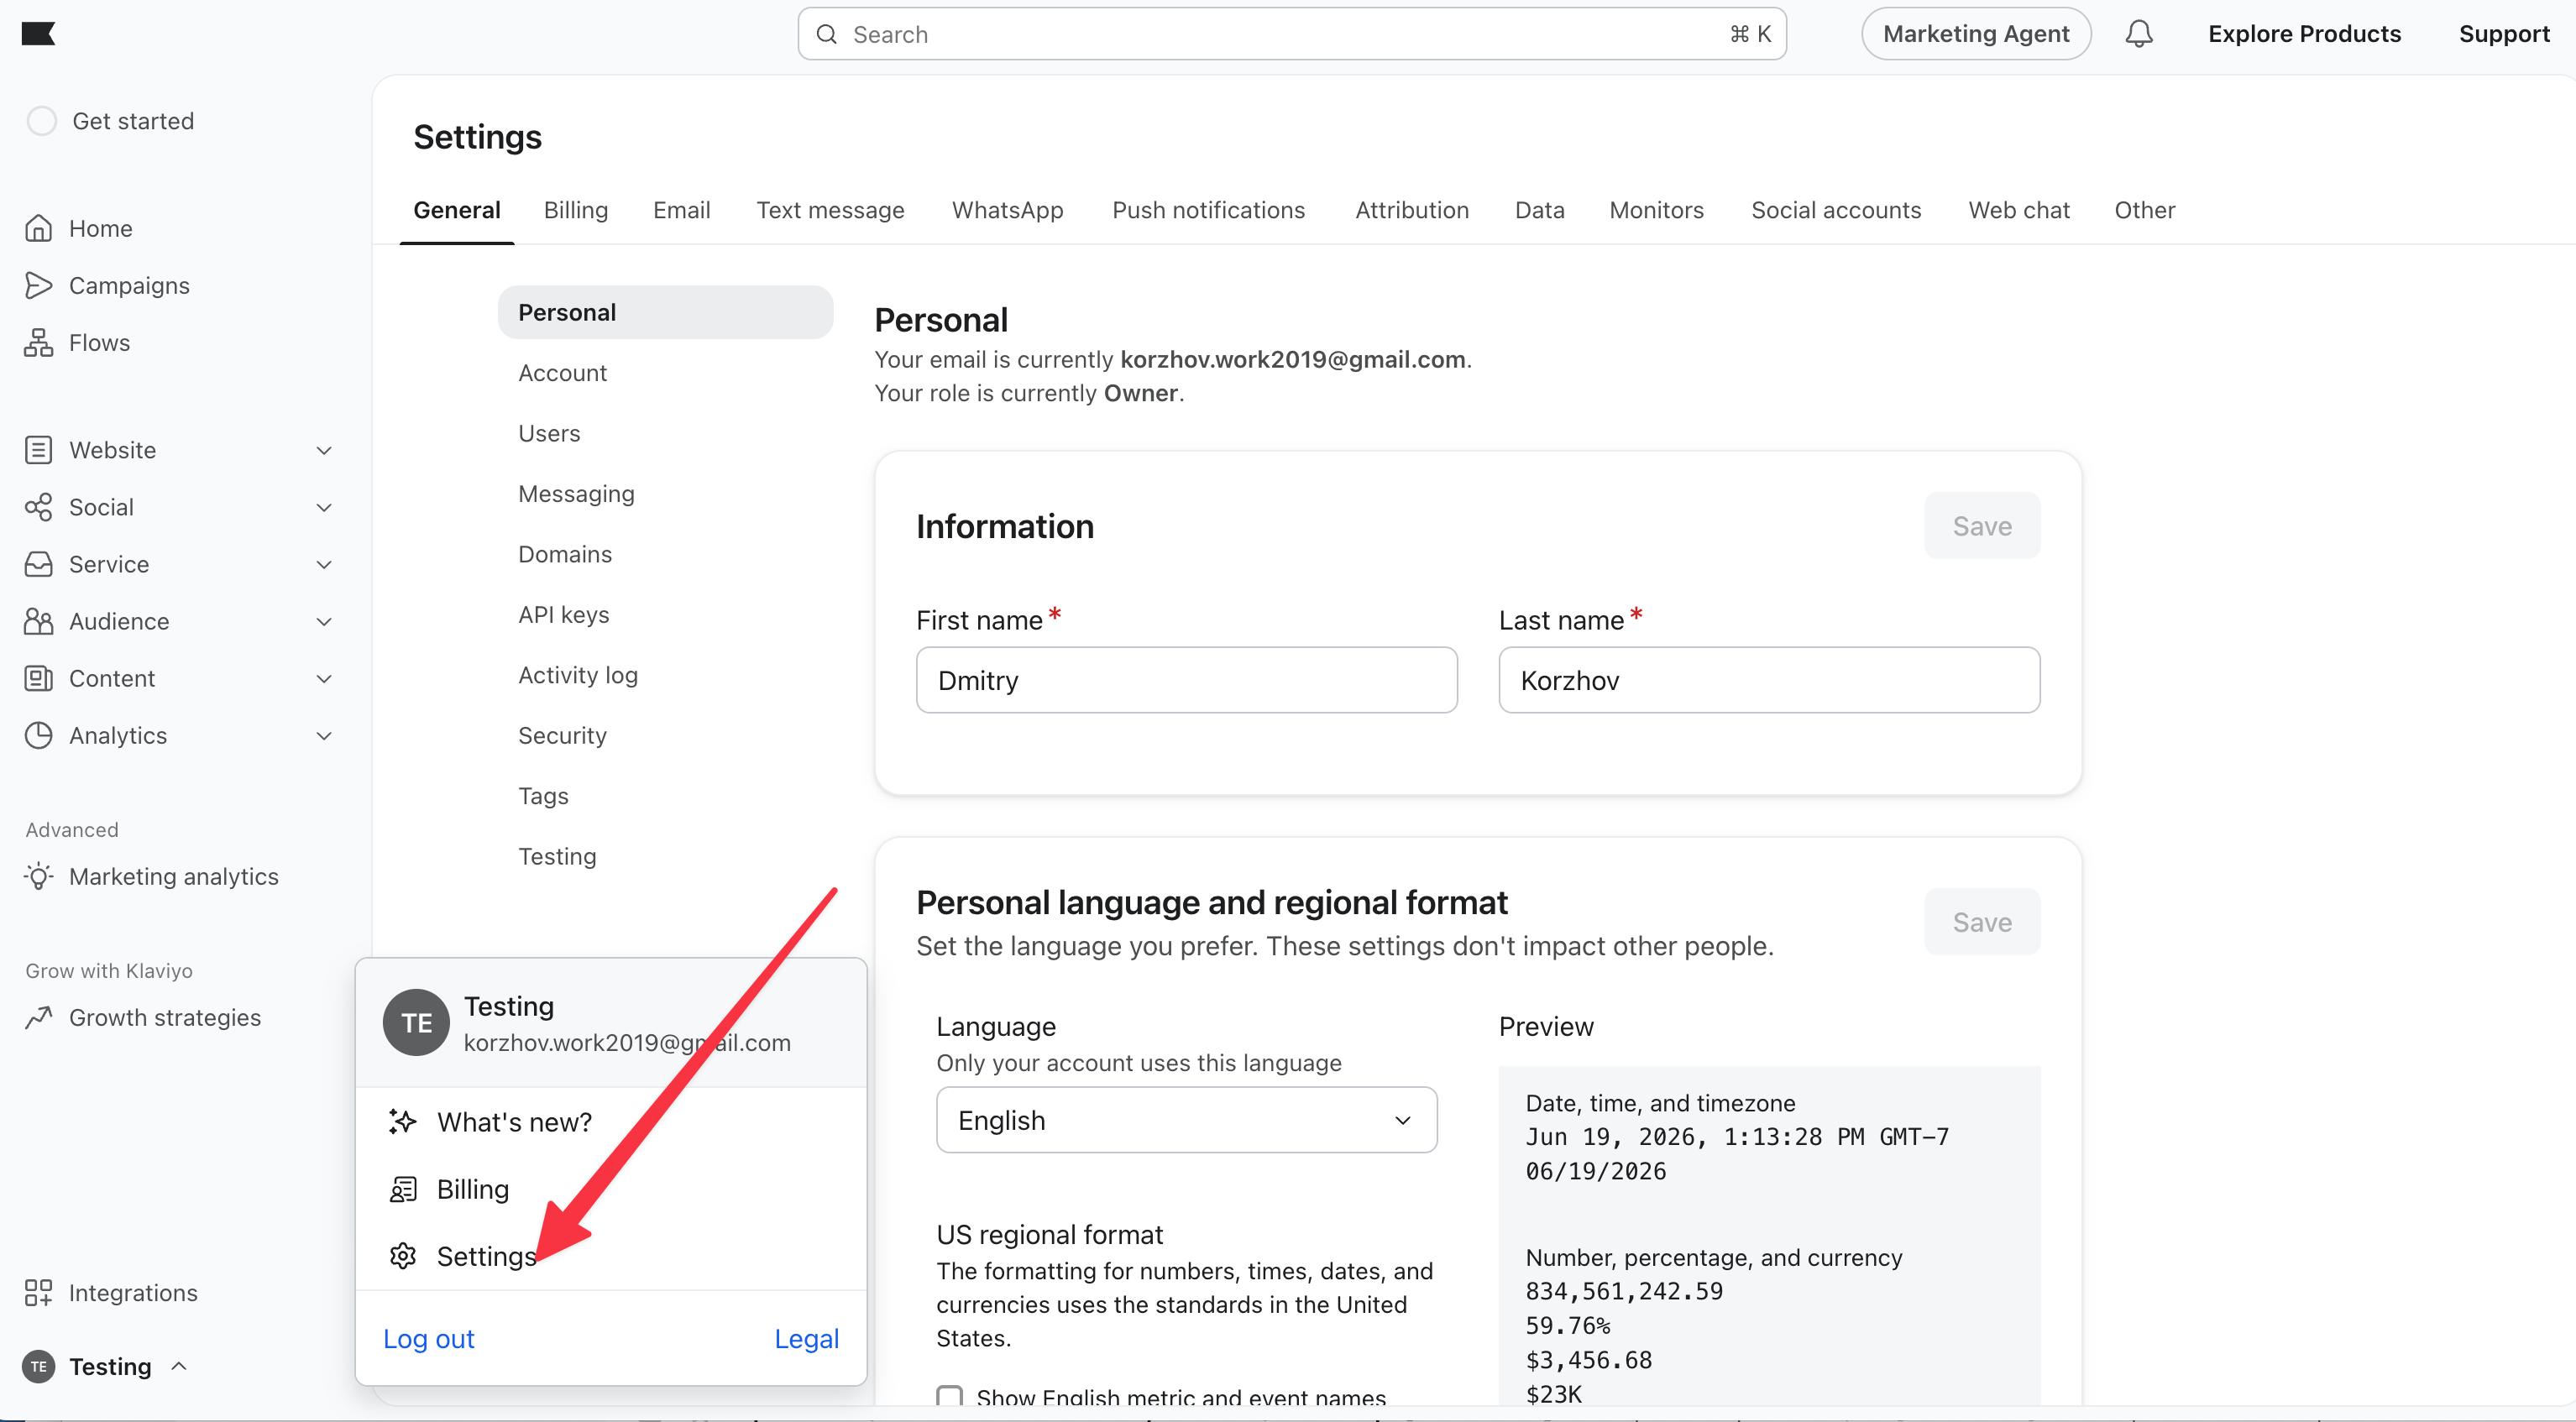
2
Create a private key
Go to the API keys tab and click Create Private API Key. Give it a name like 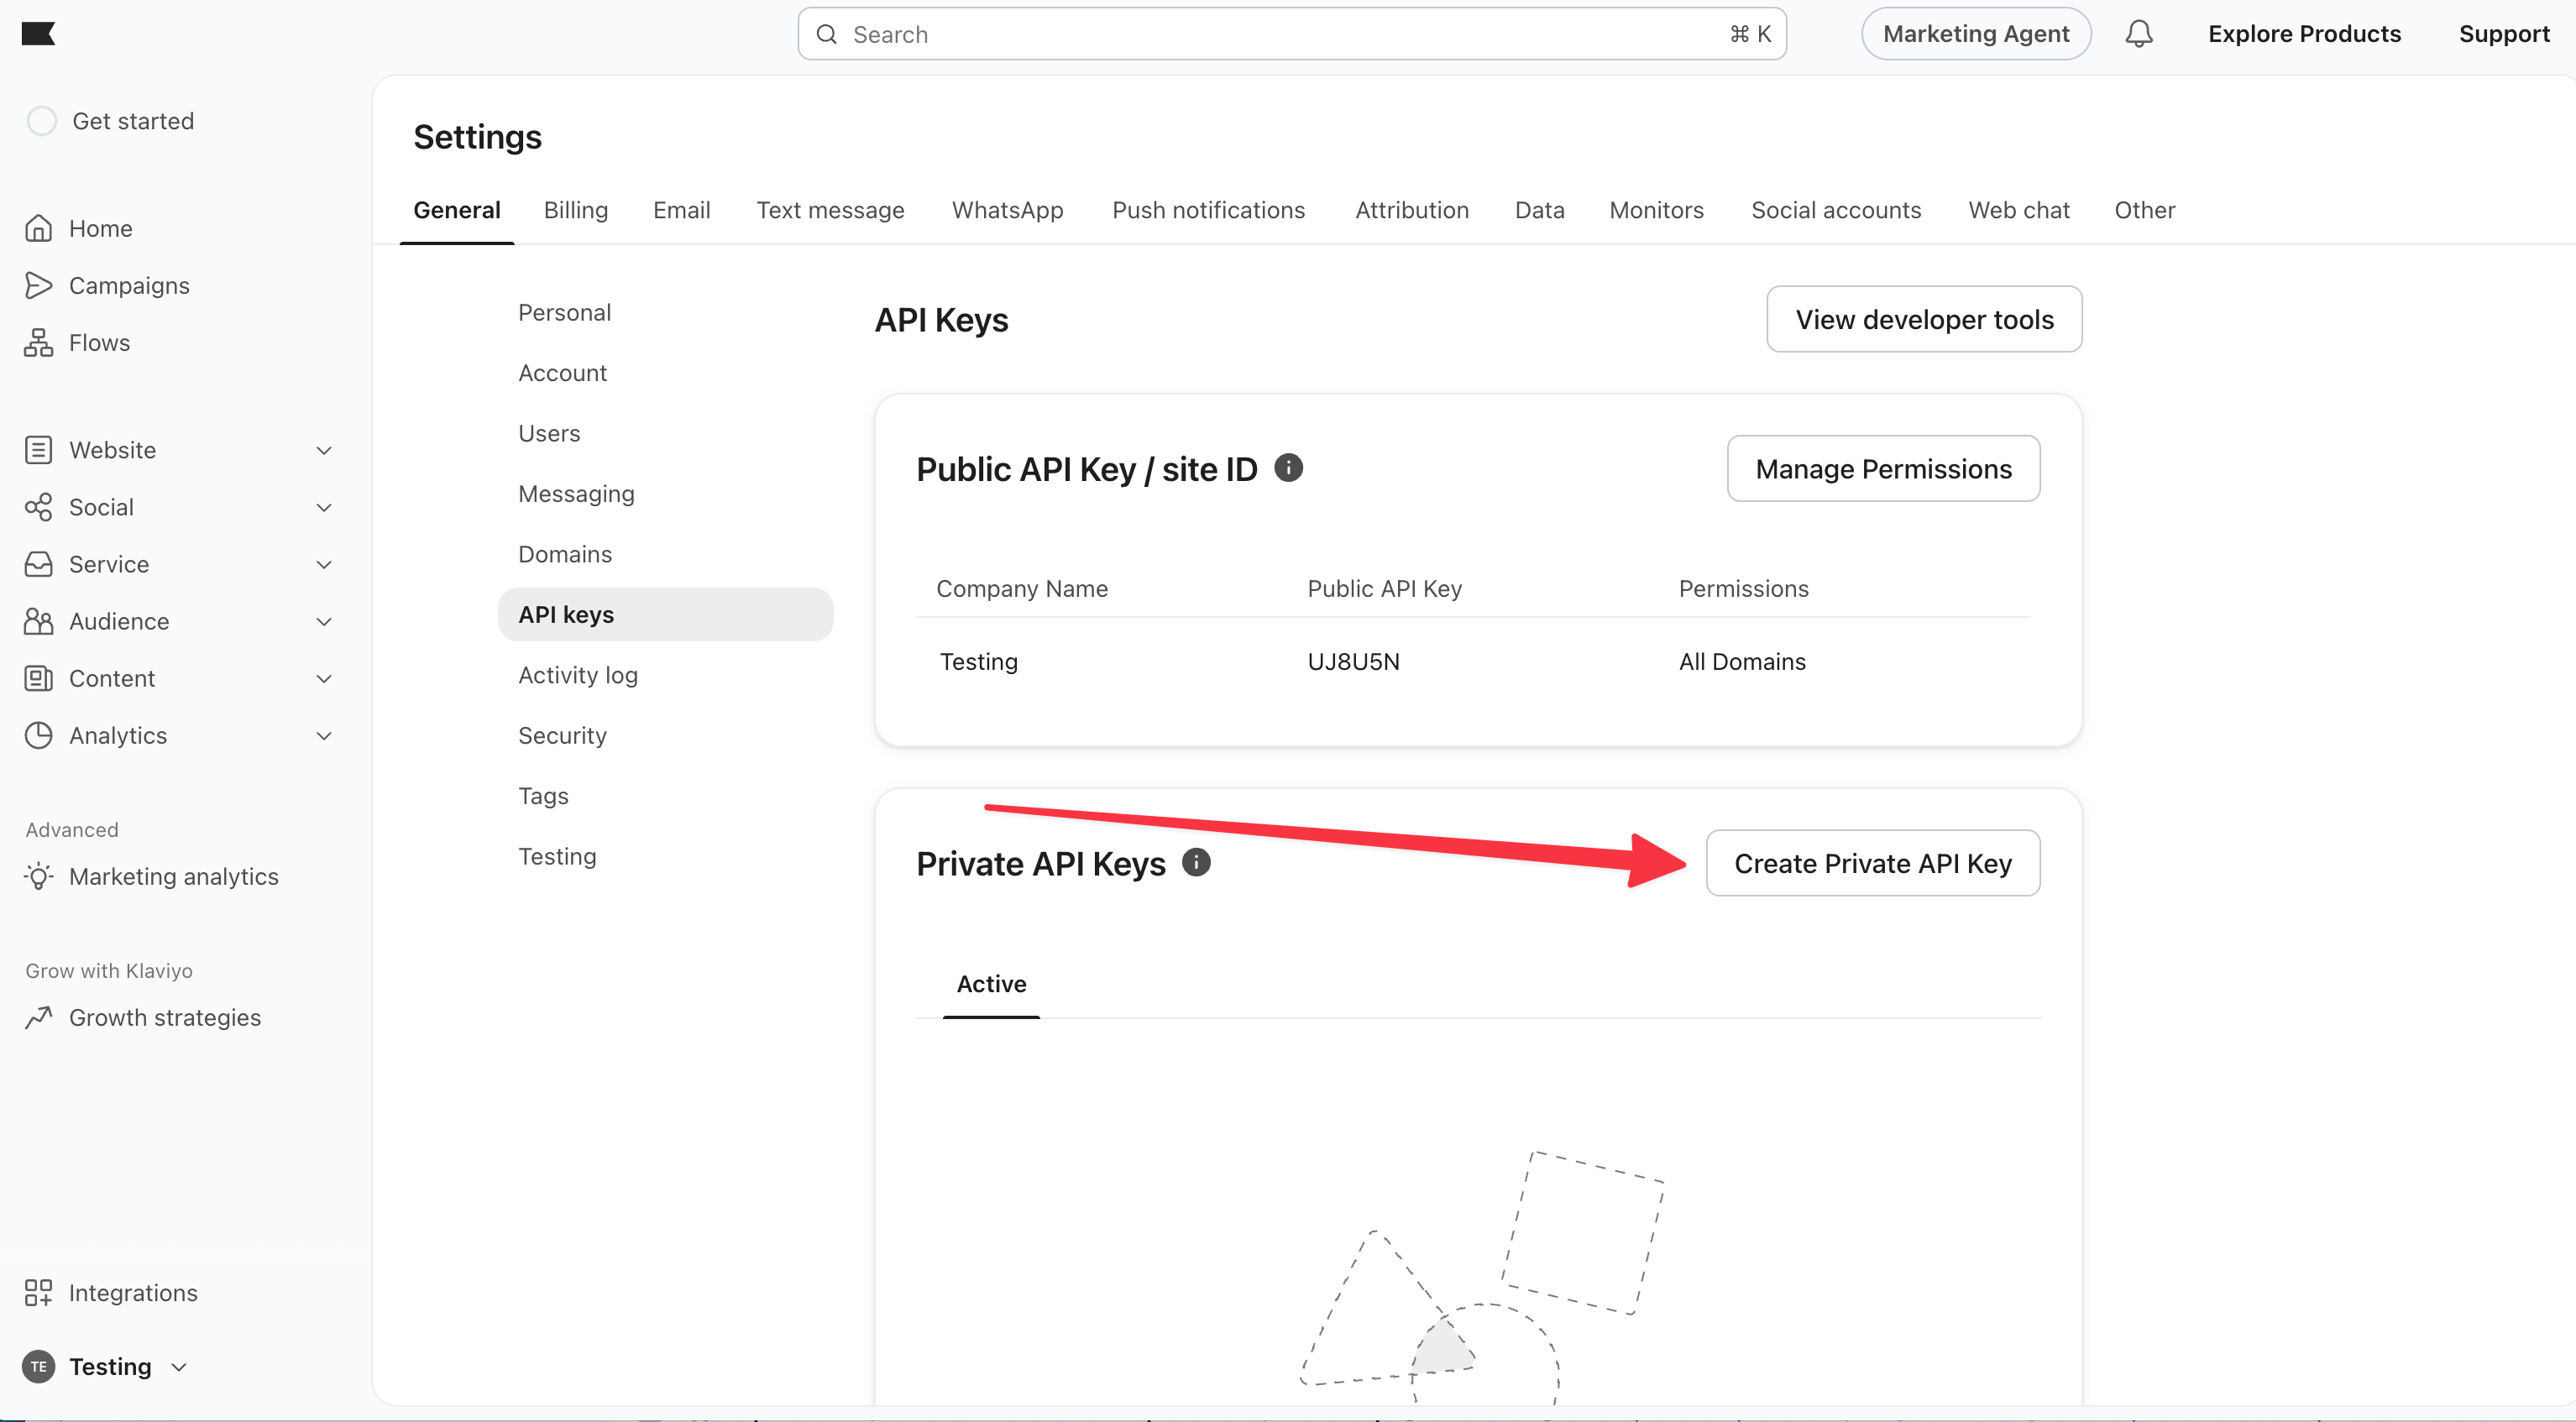
Ryze so you can recognize it later.3
Choose access level
Pick Full Access if you want Ryze to create and manage campaigns, lists, and flows. Pick Read-Only if you only want reporting. Avoid a custom key unless you know which scopes you’re enabling.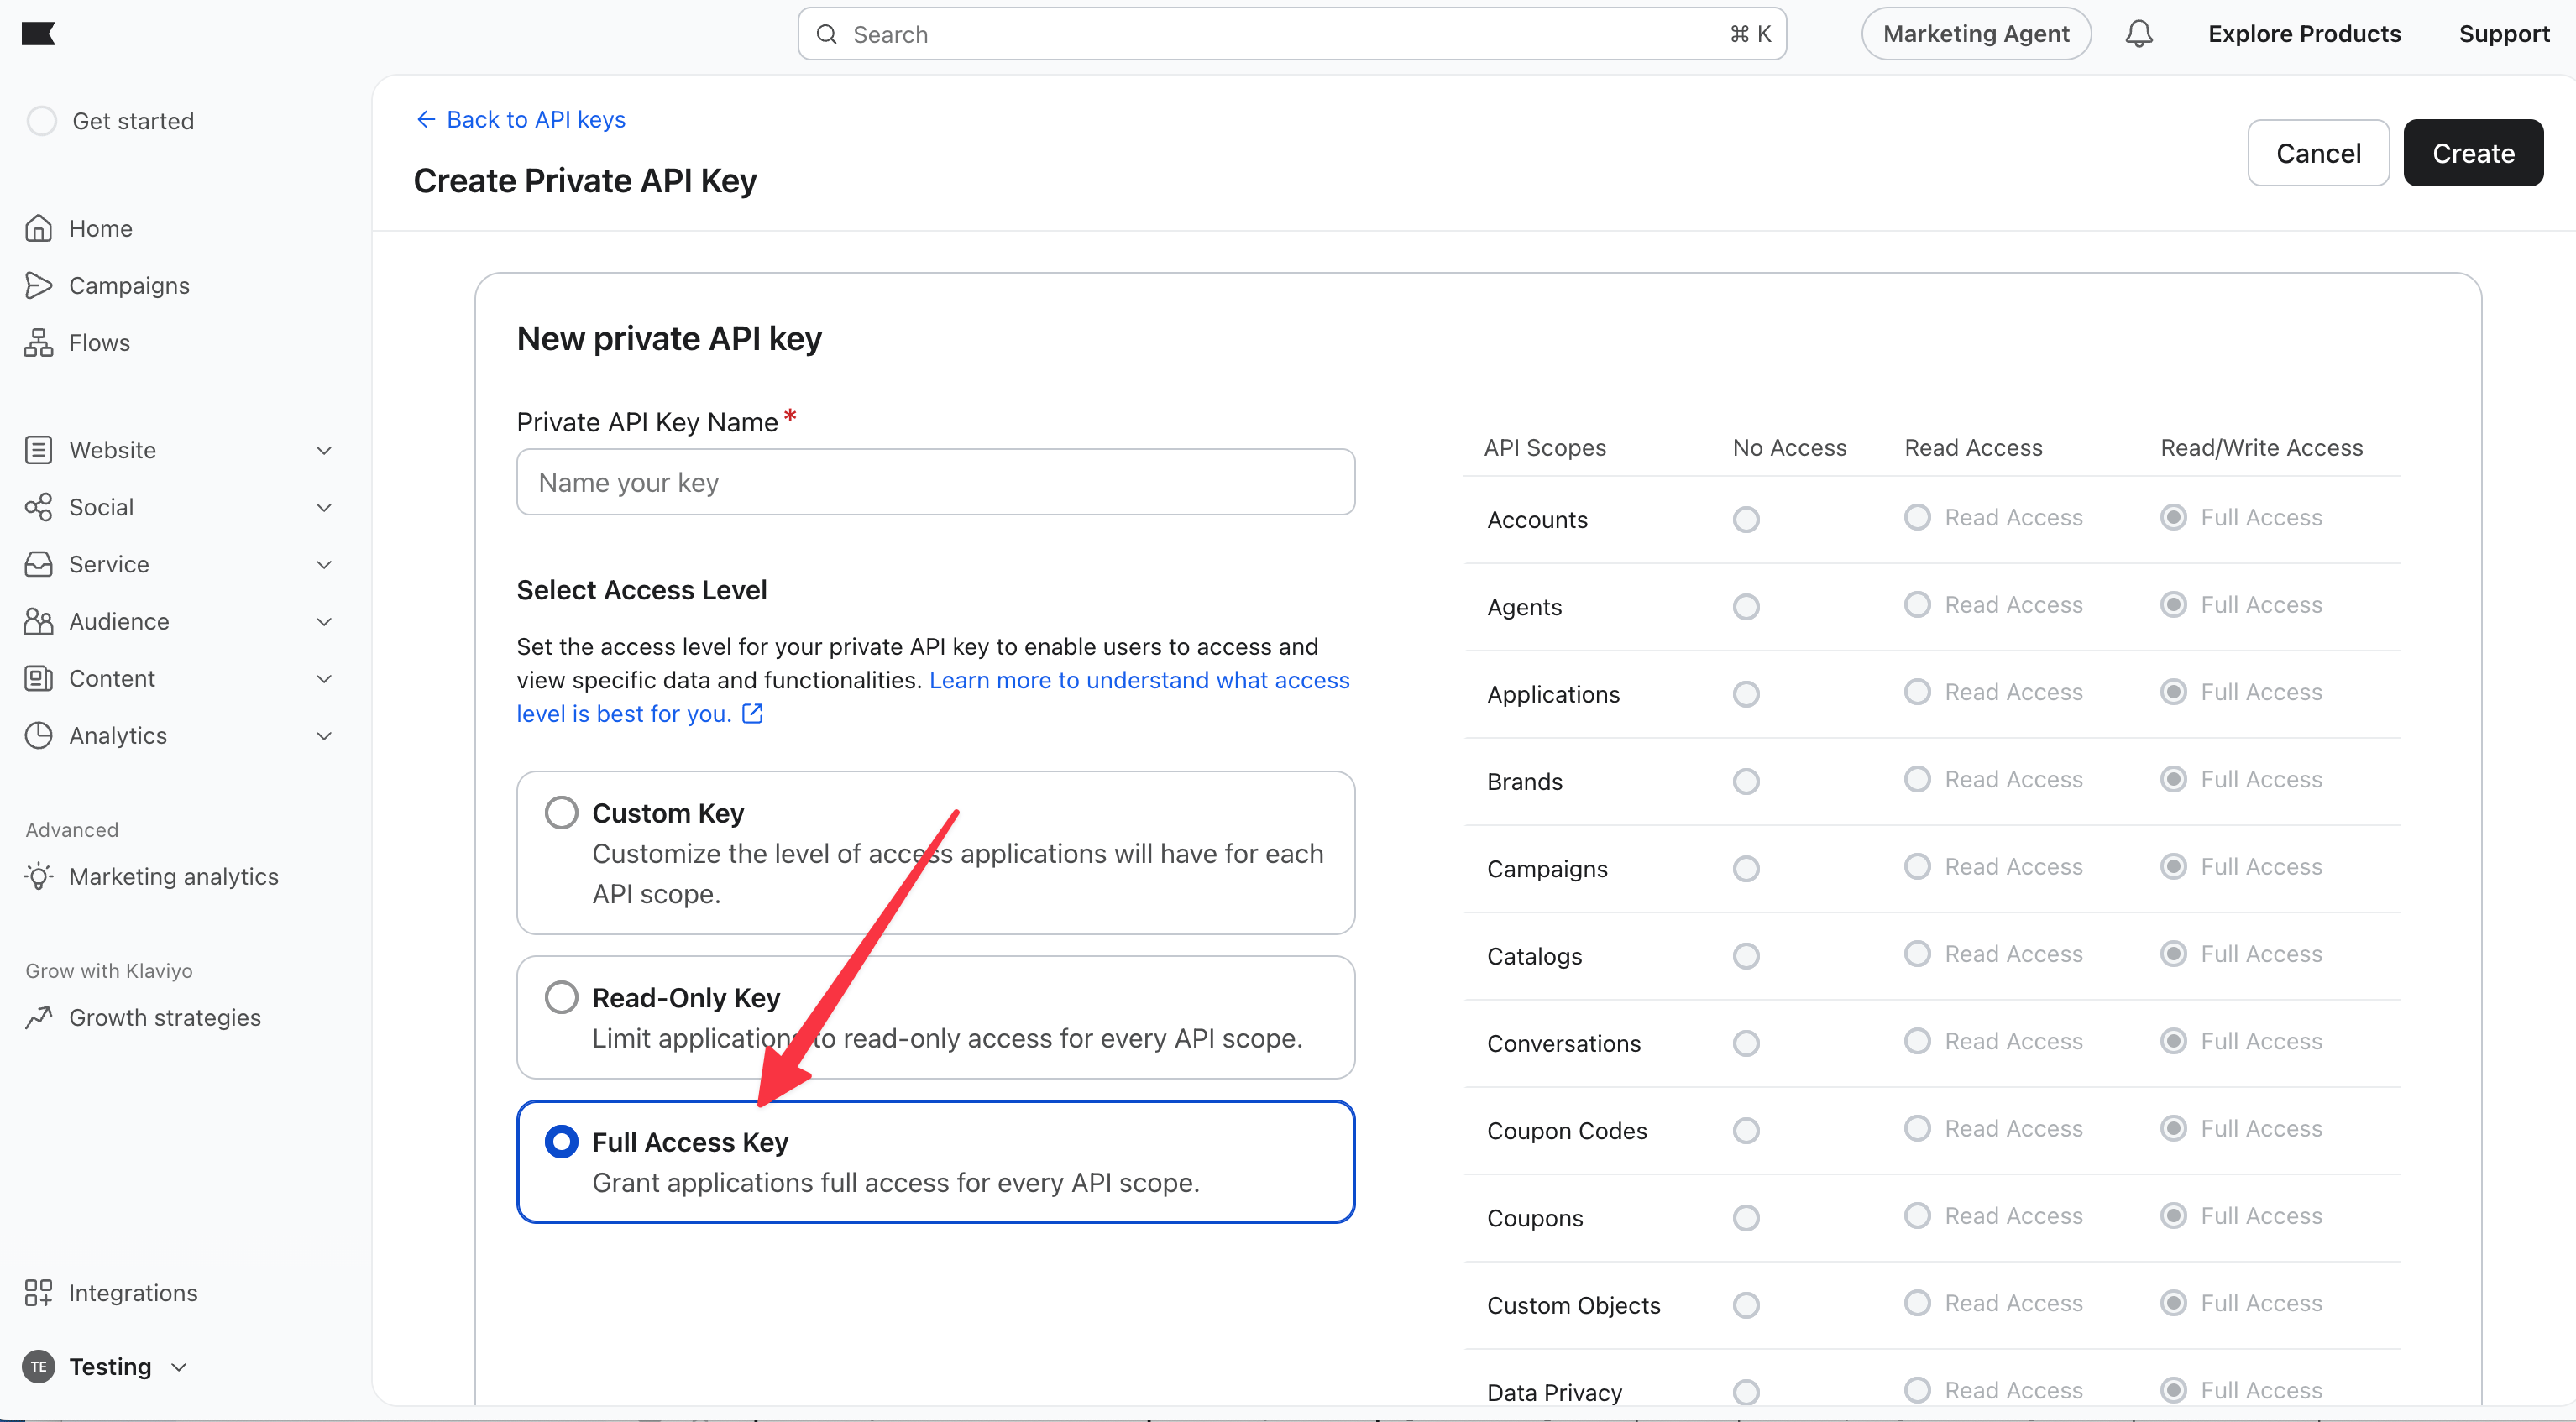
4
Copy the key
Click Create, then copy the key (it starts with
pk_). Klaviyo shows it once — copy it now.Step 2 — Connect in Ryze
In Workspace Settings → Integrations, click Connect on the Klaviyo card, then paste your key into the Private API key field and click Continue. Ryze verifies the key against your Klaviyo account and confirms the account name.Troubleshooting
- Key rejected — make sure you copied the full
pk_...key and that it has theaccounts:readscope. A Read-only or Full key always includes it; a custom key may not. - Can’t find API keys — they live under Settings → API keys (click your account name in the lower-left to reach Settings).
- Wrong account connected — each key belongs to one Klaviyo account. To connect a different account, generate a key while logged into that account.