

- You define exactly which Admin API scopes Ryze gets — nothing more.
- You can rotate the credentials or revoke access any time from your Shopify admin.
- Access runs through an app your team owns, not a third-party install.
Step 1 — Create a custom app in Shopify
1
Open Settings → Apps
In your Shopify admin, go to Settings, then open Apps and sales channels.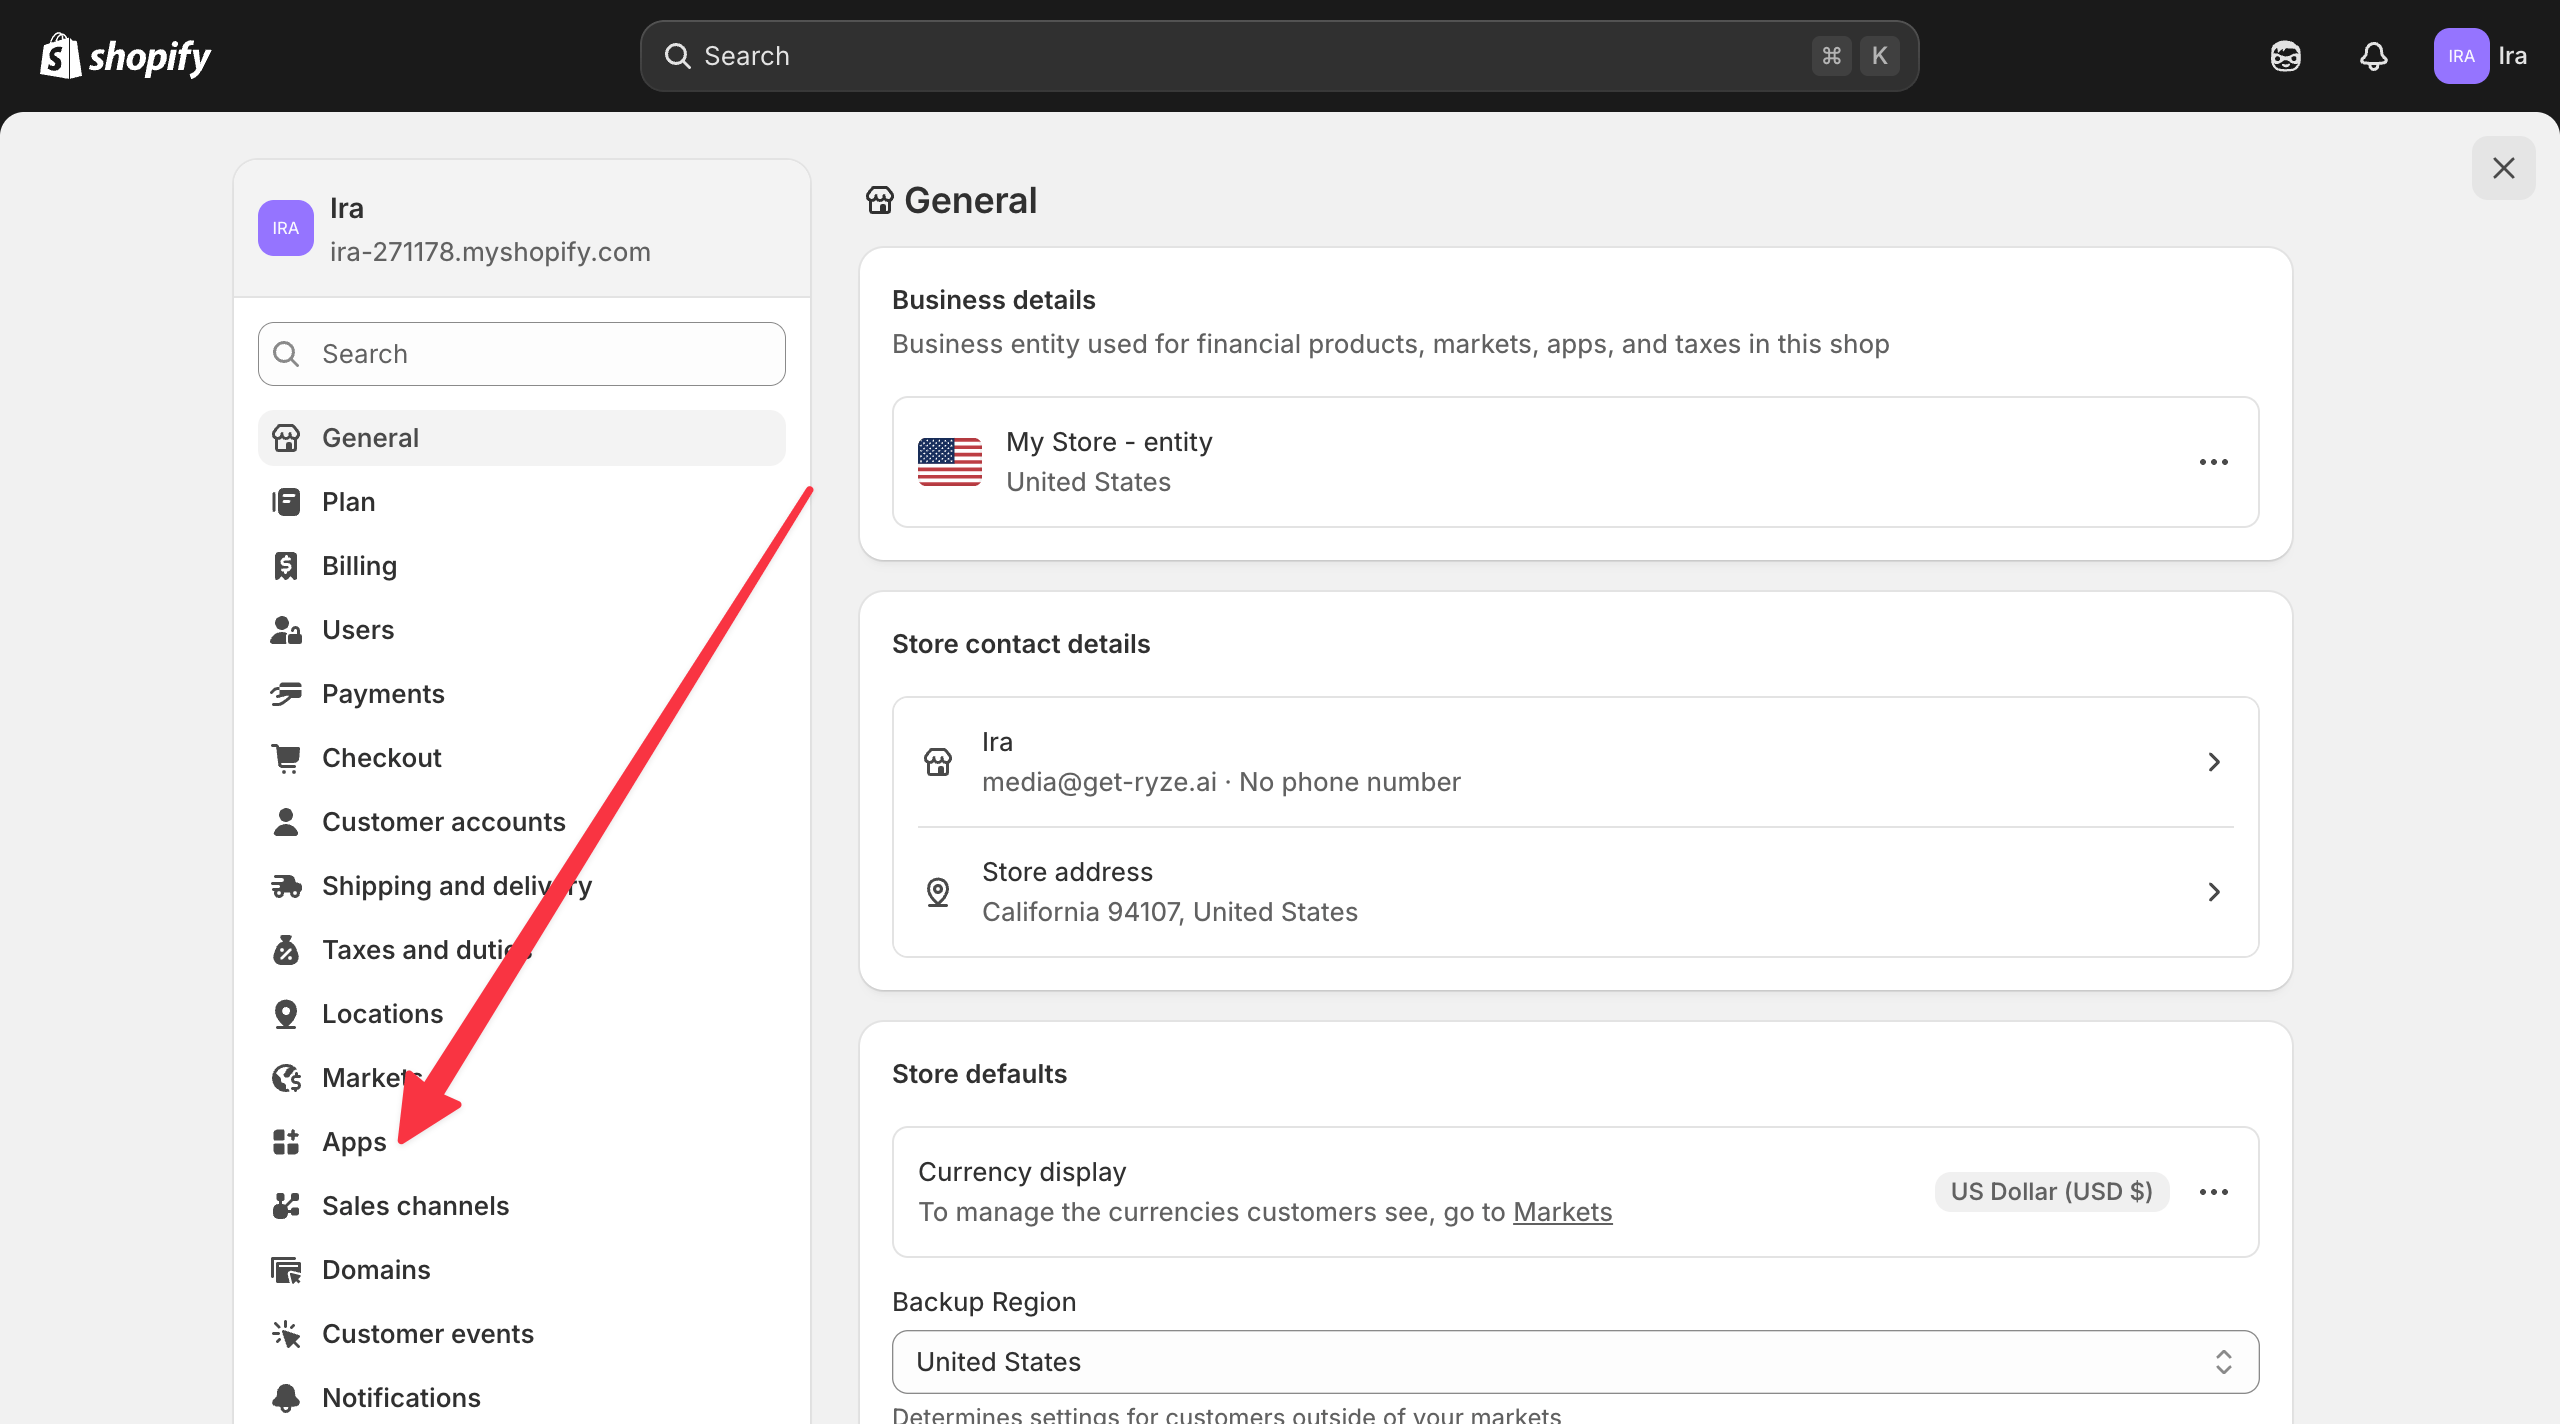
2
Click Develop apps
In the top-right corner, click Develop apps.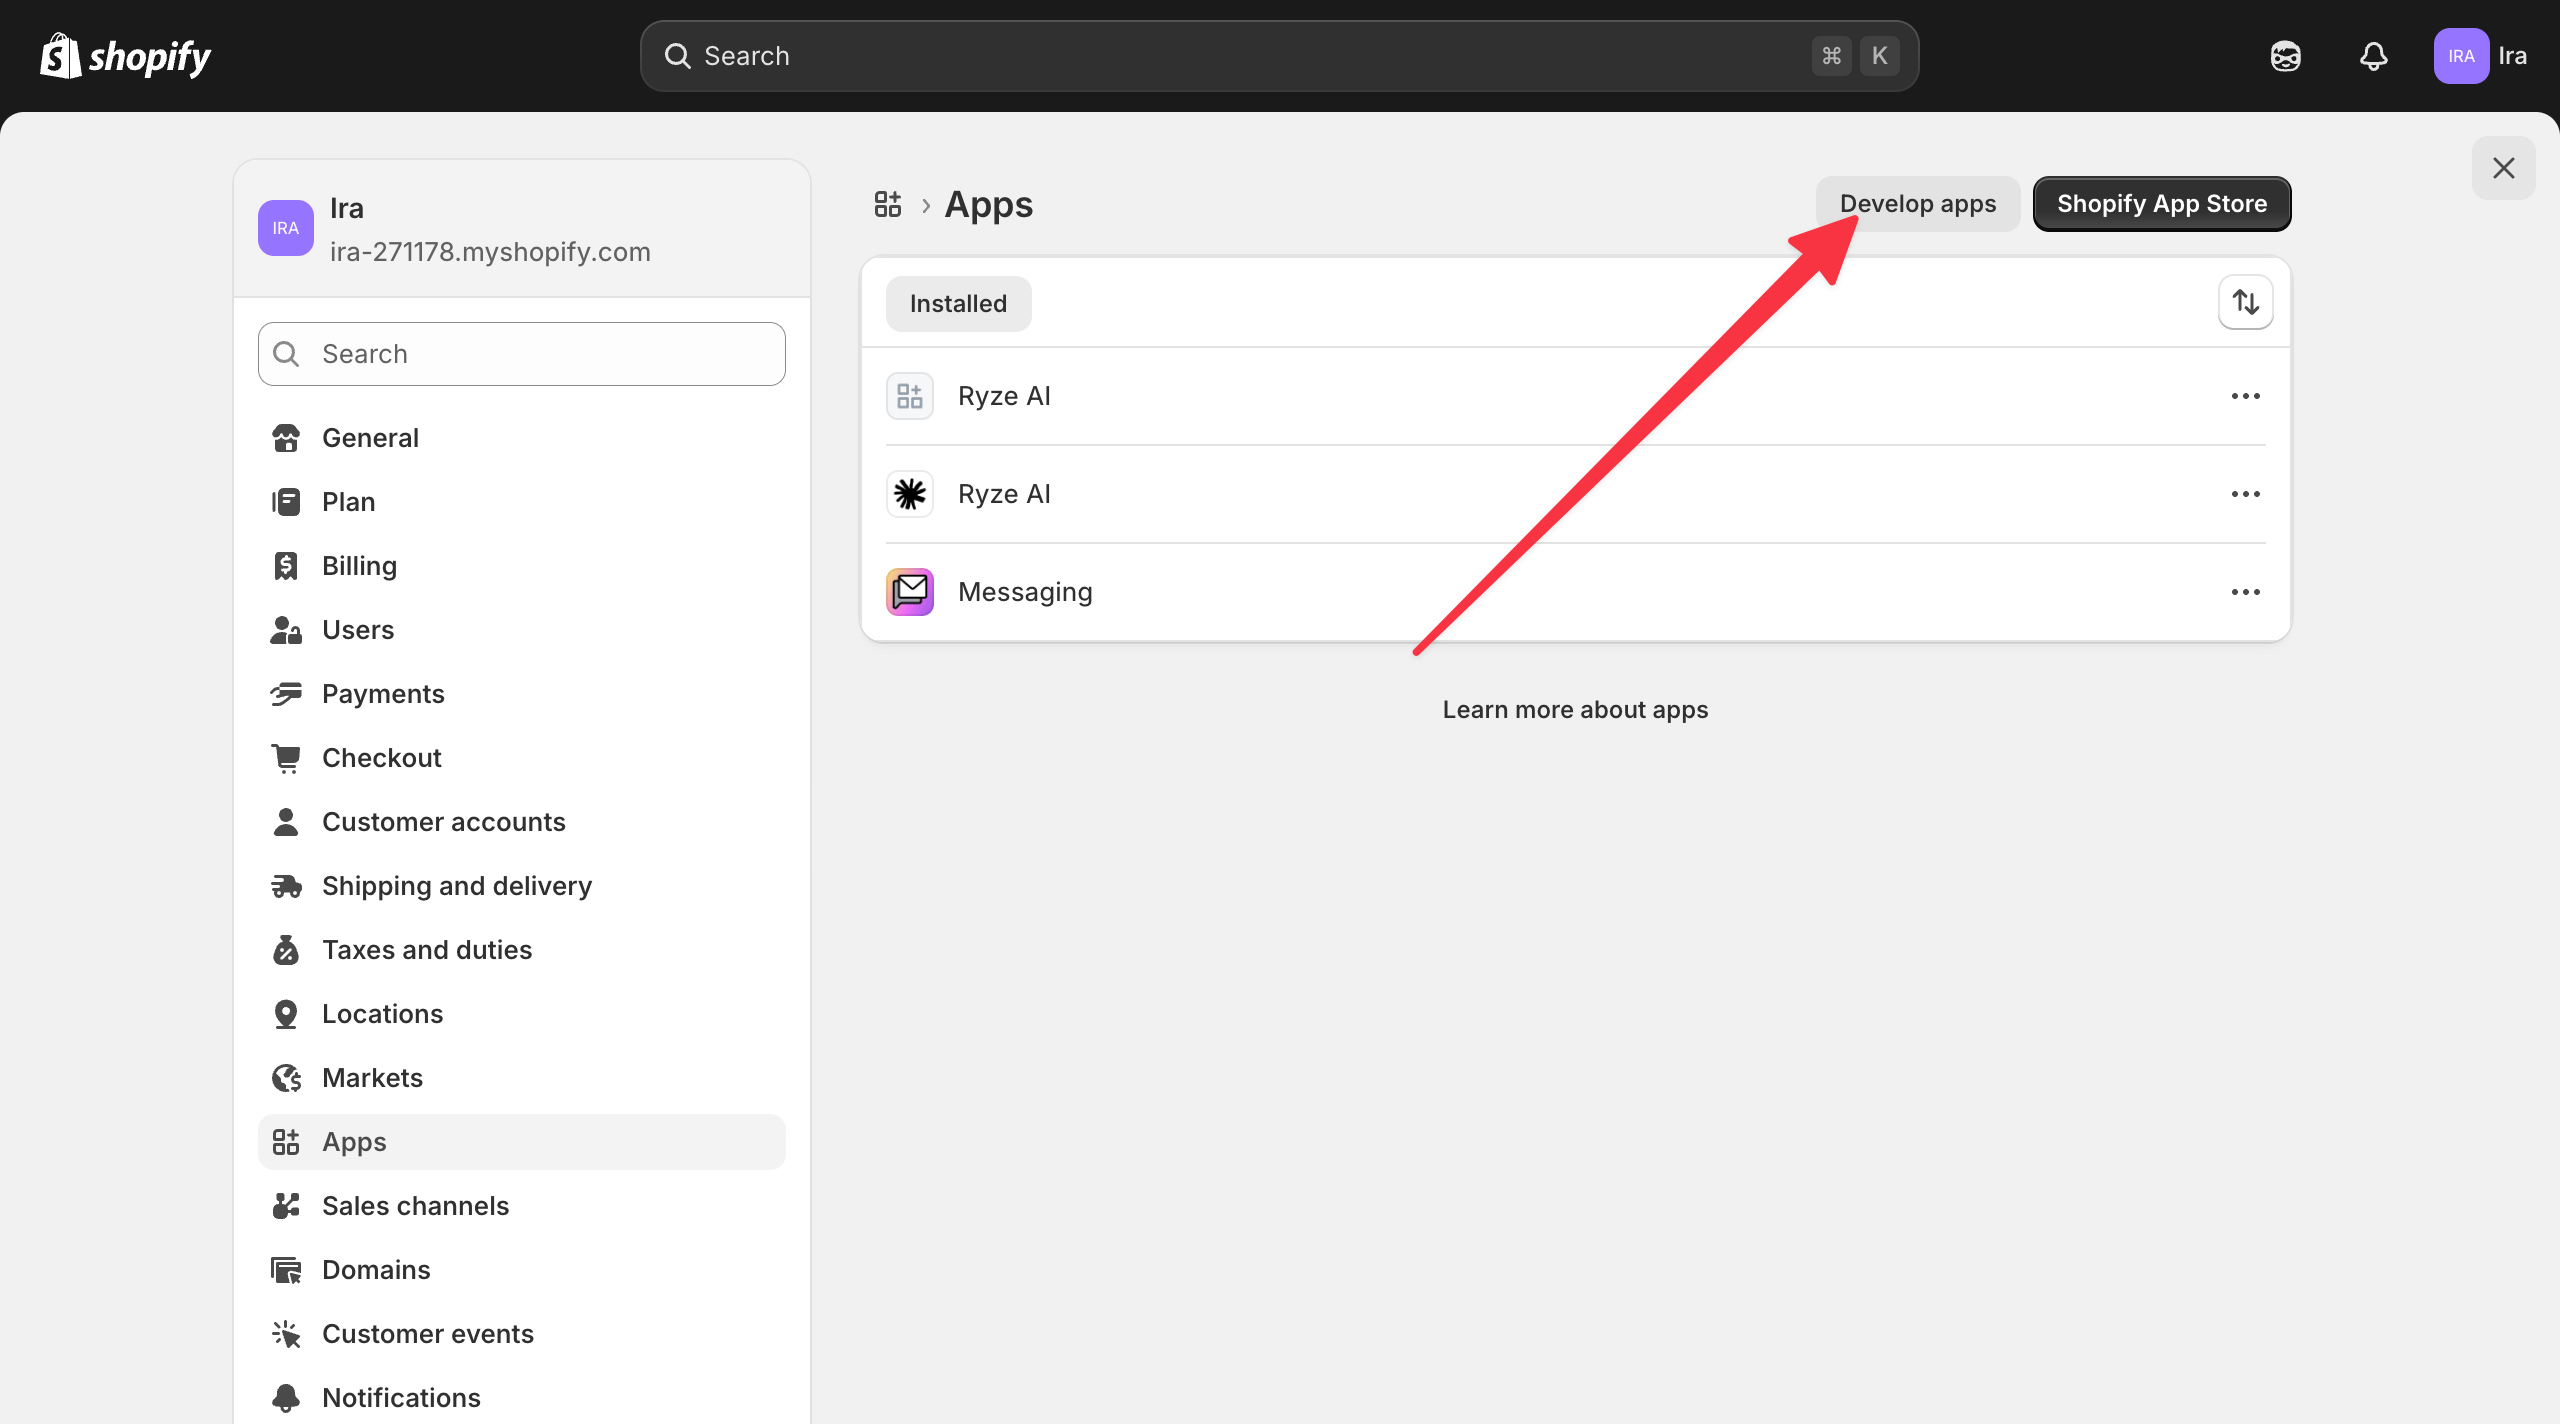
3
Open the Dev Dashboard
Click Build apps in Dev Dashboard.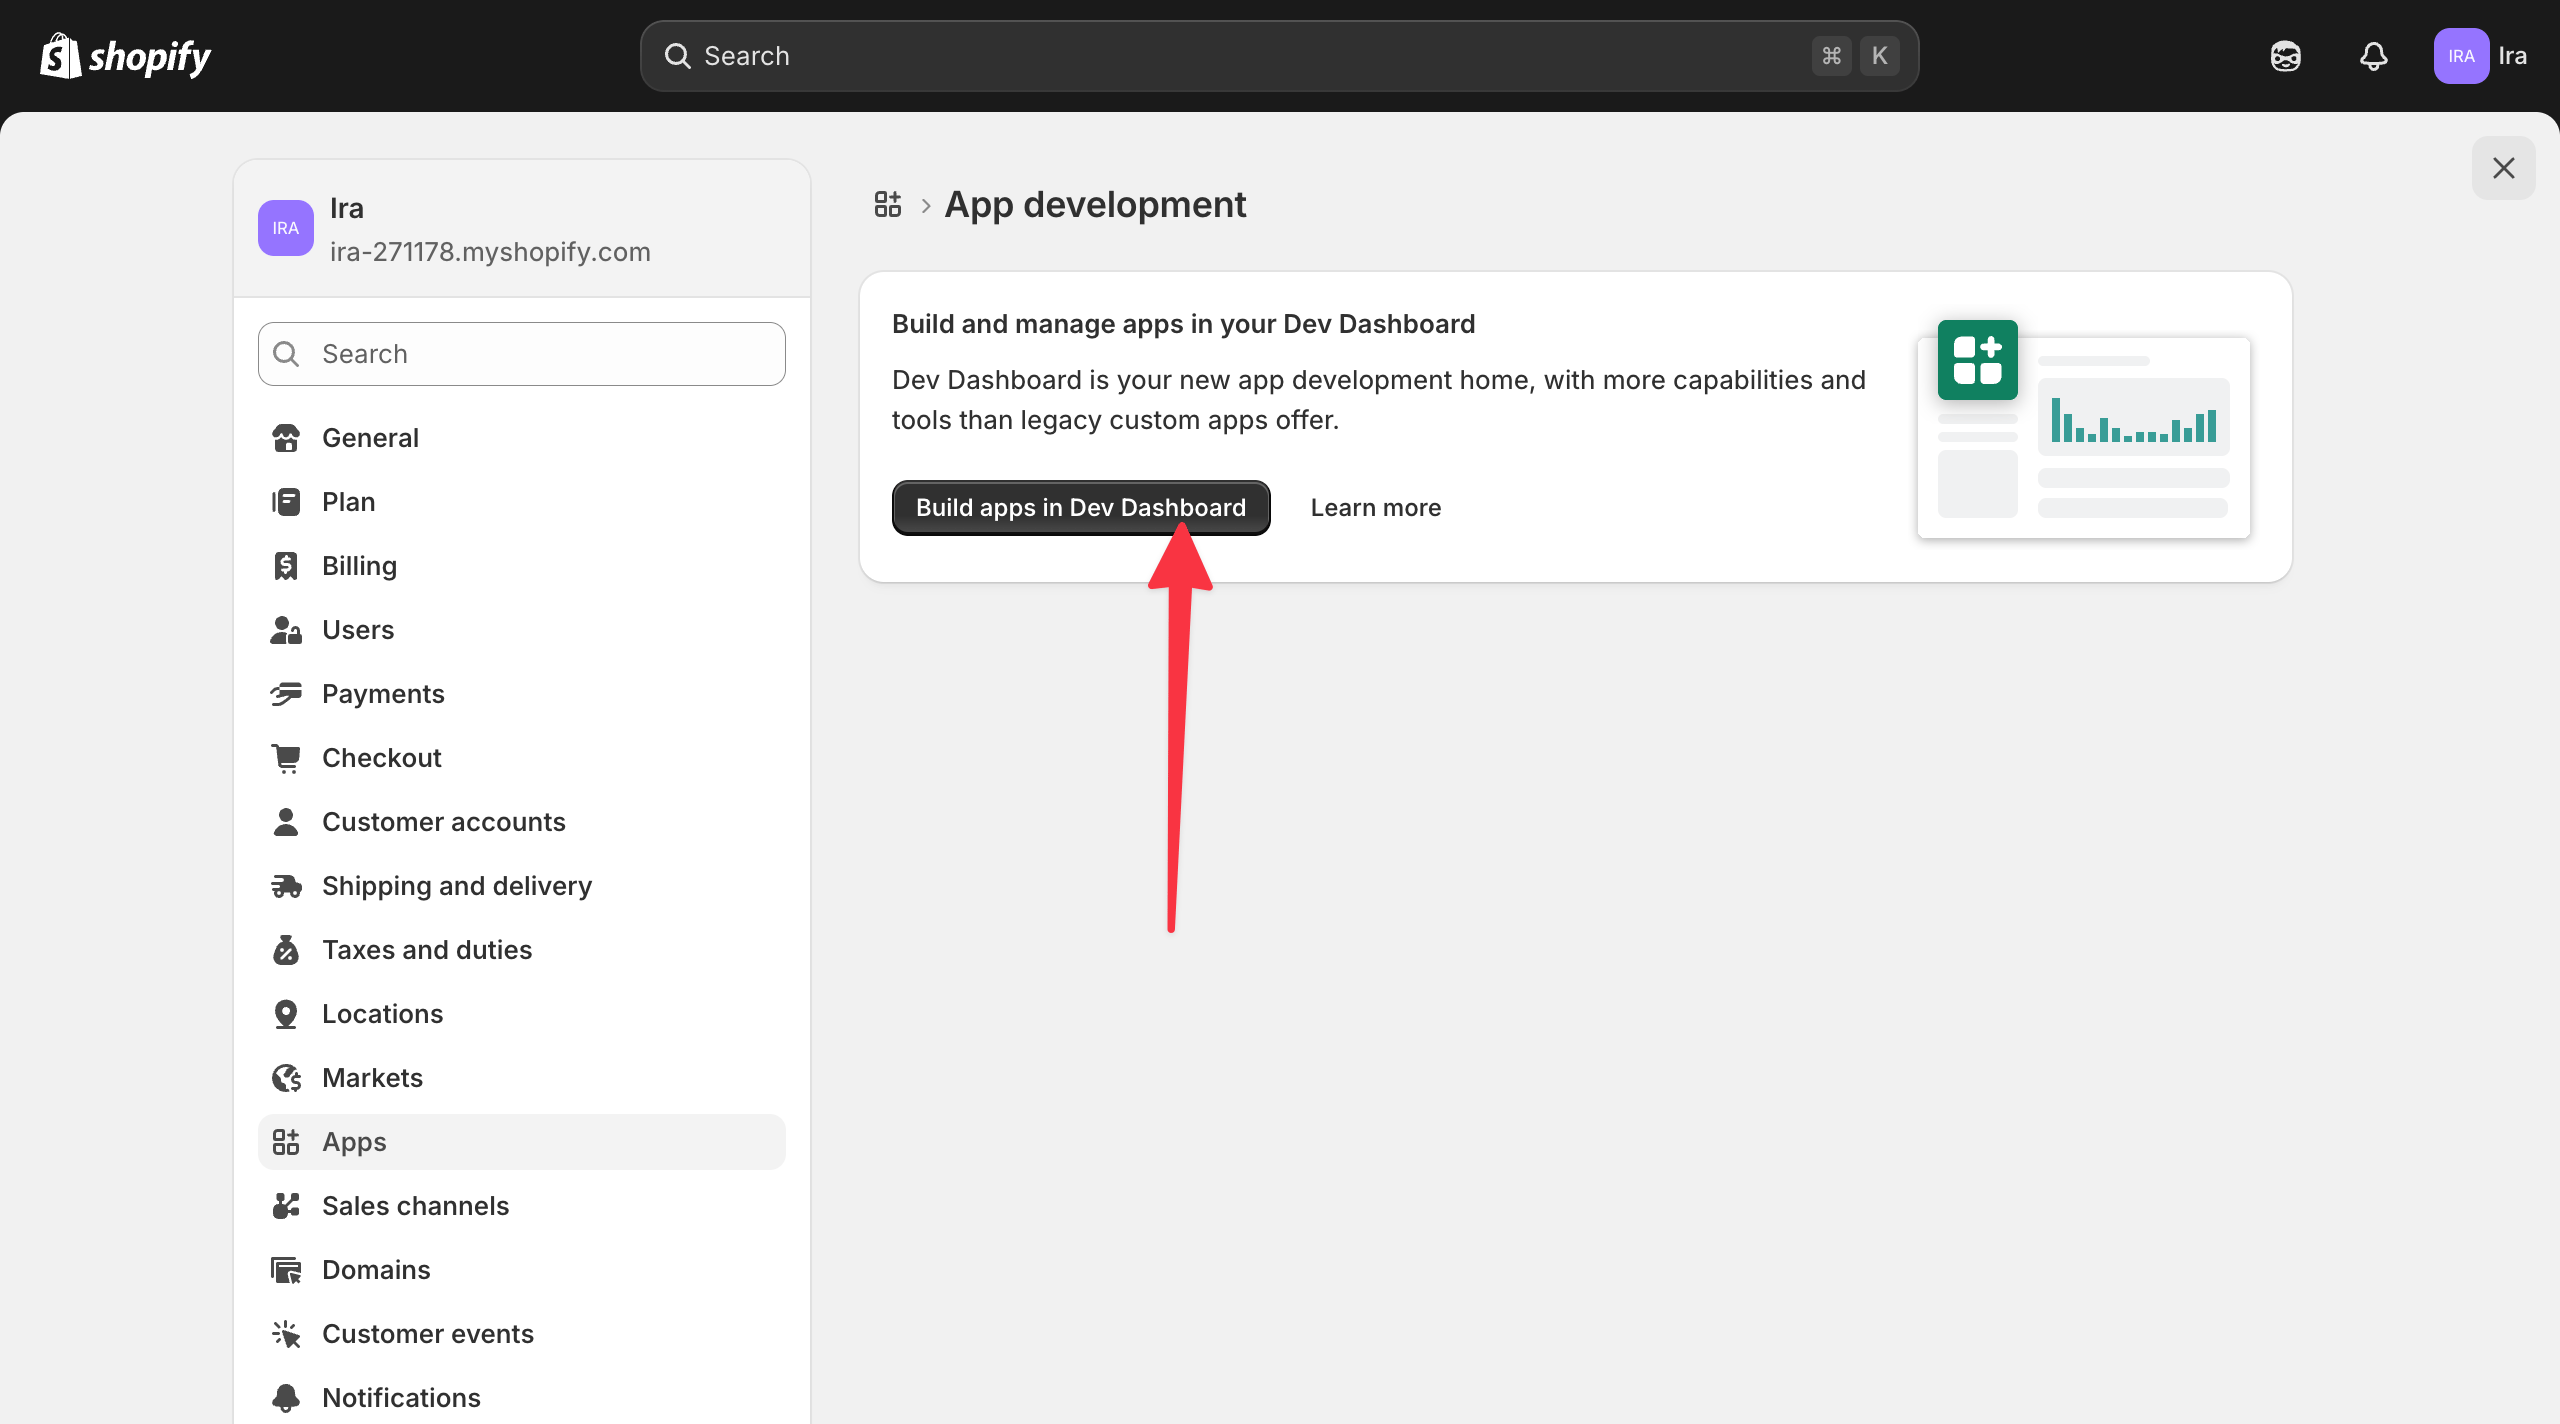
4
Create an app
Click Create app.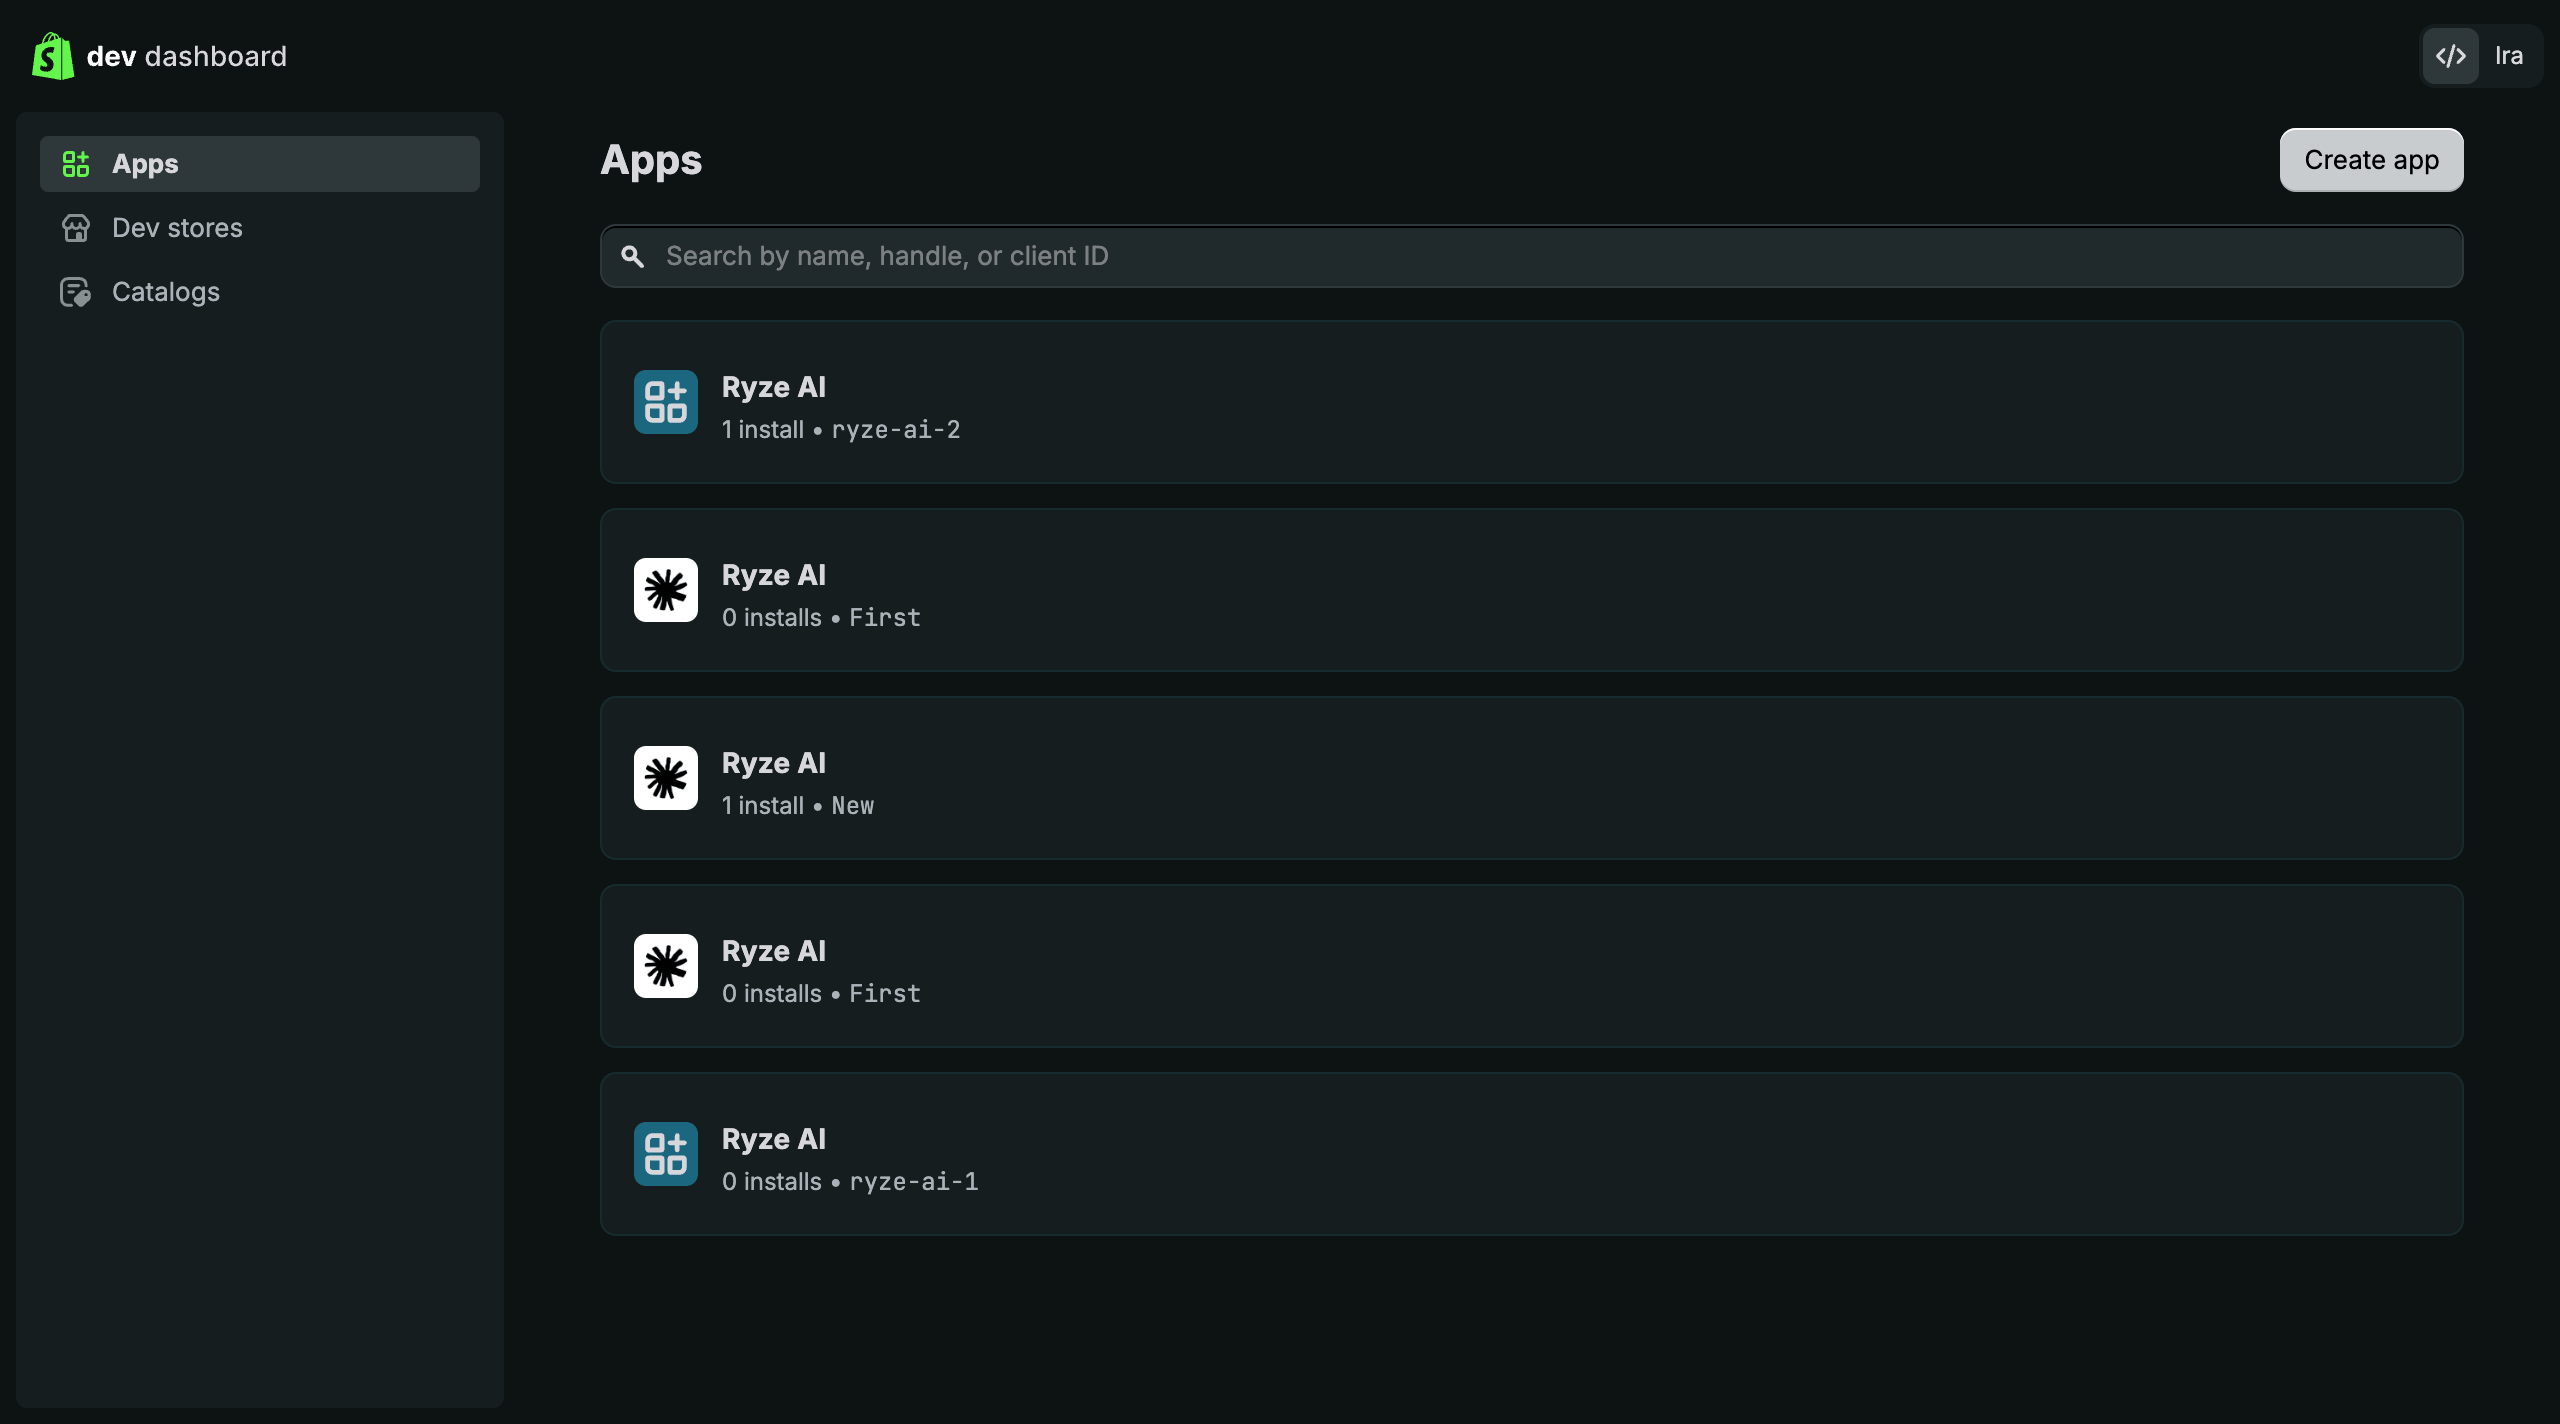
5
Name the app
Under Start from Dev Dashboard, enter a name (e.g. 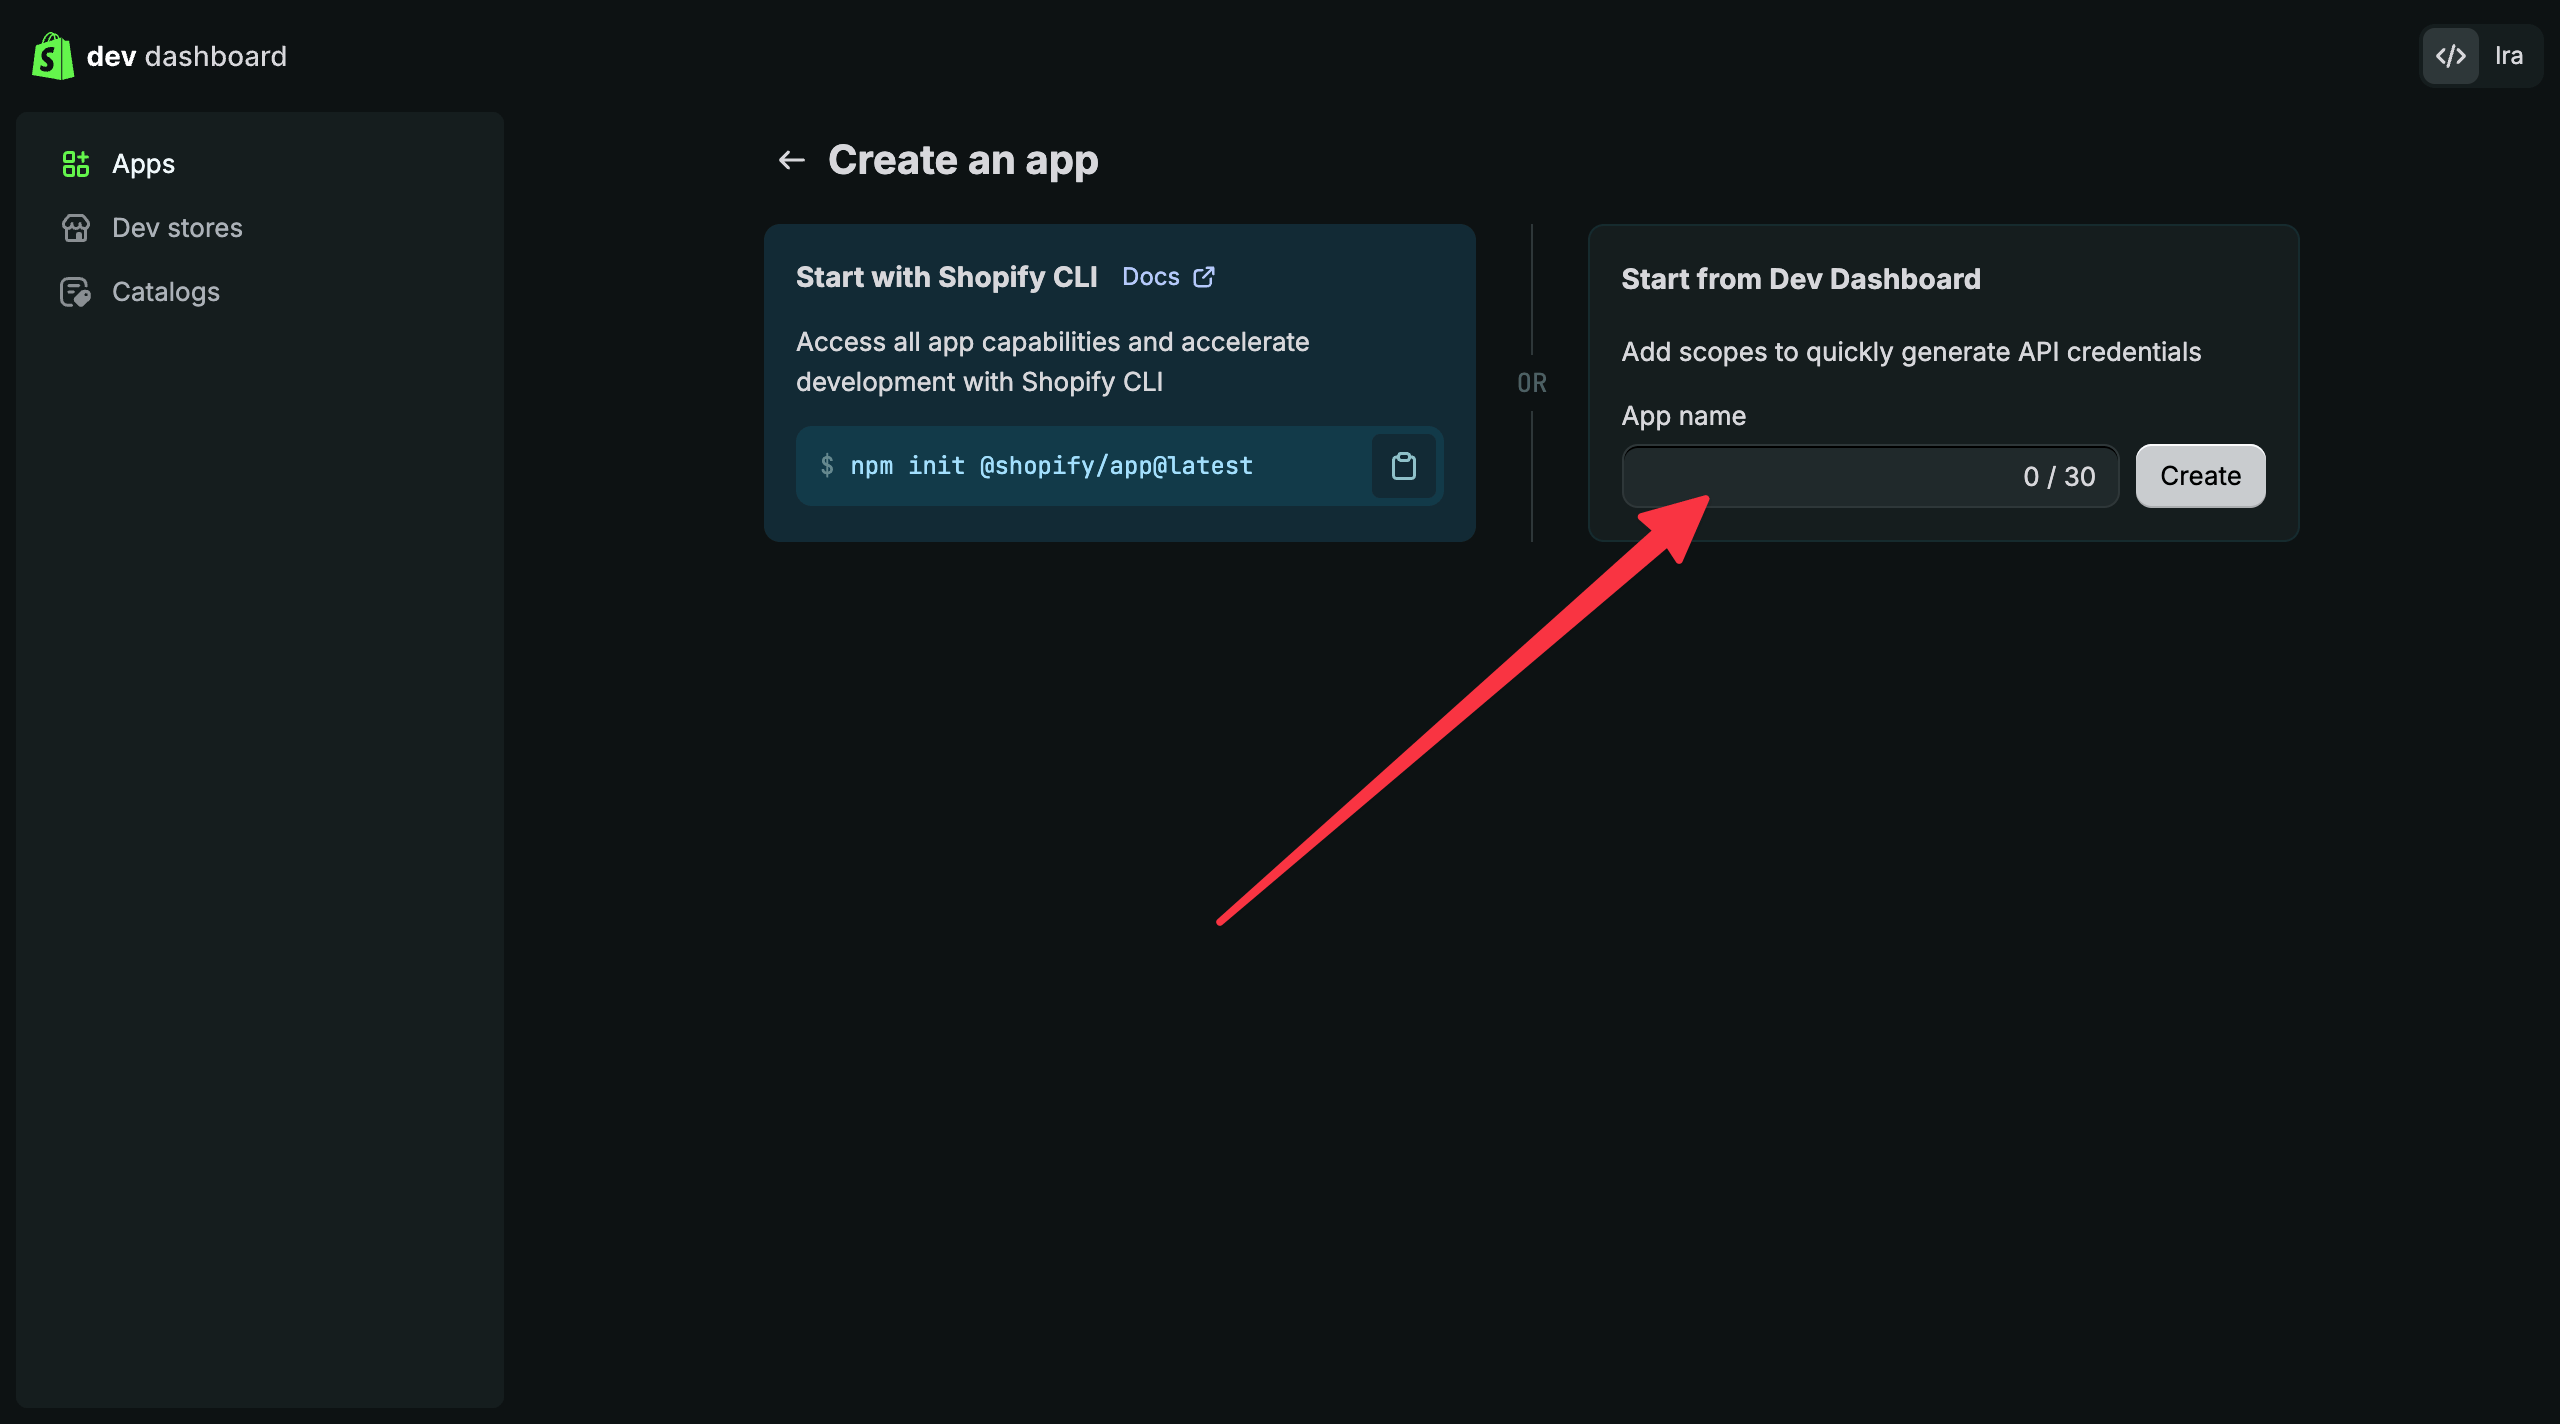
Ryze AI) and click Create.Step 2 — Configure the app
1
Set the App URL
Under URLs → App URL, enter 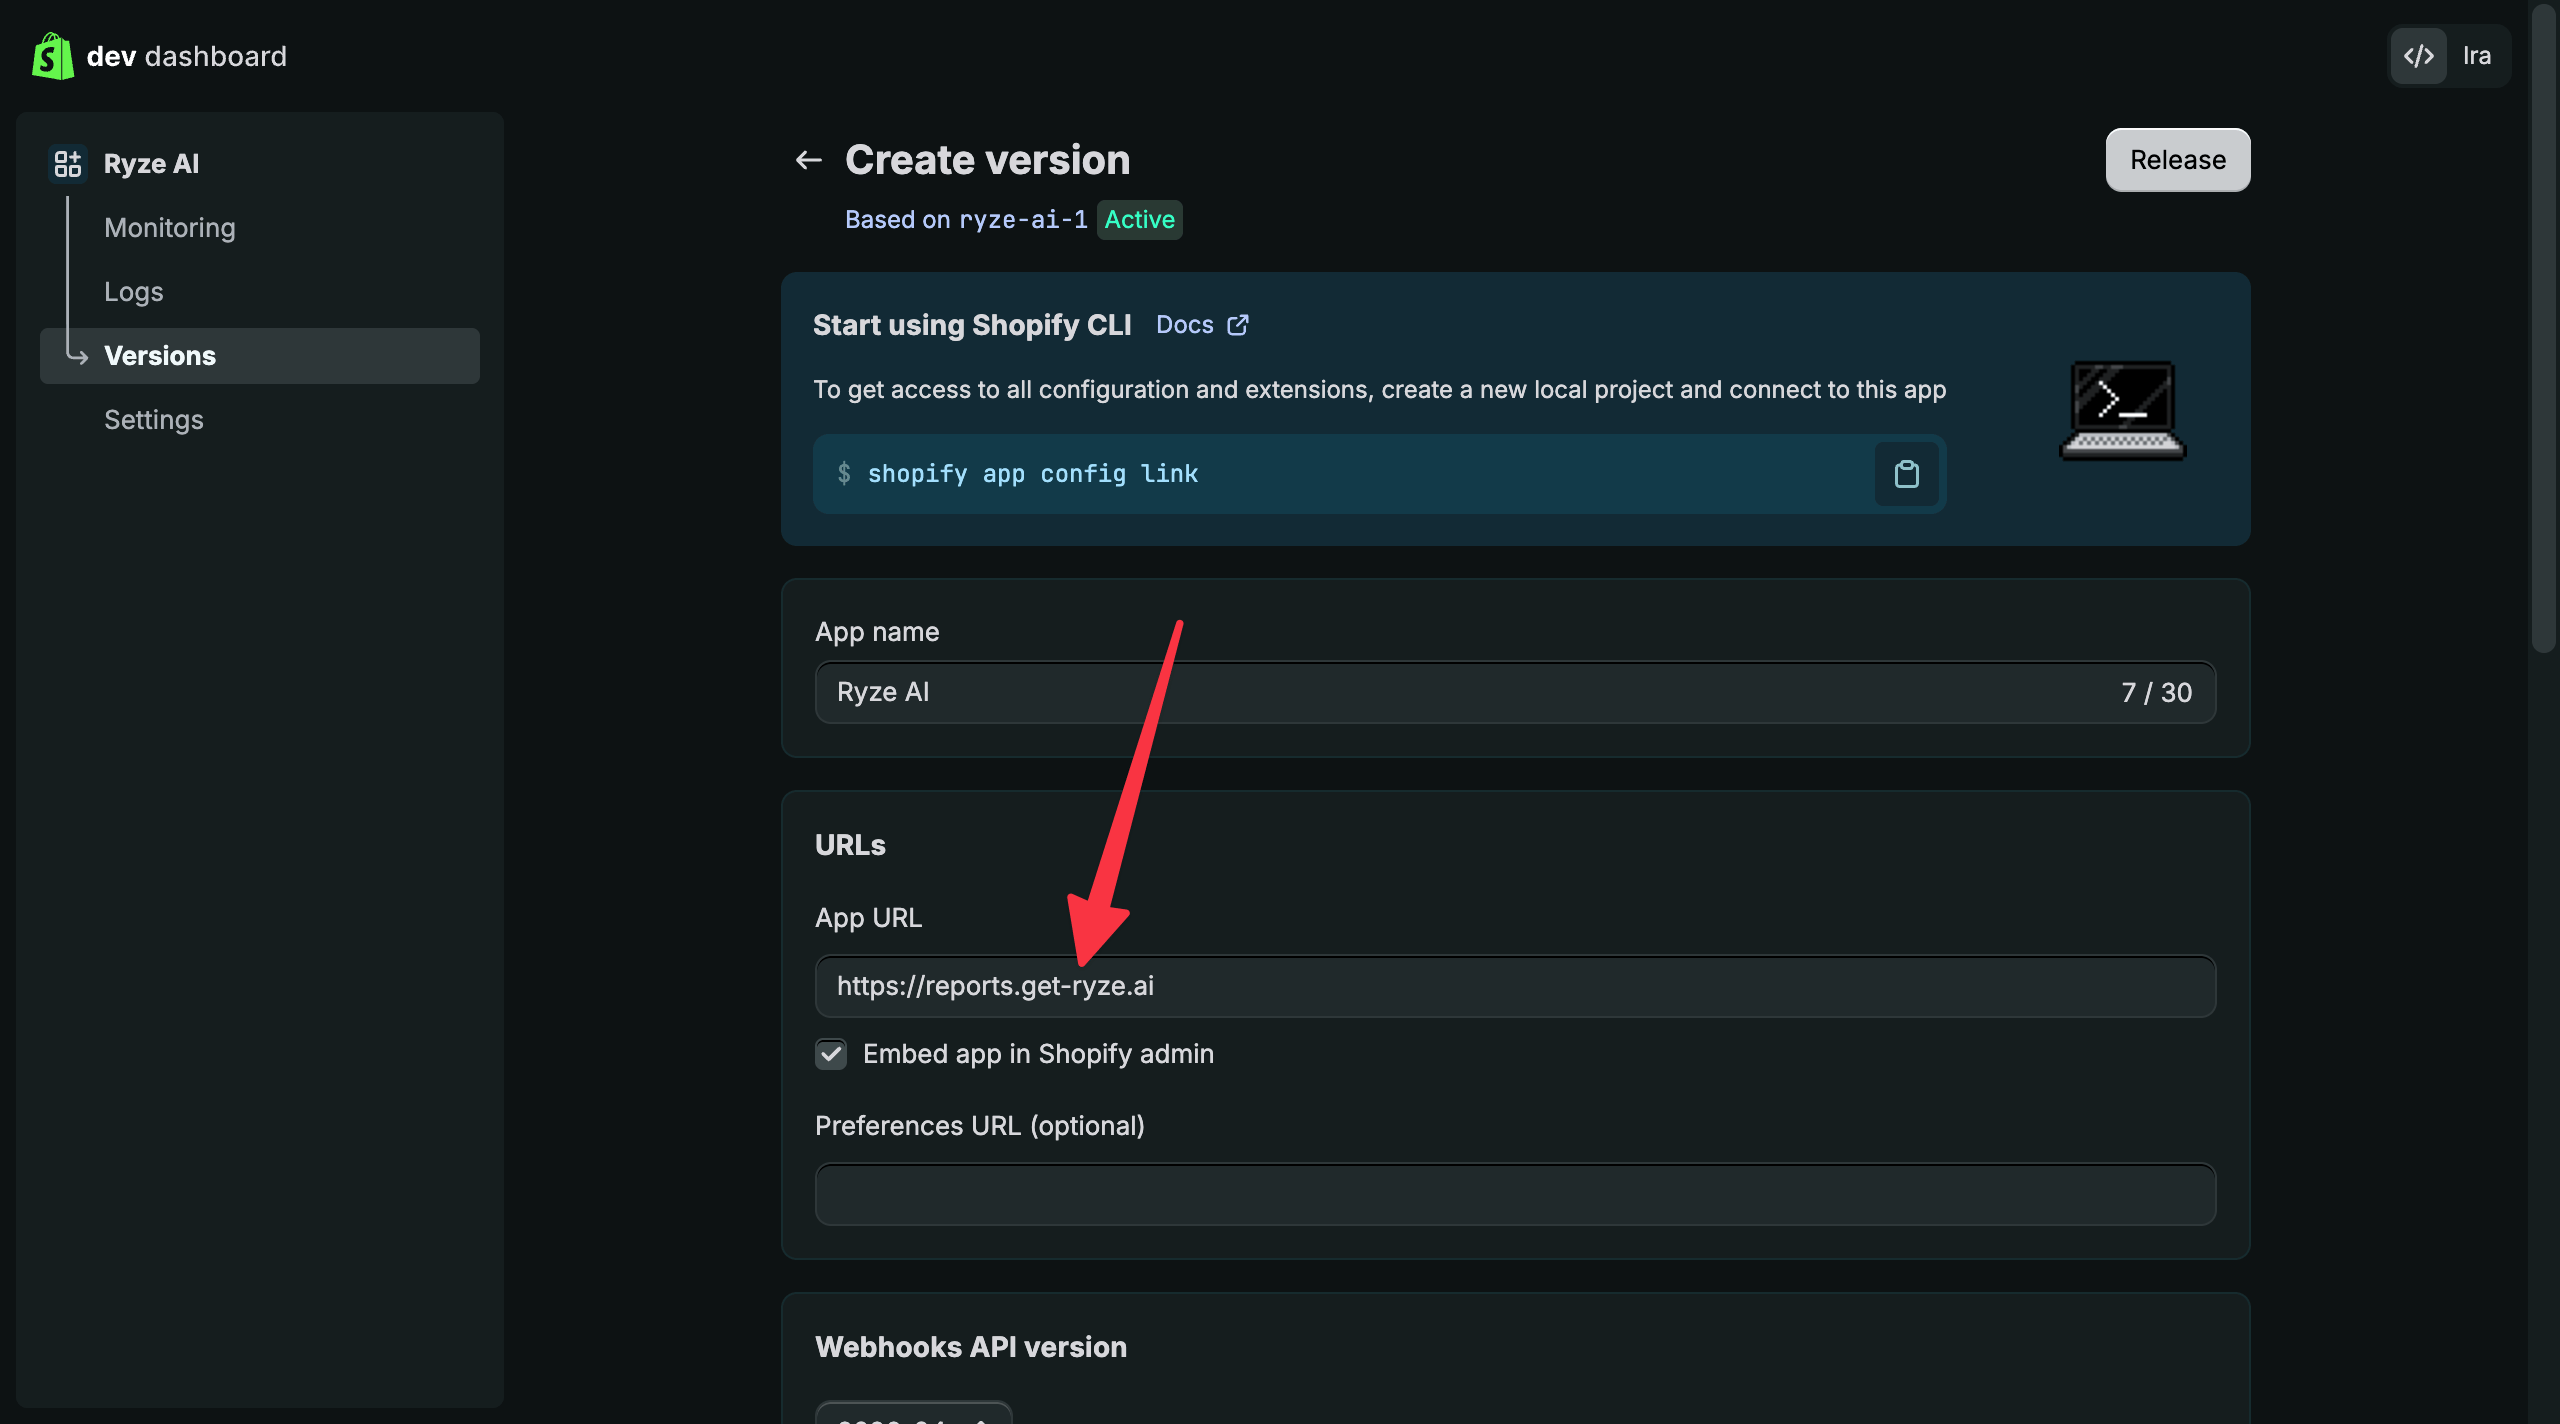
https://reports.get-ryze.ai and uncheck Embed app in Shopify admin. Ryze runs as a standalone app and will not load inside the Shopify admin frame; with the box checked, opening the app from Shopify shows a blank page.2
Add the scopes you want Ryze to have
Under Access → Scopes, paste this comma-separated list — or trim it to just the features you plan to use. Missing scopes won’t block the connection, but the related features will fail later (for example, without 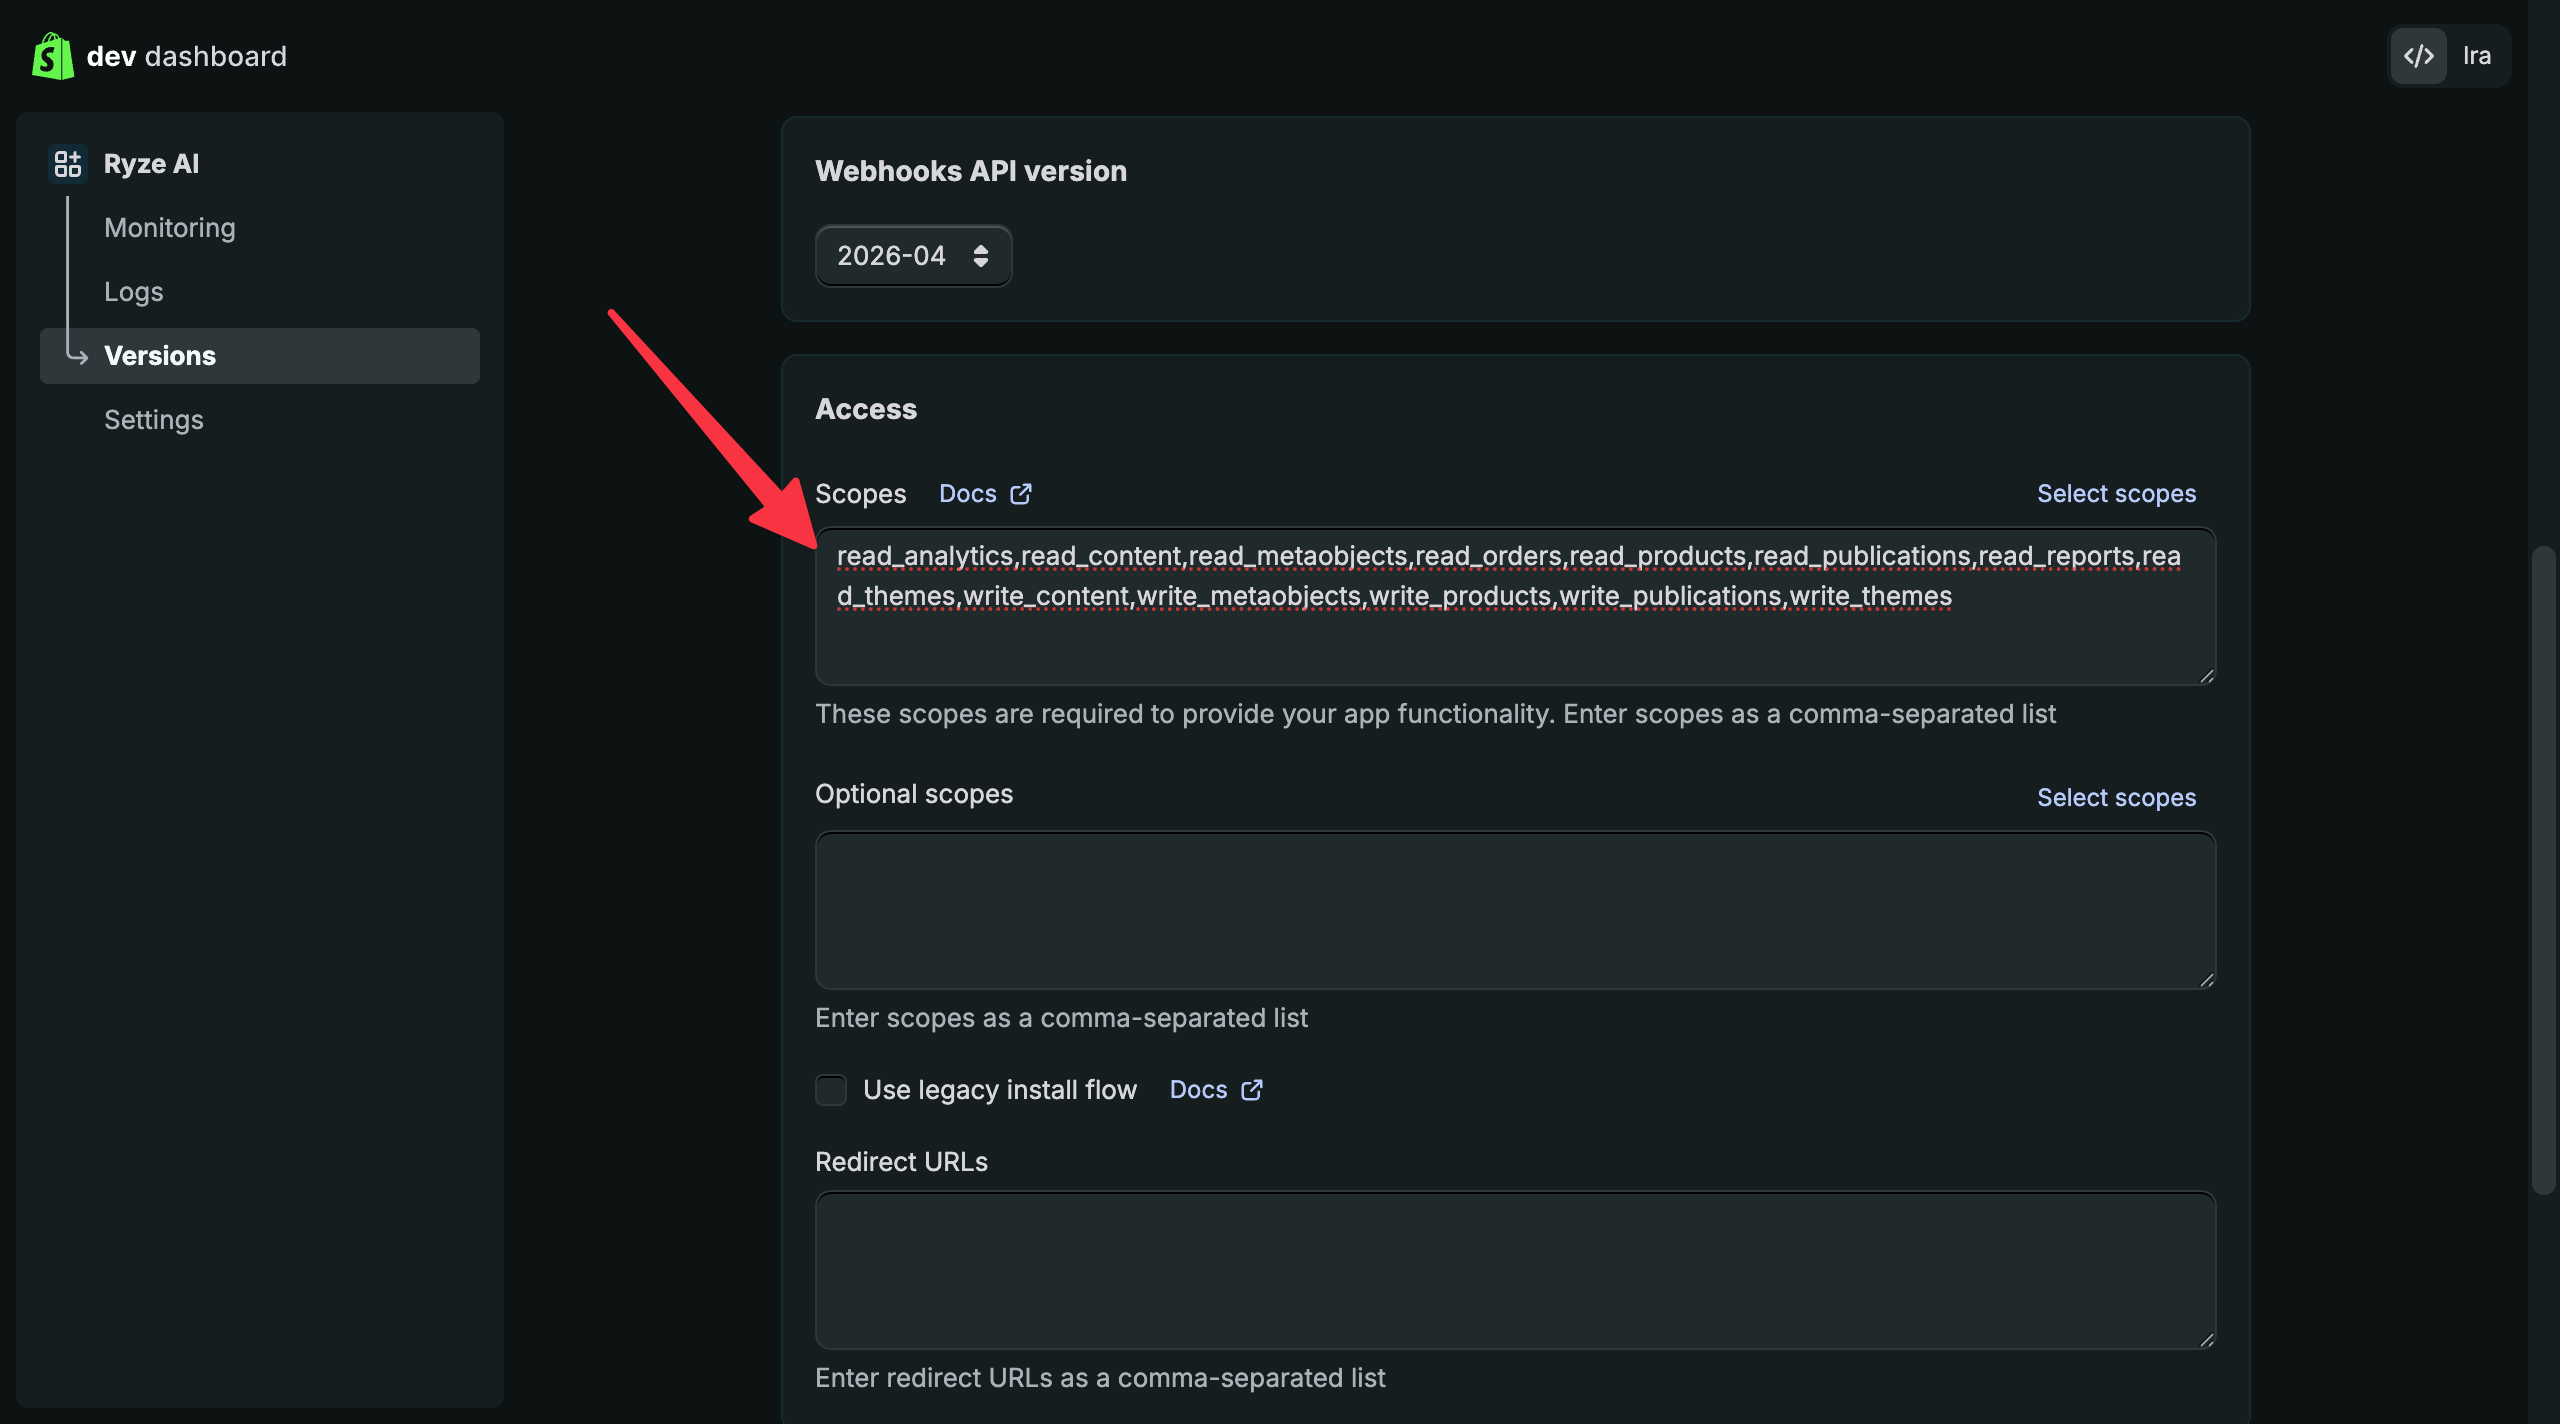
write_content Ryze can’t publish articles to your blog). You can always add scopes later in the same screen — but scopes added later only take effect after you Release a new version and Install/approve it on your store (Steps below), then reconnect once in Ryze.A custom app can also grant scopes our default connection never requests. Add these only if you need them:
read_markets,write_markets for market and domain settings, and write_online_store_navigation for URL redirects. Proposals that depend on these stay Blocked on the default connection, because those scopes are not part of the standard Ryze app.3
Add the redirect URL
Under Redirect URLs, enter 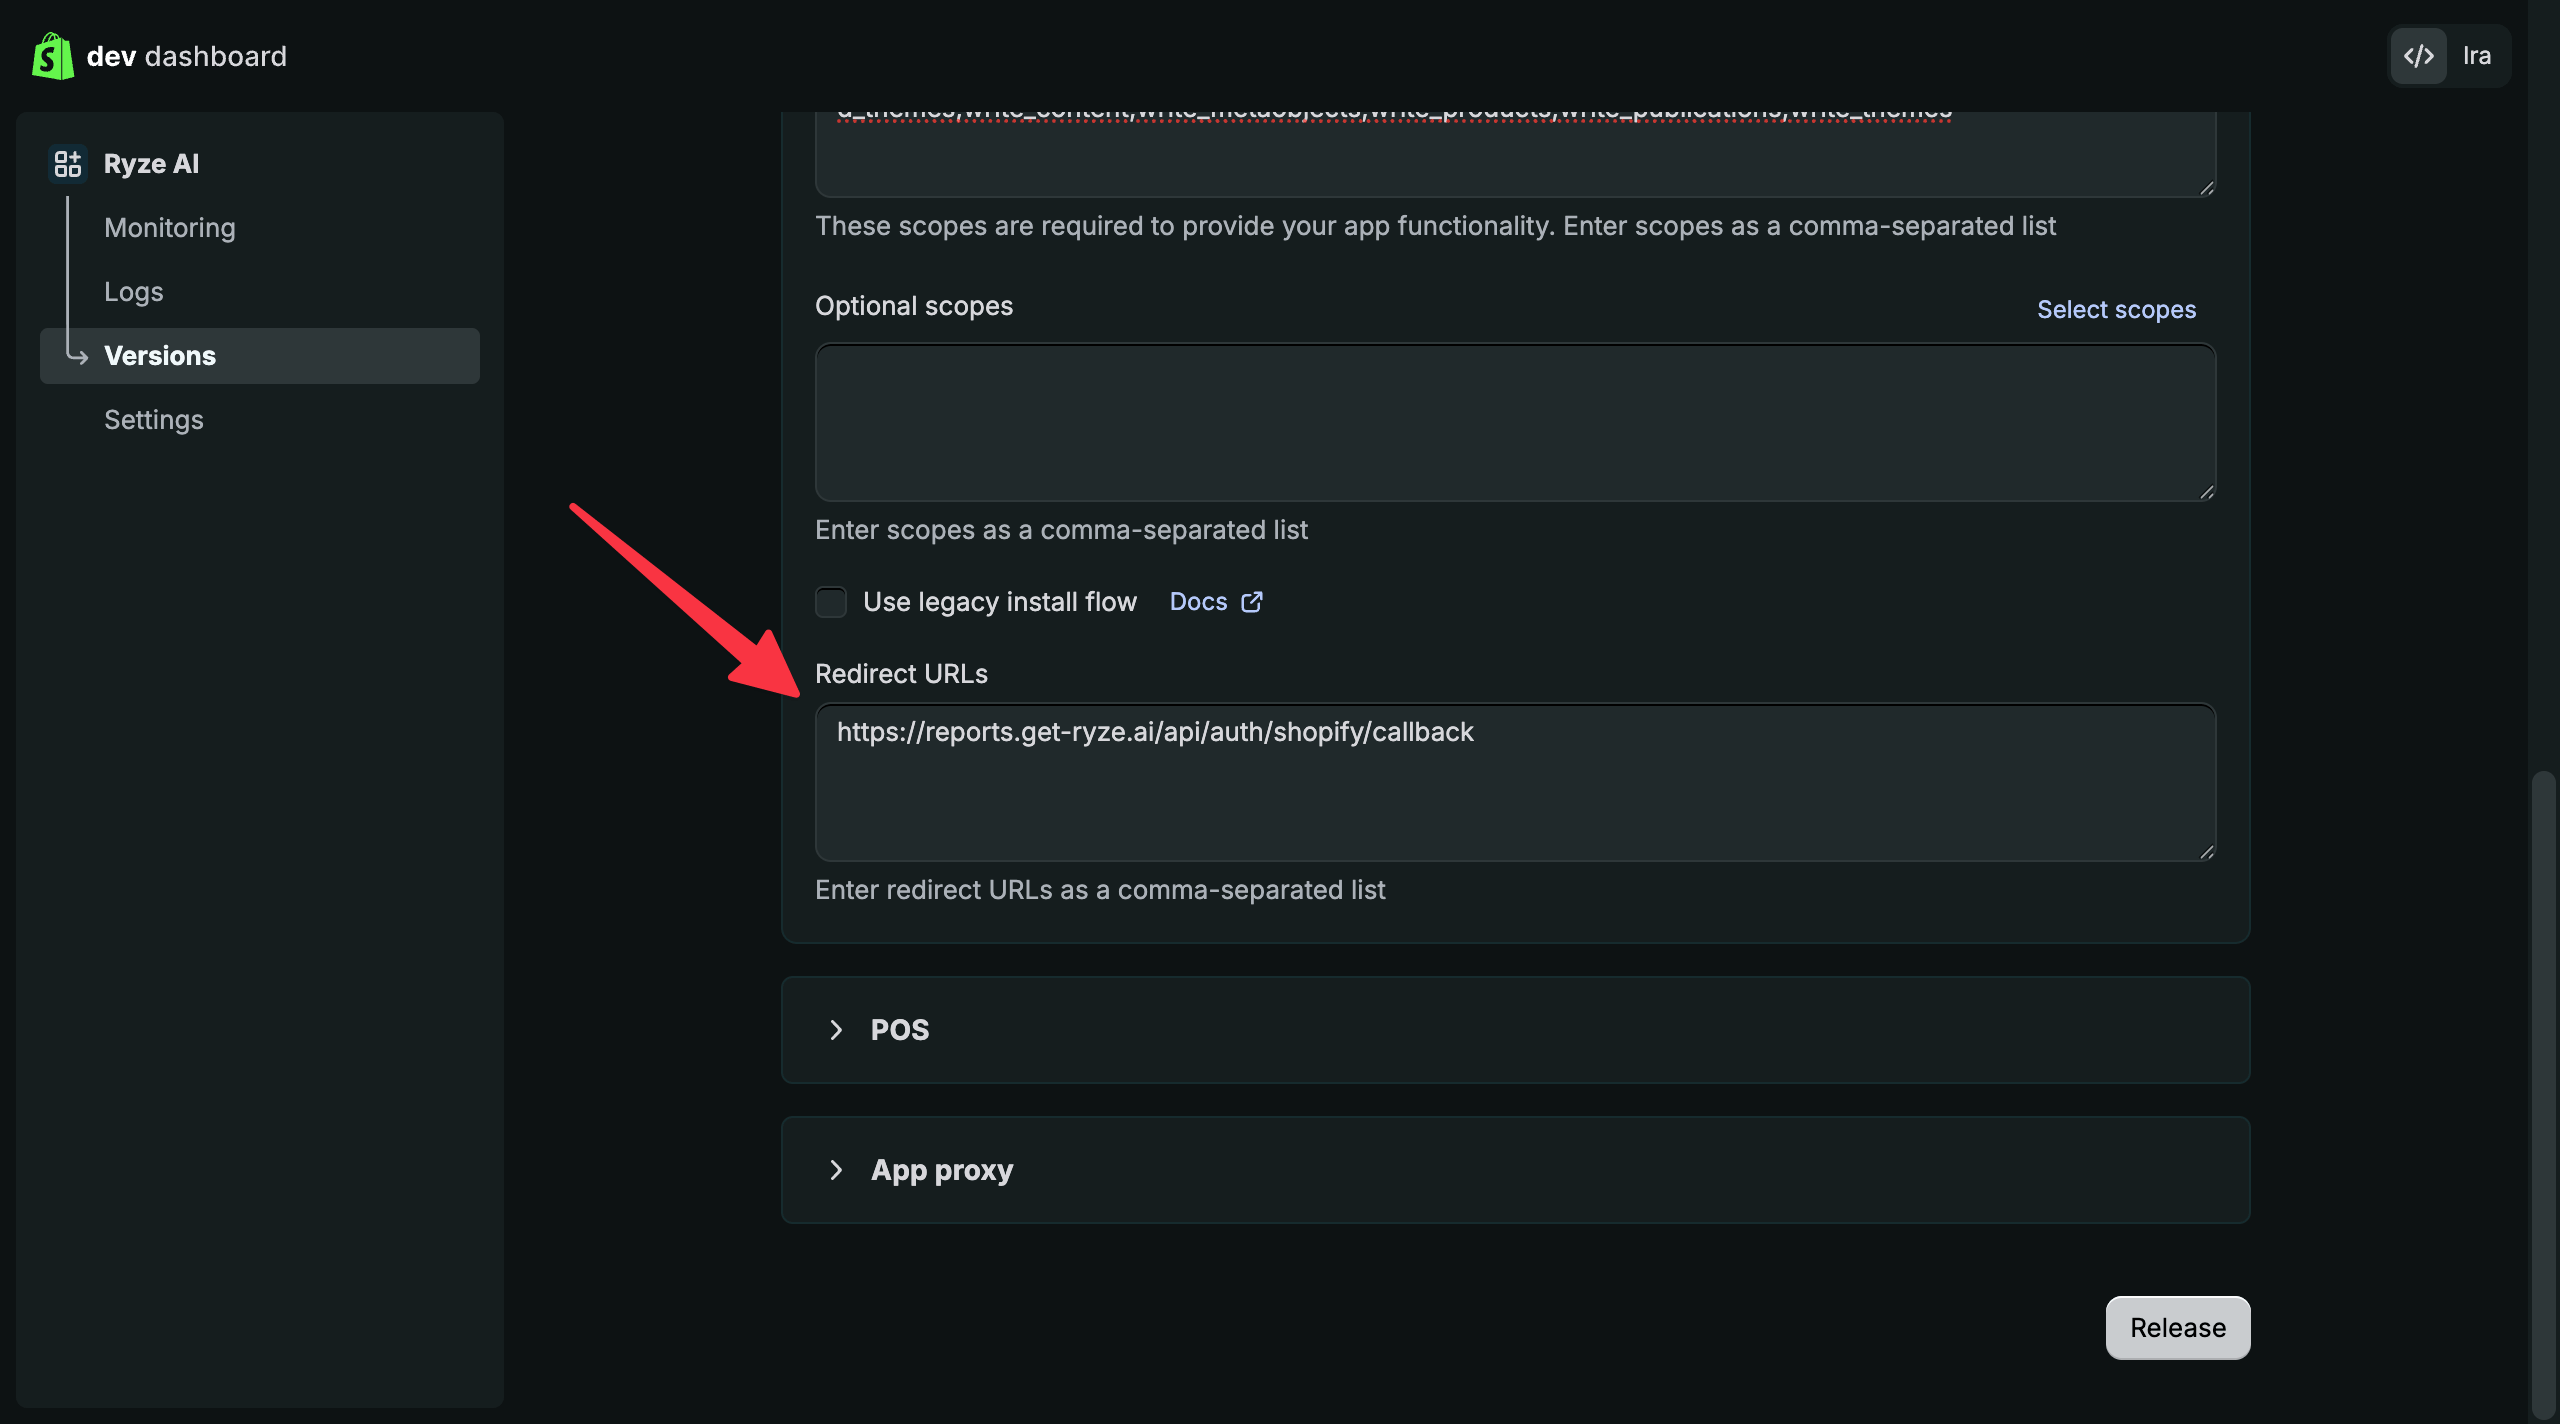
https://reports.get-ryze.ai/api/auth/shopify/callback.4
Release the version
Click Release, confirm in the dialog, and release the version. This activates the app.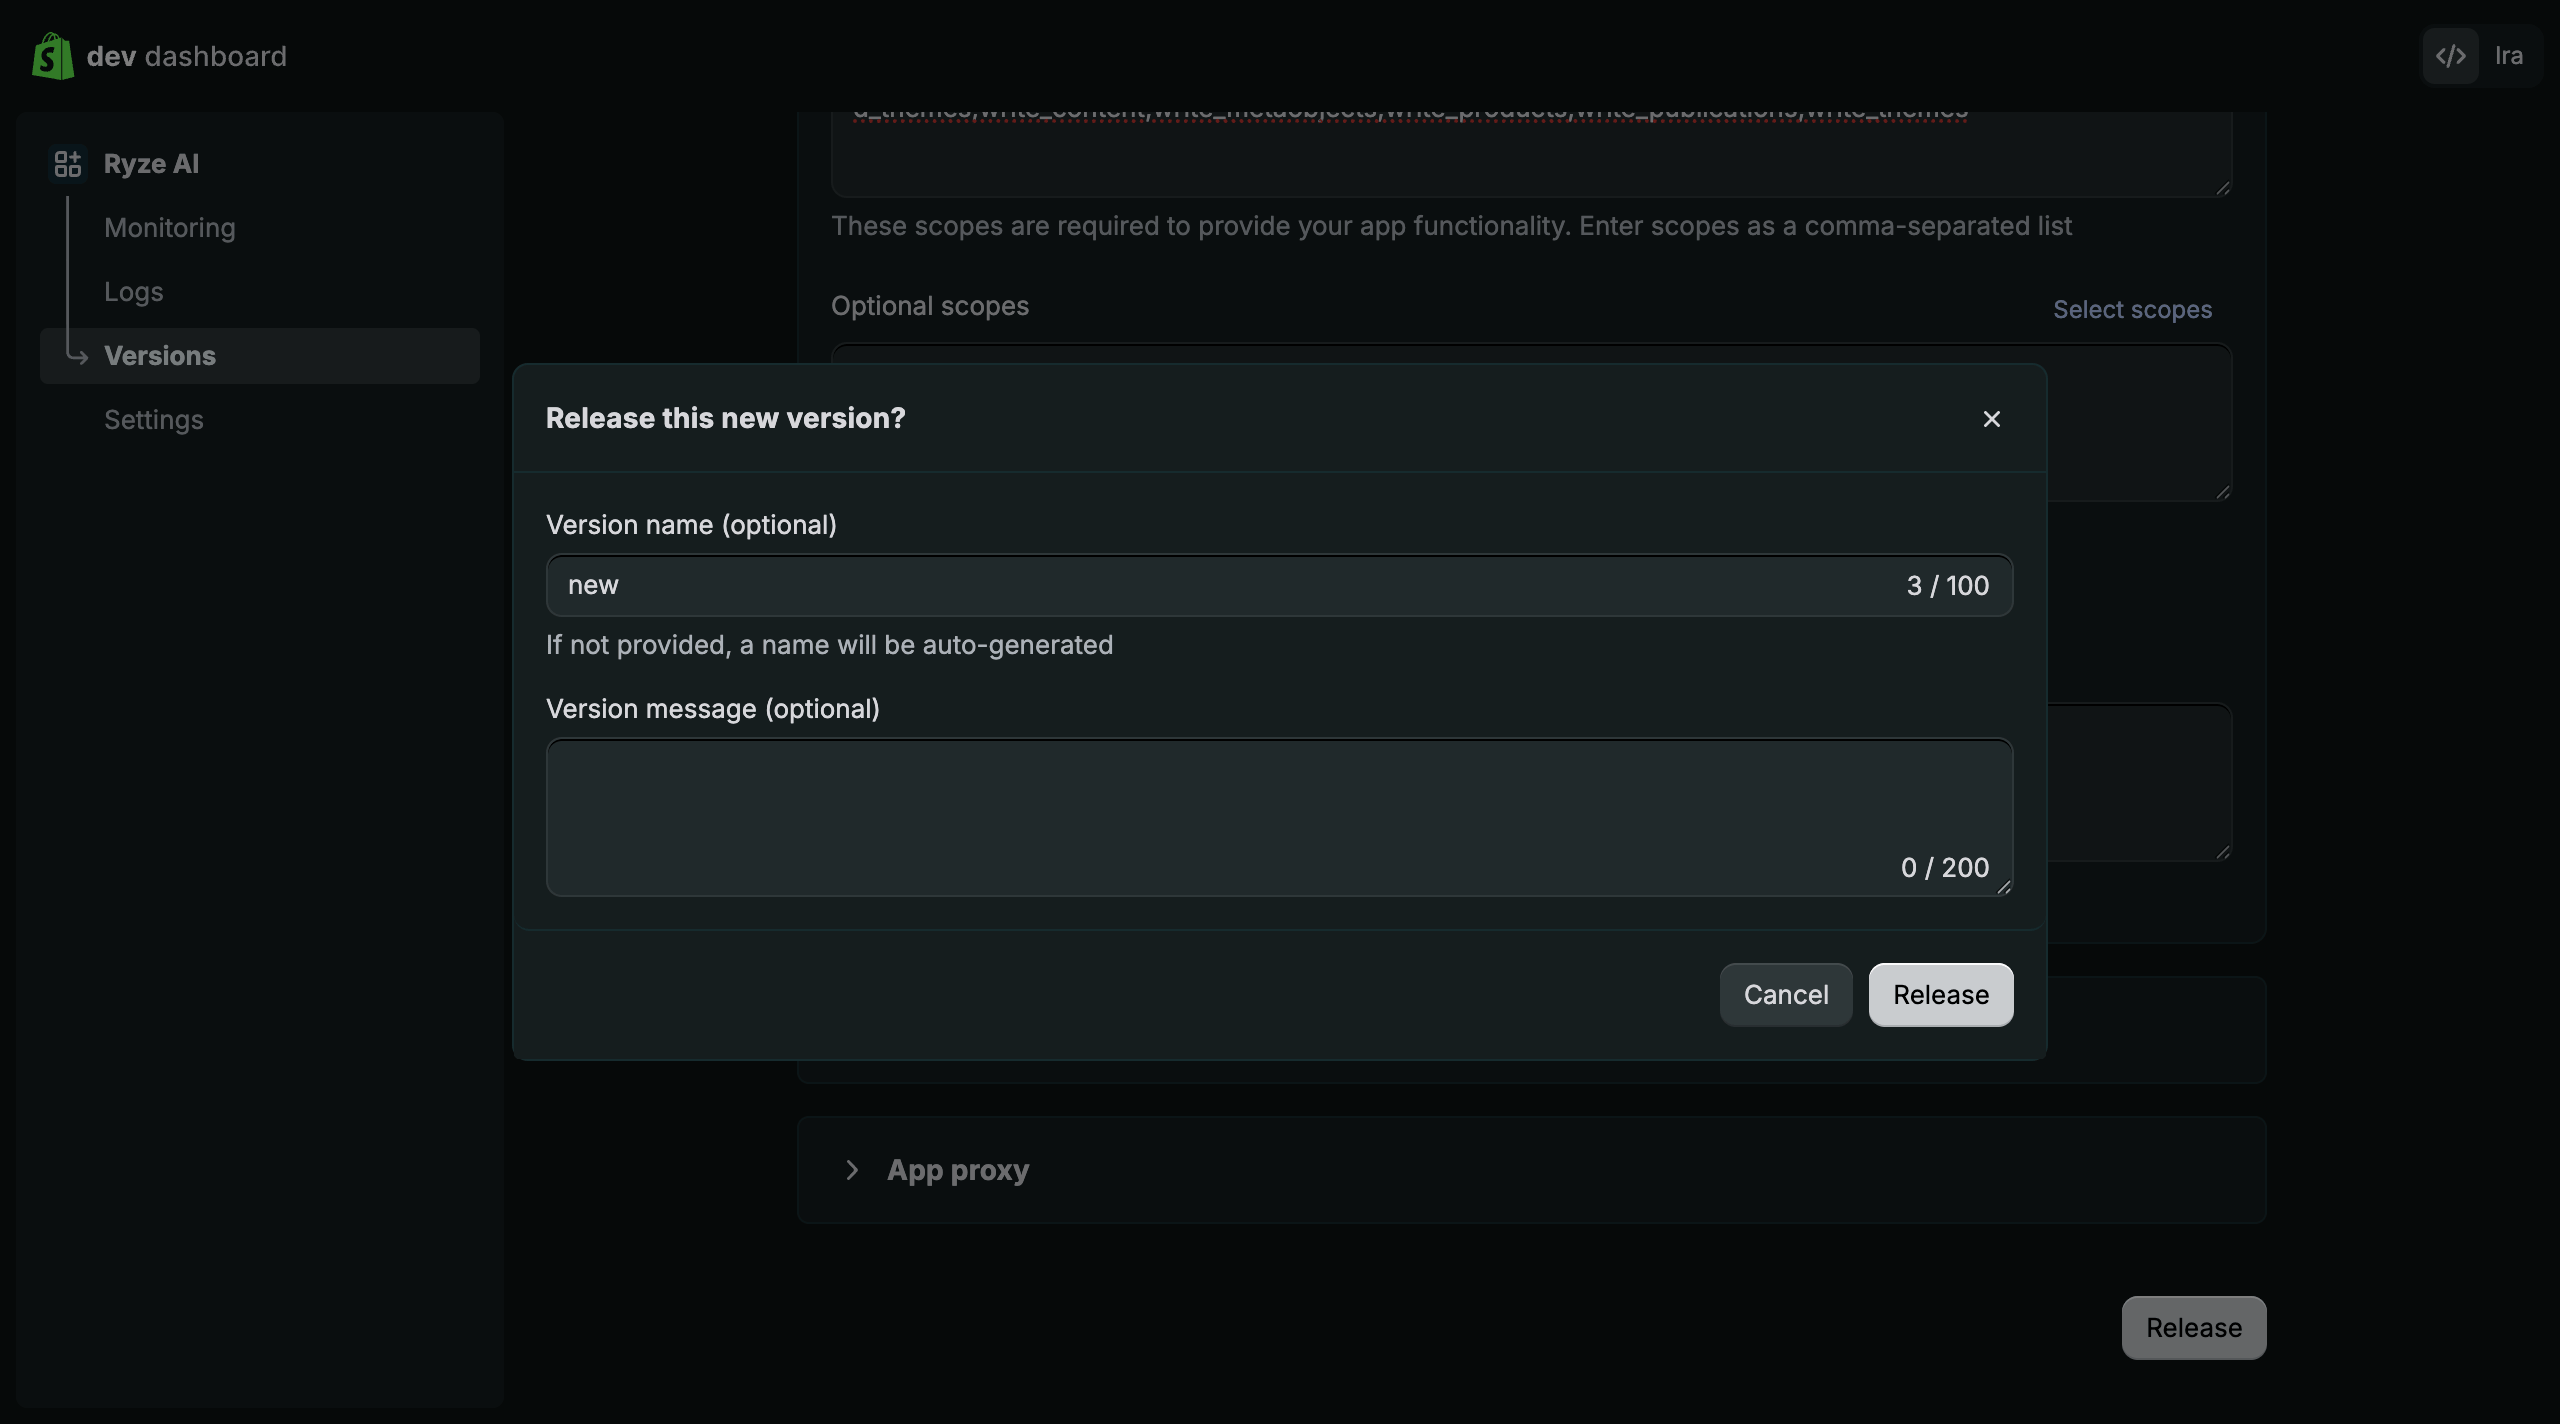
5
Install the app on your store
Open the app and click Install app (top-right). This installs the app on your store so Ryze can fetch an access token.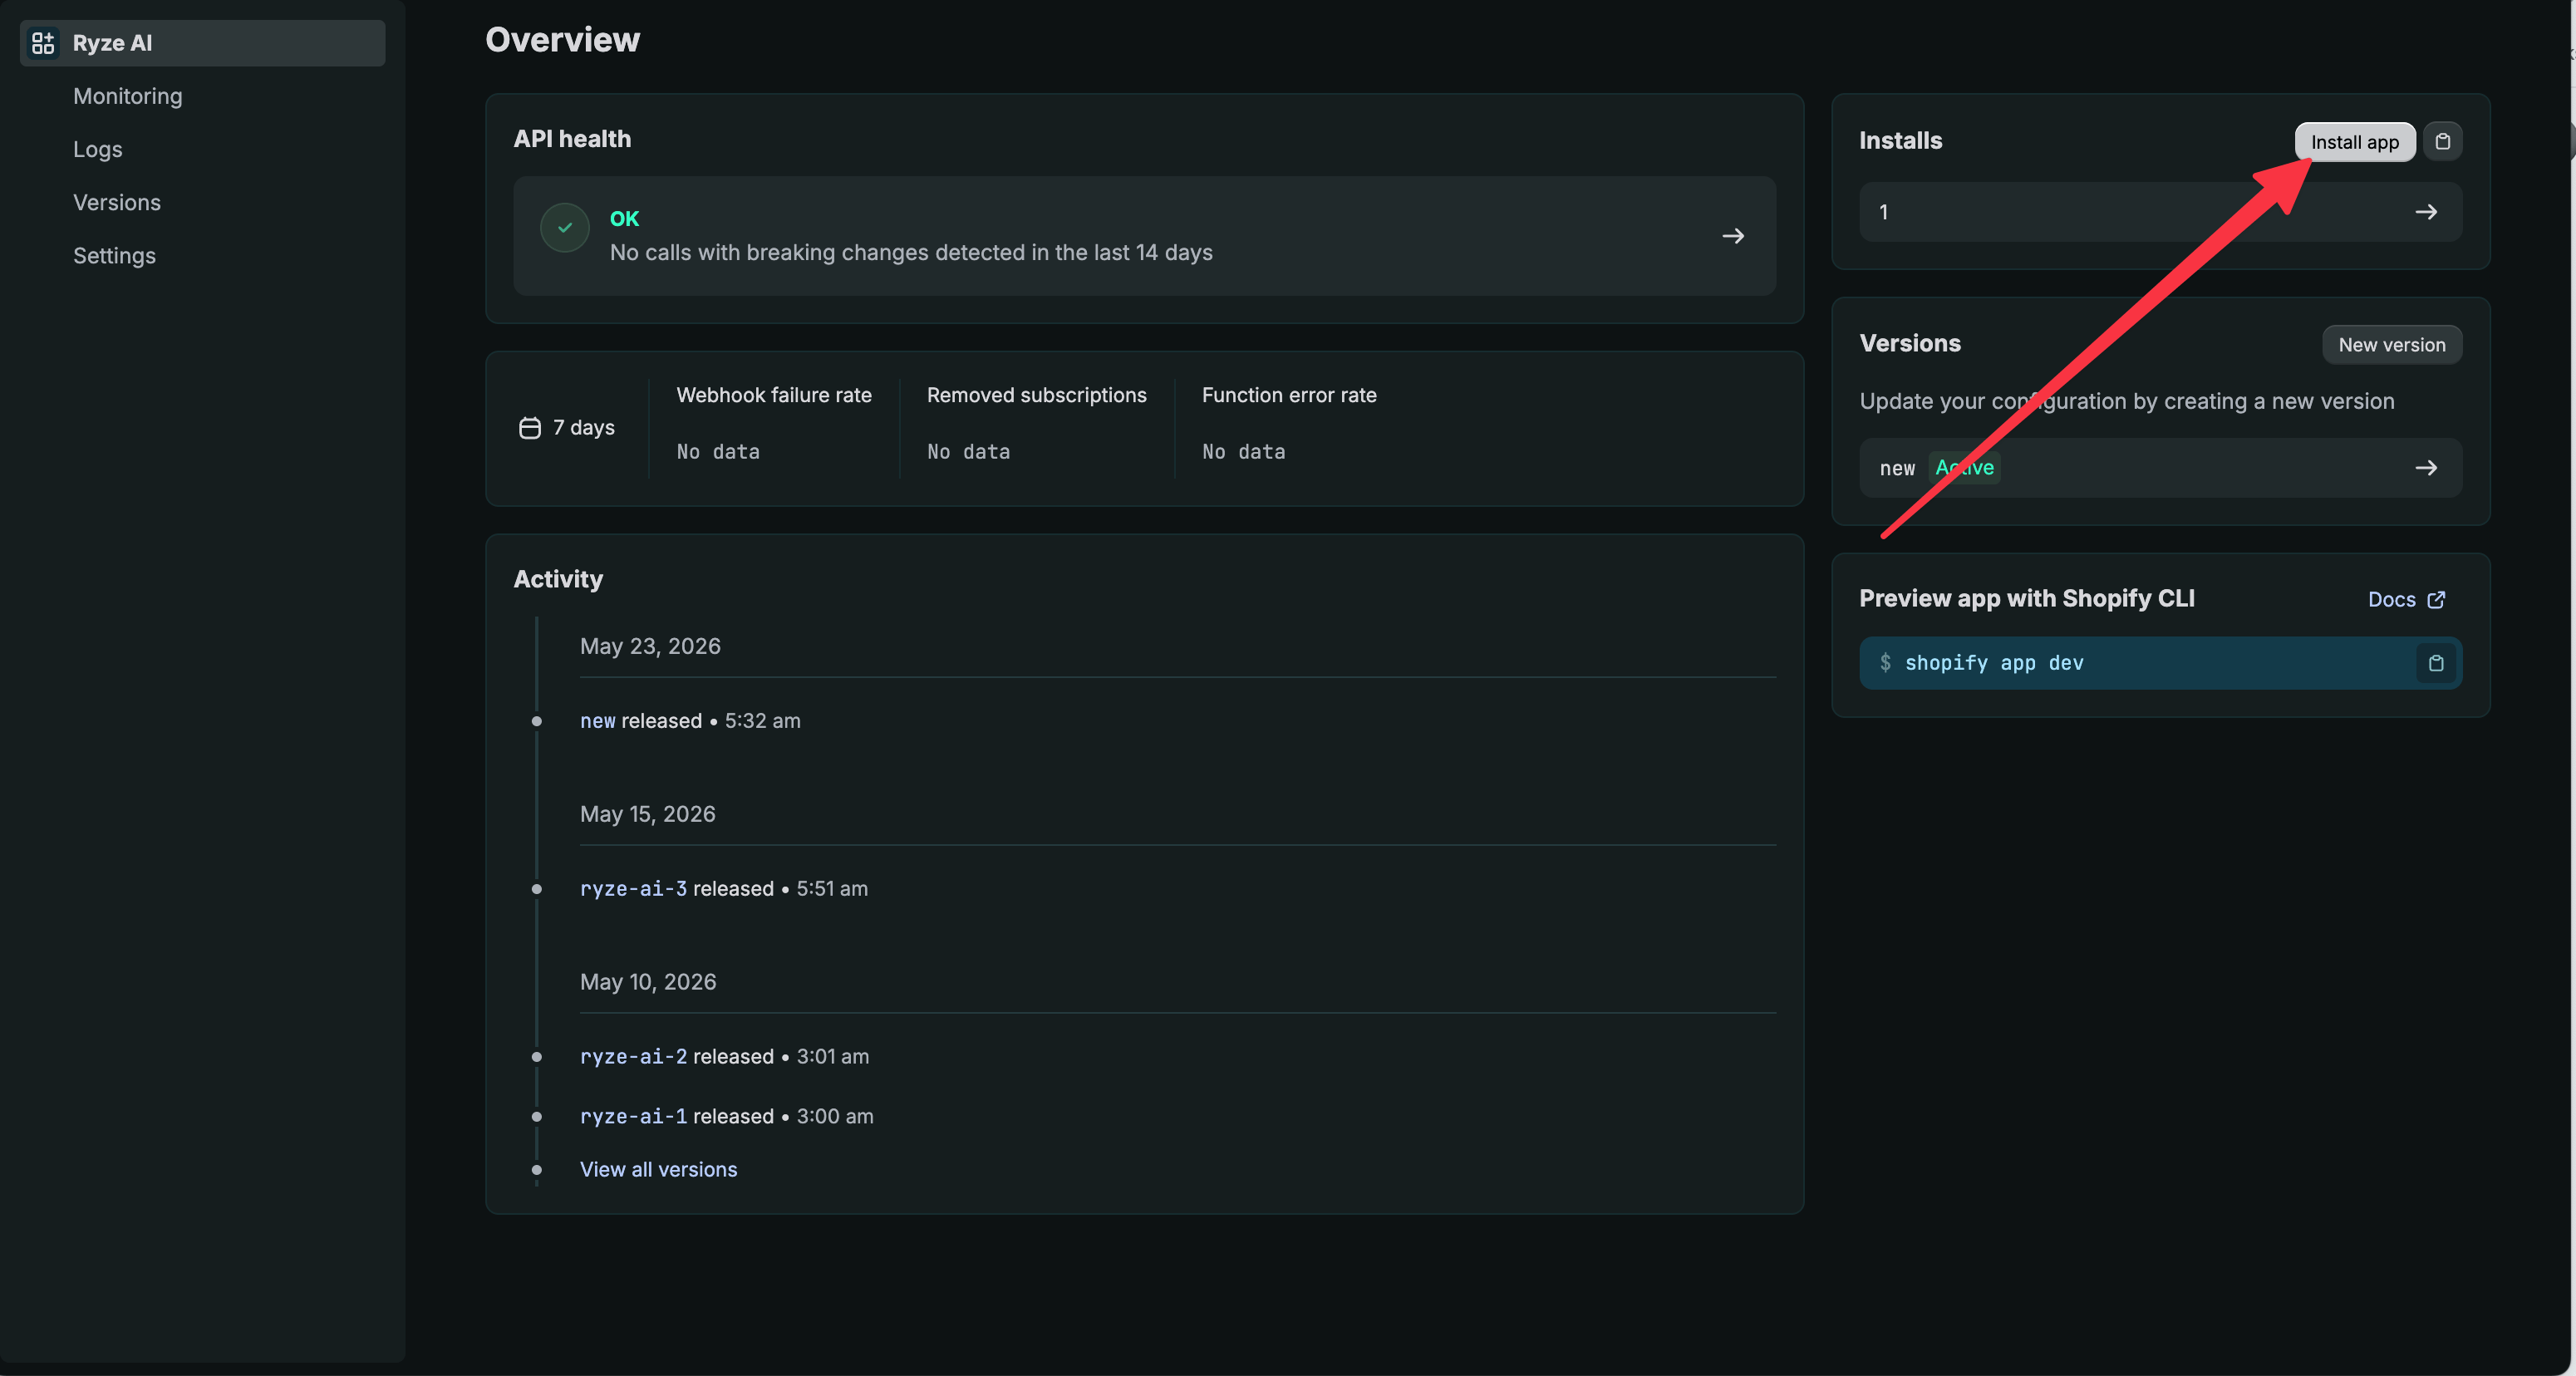
Step 3 — Copy your credentials
1
Open Settings → Credentials
In the app, open Settings. Copy the Client ID, then reveal and copy the Secret (this is your Client secret).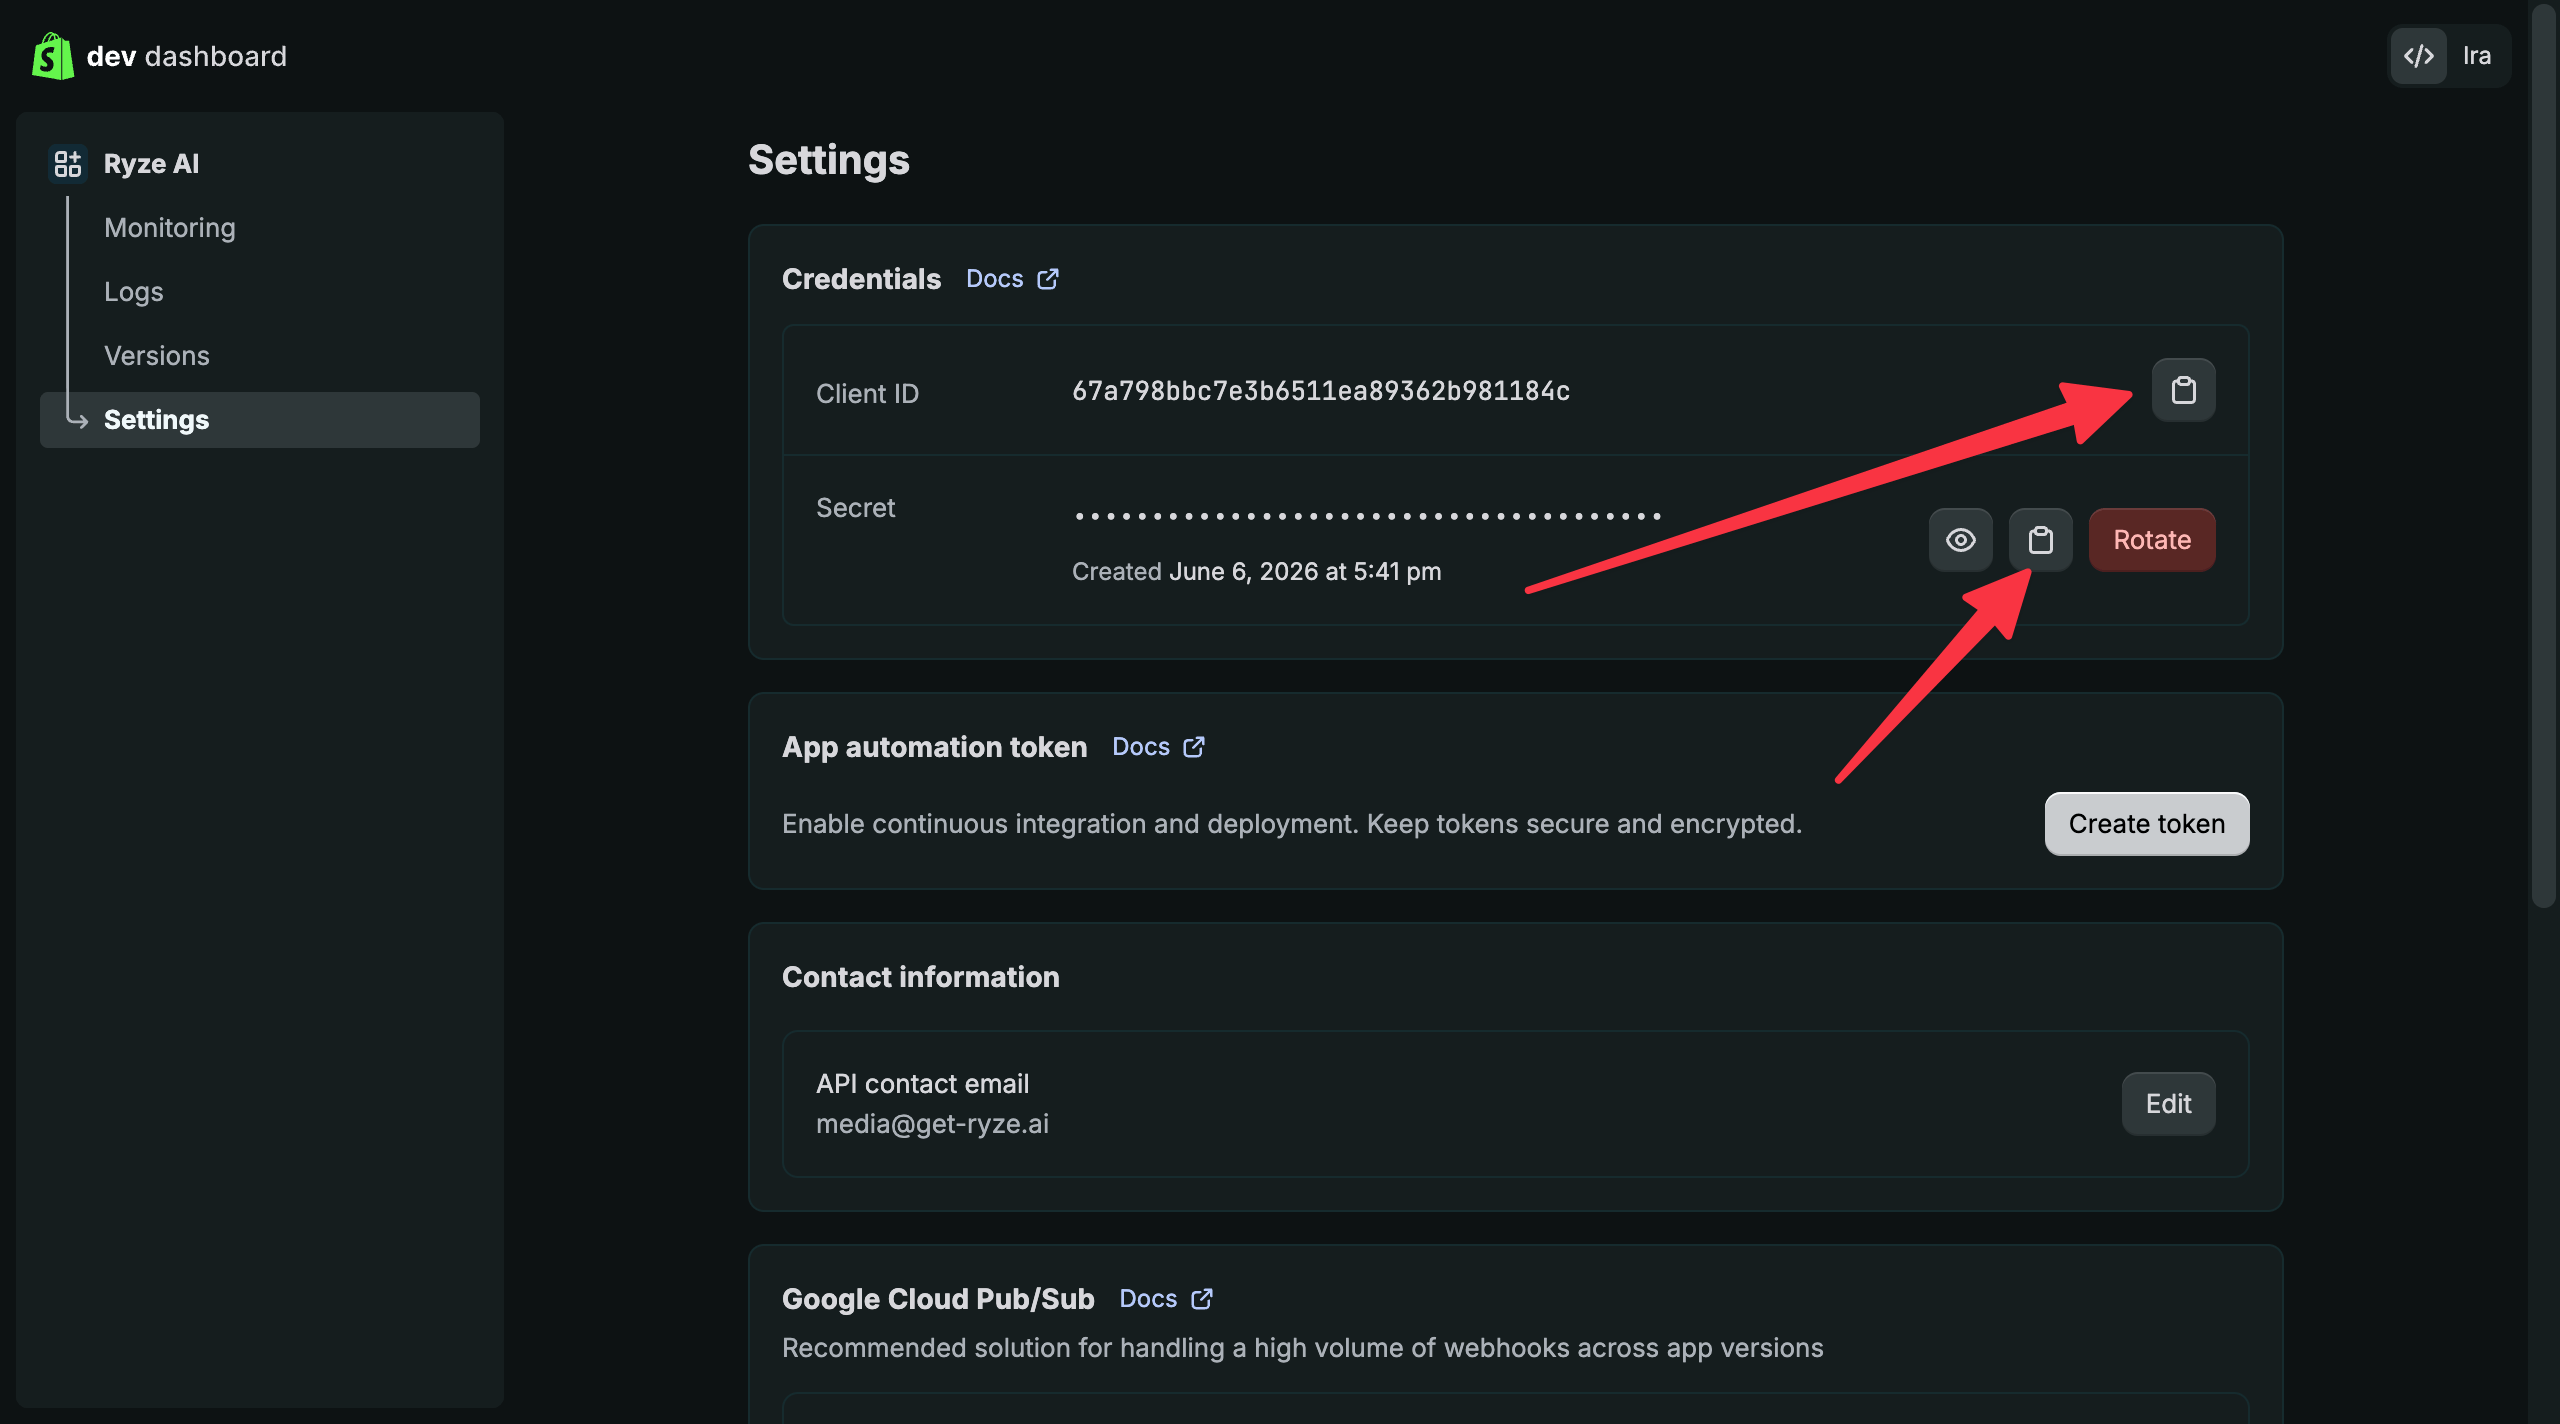
2
Find your store domain
Back in your Shopify admin, open Settings → Domains. Your store domain is the 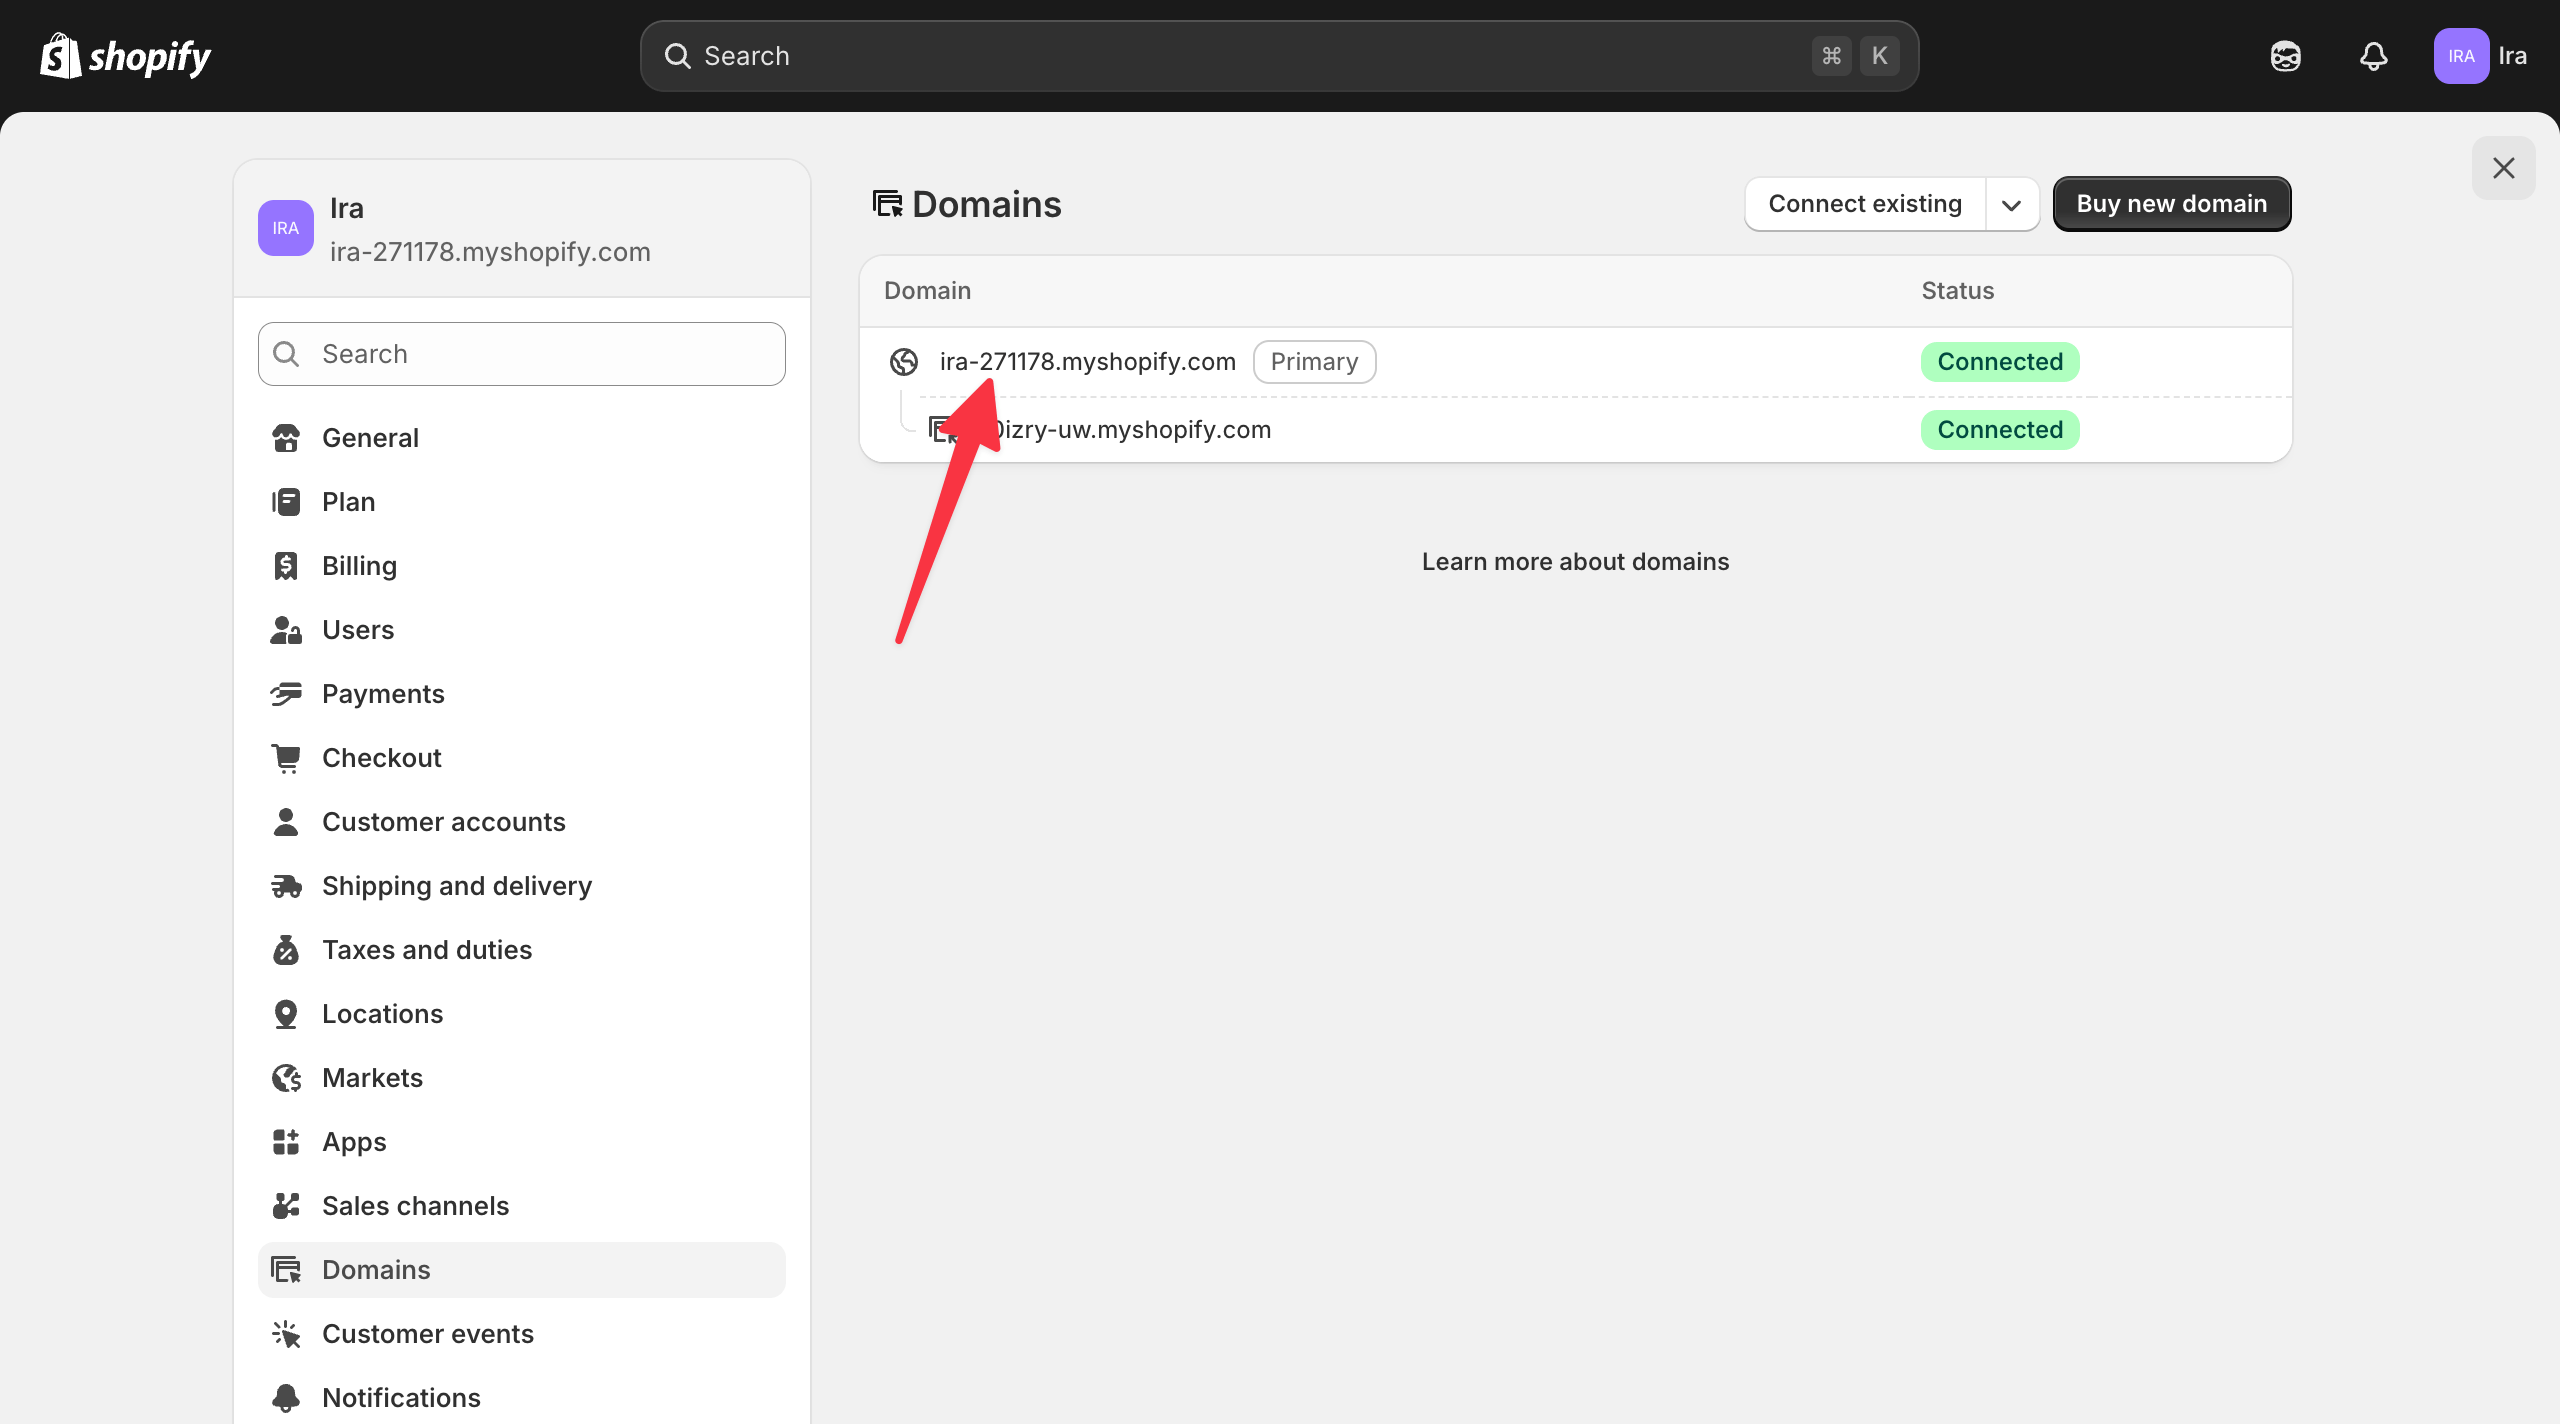
.myshopify.com address marked Primary.Step 4 — Connect in Ryze
In Workspace Settings → Integrations, click Connect on the Shopify card and switch to the Custom app tab, then fill in:- Store domain — e.g.
yourstore.myshopify.com - Client ID — the Client ID you copied
- Client secret — the Secret you copied